Related Plugins and Tags

QGIS Planet

Software quality in QGIS

According to the definition of software quality given by french Wikipedia

An overall assessment of quality takes into account external factors, directly observable by the user, as well as internal factors, observable by engineers during code reviews or maintenance work.

I have chosen in this article to only talk about the latter. The quality of software and more precisely QGIS is therefore not limited to what is described here. There is still much to say about:

  • Taking user feedback into account,
  • the documentation writing process,
  • translation management,
  • interoperability through the implementation of standards,
  • the extensibility using API,
  • the reversibility and resilience of the open source model…

These are subjects that we care a lot and deserve their own article.

I will focus here on the following issue: QGIS is free software and allows anyone with the necessary skills to modify the software. But how can we ensure that the multiple proposals for modifications to the software contribute to its improvement and do not harm its future maintenance?

Self-discipline

All developers contributing to QGIS code doesn’t belong to the same organization. They don’t all live in the same country, don’t necessarily have the same culture and don’t necessarily share the same interests or ambitions for the software. However, they share the awareness of modifying a common good and the desire to take care of it.

This awareness transcends professional awareness, the developer not only has a responsibility towards his employer, but also towards the entire community of users and contributors to the software.

This self-discipline is the foundation of the quality of the contributions of software like QGIS.

However, to err is human and it is essential to carry out checks for each modification proposal.

Automatic checks

With each modification proposal (called Pull Request or Merge Request), the QGIS GitHub platform automatically launches a set of automatic checks.

Example of proposed modification

Result of automatic checks on a modification proposal

The first of these checks is to build QGIS on the different systems on which it is distributed (Linux, Windows, MacOS) by integrating the proposed modification. It is inconceivable to integrate a modification that would prevent the application from being built on one of these systems.

The tests

The first problem posed by a proposed modification is the following “How can we be sure that what is going to be introduced does not break what already exists?”

To validate this assertion, we rely on automatic tests. This is a set of micro-programs called tests, which only purpose is to validate that part of the application behaves as expected. For example, there is a test which validates that when the user adds an entry in a data layer, then this entry is then present in the data layer. If a modification were to break this behavior, then the test would fail and the proposal would be rejected (or more likely corrected).

This makes it possible in particular to avoid regressions (they are very often called non-regression tests) and also to qualify the expected behavior.

There are approximately 1.3 Million lines of code for the QGIS application and 420K lines of test code, a ratio of 1 to 3. The presence of tests is mandatory for adding functionality, therefore the quantity of test code increases with the quantity of application code.

In blue the number of lines of code in QGIS, in red the number of lines of tests

There are currently over 900 groups of automatic tests in QGIS, most of which run in less than 2 seconds, for a total execution time of around 30 minutes.

We also see that certain parts of the QGIS code – the most recent – are better covered by the tests than other older ones. Developers are gradually working to improve this situation to reduce technical debt.

Code checks

Analogous to using a spell checker when writing a document, we carry out a set of quality checks on the source code. We check, for example, that the proposed modification does not contain misspelled words or “banned” words, that the API documentation has been correctly written or that the modified code respects certain formal rules of the programming language.

We recently had the opportunity to add a check based on the clang-tidy tool. The latter relies on the Clang compiler. It is capable of detecting programming errors by carrying out a static analysis of the code.

Clang-tidy is, for example, capable of detecting “narrowing conversions”.

Example of detecting “narrowing conversions”

In the example above, Clang-tidy detects that there has been a “narrowing conversion” and that the value of the port used in the network proxy configuration “may” be corrupted. In this case, this problem was reported on the QGIS issues platform and had to be corrected.

At that time, clang-tidy was not in place. Its use would have made it possible to avoid this anomaly and all the steps which led to its correction (exhaustive description of the issue, multiple exchanges to be able to reproduce it, investigation, correction, review of the modification), meaning a significant amount of human time which could thus have been avoided.

Peer review

A proposed modification that would validate all of the automatic checks described above would not necessarily be integrated into the QGIS code automatically. In fact, its code may be poorly designed or the modification poorly thought out. The relevance of the functionality may be doubtful, or duplicated with another. The integration of the modification would therefore potentially cause a burden for the people in charge of the corrective or evolutionary maintenance of the software.

It is therefore essential to include a human review in the process of accepting a modification.

This is more of a rereading of the substance of the proposal than of the form. For the latter, we favor the automatic checks described above in order to simplify the review process.

Therefore, human proofreading takes time, and this effort is growing with the quantity of modifications proposed in the QGIS code. The question of its funding arises, and discussions are in progress. The QGIS.org association notably dedicates a significant part of its budget to fund code reviews.

More than 100 modification proposals were reviewed and integrated during the month of December 2023. More than 30 different people contributed. More than 2000 files have been modified.

Therefore the wait for a proofreading can sometimes be long. It is also often the moment when disagreements are expressed. It is therefore a phase which can prove frustrating for contributors, but it is an important and rich moment in the community life of a free project.

To be continued !

As a core QGIS developer, and as a pure player OpenSource company, we believe it is fundamental to be involved in each step of the contribution process.

We are investing in the review process, improving automatic checks, and in the QGIS quality process in general. And we will continue to invest in these topics in order to help make QGIS a long-lasting and stable software.

If you would like to contribute or simply learn more about QGIS, do not hesitate to contact us at [email protected] and consult our QGIS support proposal.

(Fr) Rencontres QGIS-fr – Grenoble 27 & 28 mars 2024

Sorry, this entry is only available in French.

(Fr) [En image] Giros 360 : un jumeau numérique pour la Garonne

Sorry, this entry is only available in French.

(Fr) QSoccer : QGIS, football, what else ?

Sorry, this entry is only available in French.

(Fr) Financement mutualisé du logiciel libre: le cas QGIS

Sorry, this entry is only available in French.

QGIS Snapping improvements

A few months ago, we proposed to the QGIS grant program to make improvements to the snap cache in QGIS. The community vote selected our project which was funded by QGIS.org. Developments are now mostly finished.

In short, snapping is crucial for editing geospatial features. It is the only way to ensuring they are topologically related, ie, connected vertices have exactly the same coordinates even if manual digitizing on screen is imprecise by nature.  Snapping correctly supposes QGIS have in memory an indexed cache of the geometries to snap to. And maintainting this cache when data is modified, sometimes by another user or database logic, can be a real challenge. This it exactly what this work adresses.

The proposal was divided into two different tasks:

  • Manage circular dependencies
  • Relax the snap cache index build

Manage cicular data dependencies

Data dependencies

Data dependency is an existing feature that allows you to configure QGIS to reload layers (and their snapping cache) when a layer is modified.

It is useful when you store your data in a database and you set up triggers to maintain consistency between the different tables of your data model.

For instance, say you have topological informations containing lines and nodes. Nodes are part of lines and lines go through nodes. Then, you move a node in QGIS, and save your modifications to the database. In order to keep the data consistent, a trigger updates the geometry of the line going through the modified node.

Node 2 is modified, Line 1 is updated accordingly

QGIS, as a database client, has no information that the line layer currently displayed in the canvas needs to be refreshed after the trigger. Although the map canvas will be up to date, because QGIS fetches data for display without any caching system, the snapping cache is not and you’ll end up with ghost snapping highlights issues.

Snapping highlights (light red) differ from real line (orange)

Defining a dependency between nodes and lines layers tells QGIS that it has to refresh the line layer when a node is modified.

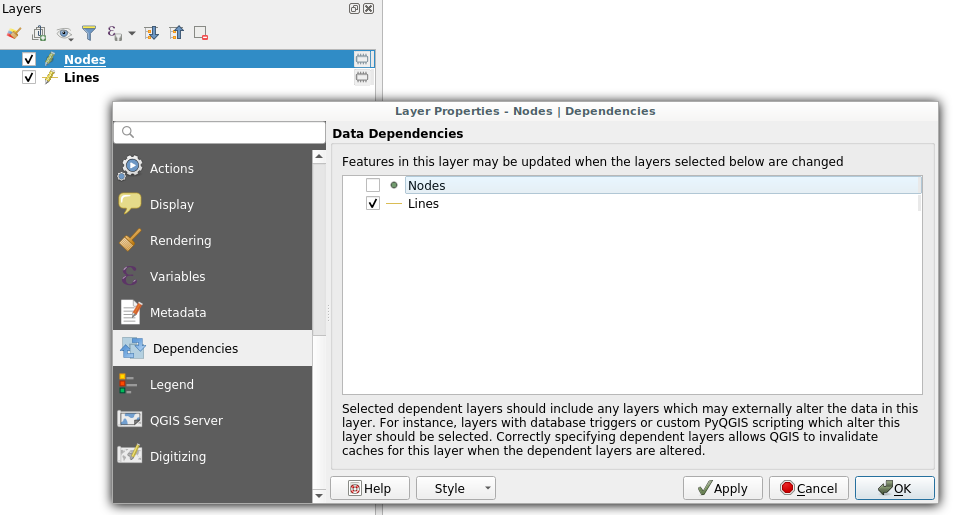
Dependencies configuration: Lines layer will be refreshed whenever Nodes layer is modified

It also have to work the other way, modifying a line should update the nodes to ensure they still are on the line.

Circular data dependencies

So here we are, lines depend on nodes which depend on lines which depend on nodes which…

That’s what circular dependencies is about. This specific behavior was previously forbidden and needed a special way to deal with it. Thanks to this recent development, it is now possible.

It’s also possible to add the layer itself as one of its own dependencies. It helps dealing with specific cases where one feature modification could lead to a modification of another feature in the same layer (to keep consistency on road networks for instance).

Road 2 is modified, Road 1 is updated accordingly

This feature is available in the next QGIS LTR version 3.10.

Relax the snapping cache index build

If you work in QGIS with huge projects displaying a lot of vector data, and you enable snapping while editing these data, you probably already met this dialog:

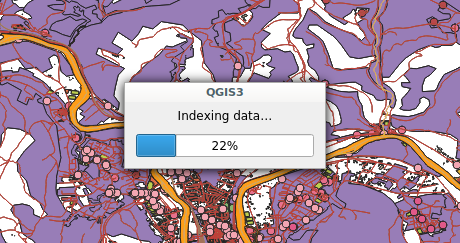
Snap indexing dialog

This dialog informs you that data are currently being indexed so you can snap on them while you will edit feature geometry. And for big projects, this dialog can last for a really long time. Let’s work on speeding it up!

What’s a snap index?

Let’s say you want to move a line and snap it onto another one. While you drag your line with the mouse, QGIS will look for an existing geometry beneath the mouse cursor (with a certain pixel tolerance) every time you move your mouse. Without spatial index, QGIS will have to go through every geometry in your layer to check if the given geometry is beneath the cursor position. This would be very ineffective.

In order to prevent this, QGIS keeps an index where vector data are stored in a way that it can quickly find out what geometry is beneath the mouse cursor. The building of this data structure takes time and that is what the progress dialog is about.

Firstly: Parallelize snap index build

If you want to be able to snap on all layers in your project, then QGIS will have to build one snap index for each layer. This operation was made sequentially meaning that if you have for instance 20 layers and the index building last approximatively 3 seconds for each, then the whole index building will last 1 minute. We made modifications to QGIS so that index building could be done in parallel. As a result, the total index building time could theoretically be 3 seconds!

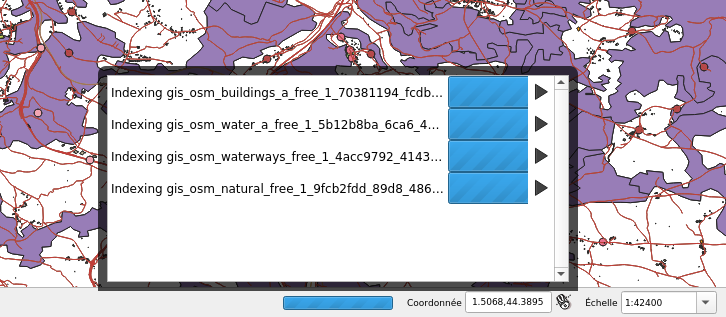
4 layers snap index being built in parallel

However, parallel operations are limited by the number of CPU cores of your machine, meaning that if you have 4 cores (core i7 for instance) then the total time will be up to 4 times faster than when the building is sequential (and last 15 seconds in our example).

Secondly: relax the snap build

For big projects, parallelizing index building is not enough and still takes too much time. Futhermore, to reduce snap index building, an existing optimisation was to build the spatial index for a specific area of interest (determined according to the displayed area and layer size). As a consequence, when you’ve done waiting for an index currently building and you move the map or zoom in/out, you could possibly trigger another snap index building and wait again.

So, the idea was to avoid waiting at all. Snap index is now built whenever it needs to (when you first enable snapping, when you move or zoom) but the user doesn’t have to wait for the build to be over and can continue what it was doing (creating feature, moving…). Snapping highlights will be missing when the index is currently being built and will appear gradually as soon as they finished. That’s what we call the relaxing mode.

No waiting dialog, snapping highlights appears as soon as snap index is ready

This feature has been merged into current QGIS master and will be present in future QGIS 3.12 release. We keep working on this feature in order to make it more stable and efficient.

What’s next

We’ll continue to improve this feature in the coming days, if you have the chance to test it and encounter issues please let us know on the QGIS tracker. If you think about a missing feature or just want to know more about QGIS, feel free to contact us at [email protected]. And please have a look at our support offering for QGIS.

Many thanks to QGIS grant program for funding these new features. Thanks also to all the people involved in reviewing the code and helping to better understand the existing mechanism.


(Fr) Rechercher une adresse avec QGIS

Sorry, this entry is only available in French.

QGIS Versioning now supports foreign keys!

QGIS-versioning is a QGIS and PostGIS plugin dedicated to data versioning and history management. It supports :

  • Keeping full table history with all modifications
  • Transparent access to current data
  • Versioning tables with branches
  • Work offline
  • Work on a data subset
  • Conflict management with a GUI

QGIS versioning conflict management

In a previous blog article we detailed how QGIS versioning can manage data history, branches, and work offline with PostGIS-stored data and QGIS. We recently added foreign key support to QGIS versioning so you can now historize any complex database schema.

This QGIS plugin is available in the official QGIS plugin repository, and you can fork it on GitHub too !

Foreign key support

TL;DR

When a user decides to historize its PostgreSQL database with QGIS-versioning, the plugin alters the existing database schema and adds new fields in order to track down the different versions of a single table row. Every access to these versioned tables are subsequently made through updatable views in order to automatically fill in the new versioning fields.

Up to now, it was not possible to deal with primary keys and foreign keys : the original tables had to be constraints-free.  This limitation has been lifted thanks to this contribution.

To make it simple, the solution is to remove all constraints from the original database and transform them into a set of SQL check triggers installed on the working copy databases (SQLite or PostgreSQL). As verifications are made on the client side, it’s impossible to propagate invalid modifications on your base server when you “commit” updates.

Behind the curtains

When you choose to historize an existing database, a few fields are added to the existing table. Among these fields, versioning_ididentifies  one specific version of a row. For one existing row, there are several versions of this row, each with a different versioning_id but with the same original primary key field. As a consequence, that field cannot satisfy the unique constraint, so it cannot be a key, therefore no foreign key neither.

We therefore have to drop the primary key and foreign key constraints when historizing the table. Before removing them, constraints definitions are stored in a dedicated table so that these constraints can be checked later.

When the user checks out a specific table on a specific branch, QGIS-versioning uses that constraint table to build constraint checking triggers in the working copy. The way constraints are built depends on the checkout type (you can checkout in a SQLite file, in the master PostgreSQL database or in another PostgreSQL database).

What do we check ?

That’s where the fun begins ! The first thing we have to check is key uniqueness or foreign key referencing an existing key on insert or update. Remember that there are no primary key and foreign key anymore, we dropped them when activating historization. We keep the term for better understanding.

You also have to deal with deleting or updating a referenced row and the different ways of propagating the modification : cascade, set default, set null, or simply failure, as explained in PostgreSQL Foreign keys documentation .

Nevermind all that, this problem has been solved for you and everything is done automatically in QGIS-versioning. Before you ask, yes foreign keys spanning on multiple fields are also supported.

What’s new in QGIS ?

You will get a new message you probably already know about, when you try to make an invalid modification committing your changes to the master database

Error when foreign key constraint is violated

Partial checkout

One existing Qgis-versioning feature is partial checkout. It allows a user to select a subset of data to checkout in its working copy. It avoids downloading gigabytes of data you do not care about. You can, for instance, checkout features within a given spatial extent.

So far, so good. But if you have only a part of your data, you cannot ensure that modifying a data field as primary key will keep uniqueness. In this particular case, QGIS-versioning will trigger errors on commit, pointing out the invalid rows you have to modify so the unique constraint remains valid.

Error when committing non unique key after a partial checkout

Tests

There is a lot to check when you intend to replace the existing constraint system with your own constraint system based on triggers. In order to ensure QGIS-Versioning stability and reliability, we put some special effort on building a test set that cover all use cases and possible exceptions.

What’s next

There is now no known limitations on using QGIS-versioning on any of your database. If you think about a missing feature or just want to know more about QGIS and QGIS-versioning, feel free to contact us at [email protected]. And please have a look at our support offering for QGIS.

Many thanks to eHealth Africa who helped us develop these new features. eHealth Africa is a non-governmental organization based in Nigeria. Their mission is to build stronger health systems through the design and implementation of data-driven solutions.

QGIS WHY U NO PRINT DEBUG INFO

One of those days today where I burnt more time then I should on something that I din’t know about and spent way to much time searching for the wrong thing.

On a new install of Fedora I couldn’t get my QGIS to output any debug messages, even on my dev build running in the terminal, Qt Creator, or VS Code. Super frustraining to say the least.

Turns out the logging, at least on Fedora for Qt5, is disabled by default. You need to enable it by editing ~/.config/QtProject/qtlogging.ini and adding the following:

[Rules]
default.debug=true

The more you know!

QGIS style dock – Part 1 – Live Styles!

This post is part of a series exploring the new style dock.

  • Part 1 – Styles
  • Part 2 – Plugin pages
  • Part 3 – New panel API

A while ago did a post about the new style dock in QGIS. The first stage was getting labels working and then moving on to styles. After many iterations of the UIs and the APIs I’m pretty happy with the release state of the dock. We now have styles (vector and raster), labels, saved styles, undo redo, and plugin support (yep!)

Of all the features I have added to QGIS this is my favorite. Nothing has made me feel more productive then working on this feature and seeing the gains it allows in day to day work.

If you haven’t used the style dock yet I would strongly encourage you to grab the nightly QGIS builds and give it a crack, F7 to open anytime, or use the paint brush icon on the layers panel.   I’m not bragging when I say that it will change your life in QGIS for the better, it has become a part of my daily workflow. No going back!

Dock break down

breakdown

As you can see in the image there is a few main things in the dock, the layer selection, style options selector (come back to this later), undo/redo, live update and apply.

Live Updates

One of the key things for me when doing this dock was instant feedback. I really hated the open close, change, apply, repeat workflow of the old dialogs.  Every widget in the dock can request a redraw on change so you can see feedback instantly in the canvas.  This might not always be what you want so you can disable it for those cases and use manual apply.

Undo Stack

Live updates come with a risk. What happens if you apply something you didn’t mean. There is no cancel button. Well not to fear we now have a undo/redo stack.  Any style change will now add an entry to the style undo stack so you can rollback and forward any changes. Undo/Redo now allows for fearless style changes, so style away to your hearts content and rollback anything you don’t like.

I will also add that the undo stack is stored on the layer object itself, so closing the dock doesn’t clear the stack nor does changing the active layer. You can also access the stack via the Python bindings if needed.

Style Options

On the side of the dock we have the different style options.  These buttons change the style options in the main panel.

options
Vector Style Options
  • Style
  • Label
  • Saved styles
  • Undo/Redo
optionsraster
Raster Style Options
  • Style
  • Transparency
  • Histogram
  • Saved styles
  • Undo/Redo

The Saved Styles and Undo/Redo will always be the last in the stack regardless of the active layer type.

Style UIs (Note: GIF heavy section)

Almost all the widgets have been tweaked to allow for better dock layout. Widgets are now in a more uniform layout which flows better when moving around in the dock and just generally look better.

layout

When I talked about live updates before this applies to everything, even the data defined buttons.  Any changes in those will be reflected into the canvas without any extra clicks.

dd

Changing renderers is now simple and quick. You go from nothing to seeing instant results in seconds.

change

A excellent side effect of the live updates is workflows that were never exposed before and now possible. Using the graduated renderer histogram for example. As the histogram allows for live edits we can now update the map on the fly from adjusting the histogram.

hiso.gif

Style UIs (Raster)

As soon as I finished vectors it became pretty evident that raster layers were going to be the next main thing to move.   So the style dock fully supports raster styling.

raster

Undo/Redo

For the final trick. Here we have the undo/redo stack in action. Unlimited undo/redo  on all layers when changing styles. Fearless change he we come

undo

Trying to find a picture to sum up my feelings about the style dock and I think this fits

but of course I’m super bias.

Stay tuned for Part 2 where I talk about adding your own style panels to the style dock.

QGIS style dock – Part 2 – Plugin panels

In part 1 I talked about the new style dock and the in built functions it has in this post I would like to cover how you can extend that dock using plugin panels.

While building the dock it became evident that being able to add your own panels with be super neat, why lock the user to what styling controls we have built into core.

After one, or two, API iterations it is now possible to add your own panels to the style dock.

First we need to make a new widget using QgsLayerStylingPanel

class CustomPanel(QgsLayerStylingPanel):
    def __init__(self, layer, canvas, parent):
        super(CustomPanel, self).__init__(layer, canvas, parent)
        self.layer = layer

    def apply(self):
        pass

then we need to create a factory object (QgsLayerStylingPanelFactory) which will hold the metadata for the panel widget, things like icon, title, and the widget it self as required. The factory object looks like this:

class PanelFactory(QgsLayerStylingPanelFactory):
    def icon(self):
        return QIcon(r"F:\icons\SVG\book.svg")

    def title(self):
        return ""

    def supportsLayer( self, layer):
        return layer.type() == QgsMapLayer.VectorLayer

    def createPanel(self, layer, canvas, parent):
        return CustomPanel(layer, canvas, parent)

# Also make a instance and tell the style dock about it
# make sure you keep a instance of the the factory around
factory = PanelFactory()
iface.registerMapStylePanelFactory(factory)

You can also see we have a supportsLayer() method. This must return True if the layer can be supported for the widget, if the layer isn’t support it’s not shown in the layer style dock. We also have the createPanel method which just returns the widget, you could also use this method to return different widgets based on layer type if you needed. This createPanel method will be called any time the item is selected in the left panel of the style dock. Using the above code we will see a new icon on the side panel

style

Remember, the create method is called any time this new item is selected.    If your widget is expensive to create you can create a cache here.

Now lets add some logic.  As an example I’m going to load the style xml and show it in the panel. Adding some logic to the __init__ method of the CustomPanel class

class CustomPanel(QgsLayerStylingPanel):
    def __init__(self, layer, canvas, parent):
        super(CustomPanel, self).__init__(layer, canvas, parent)
        self.layer = layer
        self.setLayout(QVBoxLayout())

        # Create the editor and set the xml from the layer.
        self.editor = QgsCodeEditorHTML()
        self.editor.setLexer(QsciLexerXML())
        doc = QDomDocument( "style" ) 
        rootNode = doc.createElement( "qgis" )
        doc.appendChild( rootNode )
        iface.activeLayer().writeStyle( rootNode, doc, "")
        xml = doc.toString()
        self.editor.setText(xml)
        self.layout().addWidget(self.editor)

xml

Nifty.  Now can we 1 UP it and make it live edit?  Sure can!  The style dock will call apply() whenever we raise the widgetChanged signal.  We can just connect this to the text changed event and add some logic to the apply method.

class CustomPanel(QgsLayerStylingPanel):
    def __init__(self, layer, canvas, parent):
        super(CustomPanel, self).__init__(layer, canvas, parent)
        .....
        self.editor.textChanged.connect(self.widgetChanged.emit)

    def apply(self):
        # Read the xml and set it back to the style.
        doc = QDomDocument( "style" ) 
        doc.setContent(self.editor.text())
        node = doc.documentElement()
        self.layer.readStyle(node, "")
        self.layer.triggerRepaint()

live

WINNING!

Pro Tip: Raise widgetChanged whenever you need to tell the style dock to trigger the apply method. The style state of the layer will also be saved to the undo stack so you don’t have to worry about that.

This is just an example, hand editing xml is well gross, but I’m sure you can see great uses for being able to expand the style dock.

Speeding up QGIS build times with Ninja

As a developer, feedback is important when you are working.  The quicker you have the feedback the quicker you can fix the issues.  This doesn’t just apply to feedback from users/clients but also from your tooling.

Finding a new tool that increases my productivity is one of the best feelings, and this is one of those cases.   I was told about using Ninja for building instead Make, Visual Studio, Jom (Qt Build Tool).

If you are not a developer and don’t know what those tools are, they are what we use to build and compile all the code in QGIS.  If this step is slow the feedback loop is slow and it becomes annoying.  Improving this feedback loop greatly increases your workflow and happiness, and by happiness I really do mean that.

Ninja is one of these tools that did this. It’s optimized to be fast.  It does very little work in order to be faster any time it can.  Ninja was built by a developer on the Google Chrome team in order to improve their build times (read the history here)

Building QGIS with Ninja is super easy:

Install Ninja from package manager or using the ninja.exe (the whole tool is a single exe) if you are on windows

cd qgis-src
mkdir ninja-build
cd ninja-build
ccmake -GNinja ..
ninja

Done

You can build just the targets you need using

ninja qgis
ninja pycore

etc

The ccmake setup generates the ninja.build file that ninja uses. Myself and Matthias Kuhn have already patched our QGIS cmake files to handle any odd things that got generated – only a handful of things which was nice

The best thing I find about Ninja is how smart it is on knowing if it needs to build something or not, and this is the point that I find other tools fail on. They spend ages wasting time looking for what to do. Ninja knows it in a instant.

When running Ninja with no code changes I get this (on Windows):

21:18:54: Running steps for project qgis2.15.0...
21:18:54: Starting: "C:\QtCreator\bin\ninja.exe" qgis
ninja: no work to do.
21:18:54: The process "C:\QtCreator\bin\ninja.exe" exited normally.
21:18:54: Elapsed time: 00:00. 

Not even a second. If I did the same with VS or JOM I could have written this post before it finished working out what to do.

Here is what happens changing a single file:

21:19:48: Running steps for project qgis2.15.0...
21:19:48: Starting: "C:\QtCreator\bin\ninja.exe" qgis
[1/6] Building CXX object src\core\CMakeFiles\qgis_core.dir\raster\qgshillshaderenderer.cpp.obj
[2/6] Linking CXX shared library output\bin\qgis_core.dll
21:19:51: The process "C:\QtCreator\bin\ninja.exe" exited normally.
21:19:51: Elapsed time: 00:03.

It’s super impressive. Even a cold build on Windows is shorter now. On Linux it’s even faster due to faster disk access in Linux vs Windows

If you build QGIS form source I would highly recommend giving it a crack because I know you will love it.

Styling maps in QGIS is better when it’s interactive

I’m sure you are all well aware of my hate of blocking dialogs, and when it comes to styling QGIS has a few and they annoy me to no end. With new fancy map making tools like MapBox and CartoDB all having nice non blocking styling options it’s about time QGIS followed suit to bring better control and faster workflows to users.

The first stage of the dock is complete, pending feedback of course, and merged into master.

Introducing the map styling dock:

2016-04-19 20_27_00-Action center

Having the style (label only at the moment) options in a dock widget opens up some really nice workflows to map styling.

Firstly, now you don’t have to do the Open -> Change Setting -> Apply -> Close -> Open dance each time you want to change a layer style.  The dock is linked to the active layer in the legend so you can move around freely, update settings, and move on.

Second, we can now have a great workflow and allow for live updating. Yes you did read that right, it will live update the map as you change values. How bloody great is that!  Reducing the feedback loop is always the best.  If it can be done live, do it live.  There is a Reset button if you make a mistake.

Third, all styling options will now live in a single location going forward. Once we have moved style, diagrams, blend modes, it will be a one stop shop for styles with no annoying dialogs getting in the way.

In QGIS 2.14 we also have this awesome feature for rule based labels, however that added another dialog, and I wasn’t going move to a dock just to have another dialog block me two steps down the road. So now all the rules based labels dialogs are panels inside the main dock. When adding a new rule it will show the rule editor, and the list when not.  Remember how I said the dock updates the map live, well that also applies when you add/update rules.  The dock will update the canvas as the rule changes even before you hit save on the rule

2016-04-19 20_48_36-Action center

2016-04-19 20_48_28-Action center

The new styling dock is in master now, although might not be in the nightly build for a day or so.

You can check out some videos of the dock in action here:

Super keen on any feedback and ideas anyone might have.  Give it a try and let me know what you think.

EDIT: I would also like to add that what I have started/done is only possible because of the great work that has been done before me. Big thanks to all the people that have done work to enable me to make this feature,  label settings, threaded rendering, data defined buttons, etc.

UIs are for the weak. Welcome to ASCII QGIS land

Have you ever thought “gee I wish I could have a ASCII  QGIS map viewer for console use.  I’m so over these fancy UIs with their fancy graphics, fonts, and icons”.

No?

Anybody?

You are still reading? OK good I thought I lost you.

Anyway. Here is a fun idea. A ASCII QGIS map viewer that renders your project files in a console window (with colour possible).  Still with me?

This project was mainly just a bit of fun to play with the curses Python library and QGIS. What started off as a random idea on the train seems to have turned into full “usable” thing, if viewing a project and the legend is considered usable.

If you are still with me and itching to see it in action here it is.  In all the ASCII glory

Nifty!

What can it do so far?

  • Load project
  • Pan
  • Zoom
  • Set colour mode on/off

QGIS

The code is up at https://github.com/NathanW2/ascii_qgis (or http://nathanw2.github.io/ascii_qgis/)

It’s a bit of a fun side project at the moment so you might find bugs as I have only tested it on my machine.

Follow the README on github for notes on running.

Have fun.


Good news for QGIS MapInfo users

So some good news for QGIS users who also need/want to use MapInfo.  QGIS via GDAL 2.0 can support MapInfo TAB file editing. In all older versions of GDAL there was only support for read and/or write but not both.

MapInfo TAB editing has been supported in GDAL 2 but up until this point QGIS has only be built against GDAL 1.xx.  GDAL 2.x is now the default GDAL release in OSGeo4w.

From Jurgen:

2.0.2 is now the default GDAL in OSGeo4W and the nightlies (qgis-ltr-dev,
qgis-rel-dev and qgis-dev) already picked it up.

With the next release the regular packages (2.14 and 2.8) will also be updated
to use it

Even if you don’t want to make the switch to full QGIS you can now use both bits of software and edit in both.

QGIS will still only support a single geometry type per layer so if you open a mixed tab file you will get the geometry type selector.  You can load the layer 3 times if you need the 3 different geometry types.


Rendering web images as markers in QGIS

So here is an idea.  Say you have a point layer that has a link to a static image from a web cam. Lets say it is a traffic camera for this use case.

Selection_0272016-02-04 21_30_36-QGIS 0a64c16

We can use that feed to see the image in a browser. Cool. But what would be even cooler is if we could get the images into QGIS as markers without having to download each image each time for a update ourselves.

Turns out it’s pretty easy – could be easier no doubt but lets just go with this route for now.  For this you will need: a custom expression function, and data defined SVG path locations. (We have to use SVG markers because QGIS doesn’t have image markers just yet)

Lets write that custom expression function.  We need a SVG marker so lets set that for the layer and also edit the data defined path

svg.png

Hit the New file button and define a new function called show_camera. 

import requests
import base64

@qgsfunction(args='auto', group='Custom')
def show_camera(feed, feature, parent):
    svg = """
<?xml version="1.0" encoding="UTF-8" standalone="no"?>
<svg>
  <g>
    <image xlink:href="data:image/jpeg;base64,{0}" height="256" width="320" />
  </g>
</svg>
"""
    data = requests.get(feed, stream=True).content
    name = feed[-16:]
    b64response = base64.b64encode(data)
    newsvg = svg.format(b64response).replace('\n','')
    path = r"C:\temp\camera\{0}.svg".format(name)
    with open(path, 'w') as f:
        f.write(newsvg)
    return path.replace("\\", "/")

This will take the image feed, load it with the Python request library, base64 the image, stick the data in to a SVG, save the SVG to disk, and return the path to the new SVG.

We have to save to disk because QGIS can’t load SVGS from strings, although that would be a cool feature. I am also using base64 because a linked file SVG didn’t render in QGIS.

Once we have defined that we can use the function like so

show_camera( "url" )

looking at the output preview we have

'C:/temp/camera/MRMETRO-1216.jpg.svg'

Which looks right. Hit OK on the expression.

Before hitting Apply just make the size of the marker a little bigger as it will make the image to small to see, I used 35 for the demo. You should also pick a SVG marker from the list that is used as the default one if there is no valid path returned.

Hit Apply. Magic :)

qgis

The images are getting download and saved into C:\temp\camera for this demo but you could add some more magic around that.

Something to note is that each time you refresh the map you are making a bunch of web requests to get the new images. You could avoid this by tracking the image times and only grabbing new ones if a set time has elapsed.  I will leave that up the reader, however here is a link to a Gist with the code if you wish to fork it

Big hat tip to QGIS and its multi threaded rendering that still allows you to continue to work while it renders and downloads the images in the background.

UI theme support now core in QGIS

I enjoy using the dark UI theme for QGIS so much I figured why not make it a core feature. In the next version of QGIS if you head to the options screen you can now find a UI Theme option.

Options | General_037

The default dark theme is called Night Mapping for all those late night mapping jobs that you do, or if you just like dark UI themes.

QGIS b789fab_029

Selection_031

Selection_034

Something you will notice with this theme is the custom icons for the layer visibility. Pretty nifty! Here is how it is done

Creating new themes

To create a new theme simply make a new folder in .qgis2\themes\ with the name of the theme you want and create a style.qss file inside there. Check out the default themes for an example

Follow the Qt style sheet guides to see what can be styled.

Something I have added on top of the normal style sheets is variable support. Variables can be declared in a variables.qss file in the theme folder.

Here is an example of some variables:

@background: #323232
@text: #aaa
@selection: #507098
@menuback: #444
@highlight: #ffaa00

Now in style.qss we can do this:

QWidget
{
color: @text;
background-color: @background;
}

Great for not having to repeat your self or quick updating in a single place. When the theme is applied via the Options dialog or via the API it will replace the variables in style.qss using variables.qss. The result file is called style.qss.auto

Needs some tweaks

The default dark theme is a collection of stuff I have found around the net and stuff I have added myself. It’s far from prefect and I would love help to make it the best dark theme for QGIS. If you have another theme you think would make a good default one open a pull request on GitHub

Enjoy

Mixing a bit of Excel into QGIS – conditional formatted table cells

I was using Excel the other day and used the conditional formatting rules to style some cells based on a condition. If you have never seen or used them they look like this:

They are pretty handy for a quick idea on the state of your data.  Looking at QGIS I thought to myself “Wait!? Why not do that in QGIS too. That would be pretty neat”.  And with that here it is, finally!. Conditional formatting rules for QGIS attribute table.

cells

icons

You can control the font style, color, background color, even custom icons based on QGIS symbols. The buttons at the top give you access to quick styles which you can tweak more with the other options.

The conditions are just normal QGIS expressions. Use the special variable @value to refer to the current cell value. As they are normal QGIS expressions you can reference the other fields in the expressions.

(Click the GIF for a better view)

table

So go nuts. I would love to hear any feedback if you use it. Try it out in the next nightly dev build.


Filed under: Open Source

QGIS UI themes plugin

Scrap that idea. Seems there is already a  plugin to do this called Load QSS.  I’m not going to duplicate effort. Use that one and we can all make it better.

Want to have a dark theme, or even your own custom theme, for QGIS?  No worries. The UI Theme plugin has your back. Grab it from the plugin installer.  

Change the theme using Plugins -> UI Themes -> Theme It!

theme

Just select a theme and the interface will change styles.  Here is the dark theme called “Much Dark. Such Goth” :)

dark

I will let you try the “Oh my eyes” theme.

Themes can be added by creating a {name}.css file in plugin folder themes folder and edited __init__.pyfile to list the theme.  I’m working on this to make it better but I wrote this in about half an hour so it’s not all there yet.

The active themes is saved in the settings and restored on QGIS load.

If you make a cool theme feel free to make a pull request or ticket so it can be added to the plugin for others to use.  There is heaps that can be done with the Qt stylesheets so go nuts and make something cool.

Note: It’s a work in progress and things might not always look right.


Filed under: Open Source

Hat racks; or appreciating people for what they do.

The biggest thing with open source work is that it can be pretty thankless. There is a lot more that goes into a open source project then just some lines of code, there is events, documentation, API documentation, PR material, more documentation, websites, build setups, etc. It’s quite easy to just look at a project on GitHub, check out the graphs and see the top contributors and never think about it again. Because the code is all that matters right?

githubn

All hail Jürgen and Nyall!

Getting back to the point.  There is a lot of stuff that goes into an open source project that can go unnoticed and under appreciated.  Stuff that isn’t code is hard to track.  Do you know who maintains the QGIS website? What about who translates the UI? What about who ran the last dev meetings? These projects are non code related but are normally things that go unnoticed or under appreciated simply because it’s not a fancy chart in GitHub.  Making people feel welcome and appreciated in a project normally leads to a higher retention rate and a better overall feel for the project.  I remember when I was first thanked for the work I added to QGIS and how it made me feel, still here doing the same thing so it must have worked pretty well.

At PyCon AU 2015  Katie McLaughlin gave a talk about welcoming contributions to a project and being generally being nice to people. Not just being nice but actively thanking people for what they do and how it makes you feel. People generally put a lot of time into the projects they involve themselves in knowing you are appreciated makes you feel good.

Katie got the idea for the project from the talk and post titled A Place to Hang Your Hat by Leslie Hawthorn.  It seems like a silly title but read it and it will all make sense.

Her sub text makes the perfect summary:

On getting many good things done. And no one knows you’re doing any of it.

I’m not going to copy the post here but I will steal her tl;dr part:

  • If someone has volunteered to help your project, take the time to write a 2-3 sentence summary of what they did to help.
  • You can send it to them, along with a thank you note, or offer to post it on their LinkedIn profile. (Remember, users can approve recommendations before they’re added to their profile.)
  • Let’s spend some time celebrating our successes and all of our contributions! Let folks know you’re celebrating that success using #LABHR as a hashtag.
  • #LABHR stands for Let’s All Build a Hat Rack. For why its an awesome acronym, you have to read the post.

And here is the example post she makes:

Sample Recommendation

Deb Nicholson, Board Member, Open Hatch
While not strictly related to her work as an OpenHatch board members, Deb has given me invaluable counsel on fundraising for various non-profits I’ve been affiliated with. She’s also trained numerous community members on how to perform in-person advocacy for free and open source software projects, and software patent reform. As part of that training, she’s also convened numerous meetings and round tables to help people get things done in the open source world. She performs all this work with grace and patience for our sometimes difficult personalities. She’s brilliant and utterly unflappable. Cannot recommend her work highly enough.

So go ahead. Write something nice about someone and what they have done. Send it to them, blog about it, put it in Twitter, LinkedIn, etc.


Filed under: Open Source

  • Page 1 of 6 ( 106 posts )
  • >>
  • open source

Back to Top

Sustaining Members