Related Plugins and Tags

QGIS Planet

About label halos

A lot of cartographers have a love/hate relationship with label halos. On one hand they can be an essential technique for improving label readability, especially against complex background layers. On the other hand they tend to dominate maps and draw unwanted attention to the map labels.

In this post I’m going to share my preferred techniques for using label halos. I personally find this technique is a good approach which minimises the negative effects of halos, while still providing a good boost to label readability. (I’m also going to share some related QGIS 3.0 news at the end of this post!)

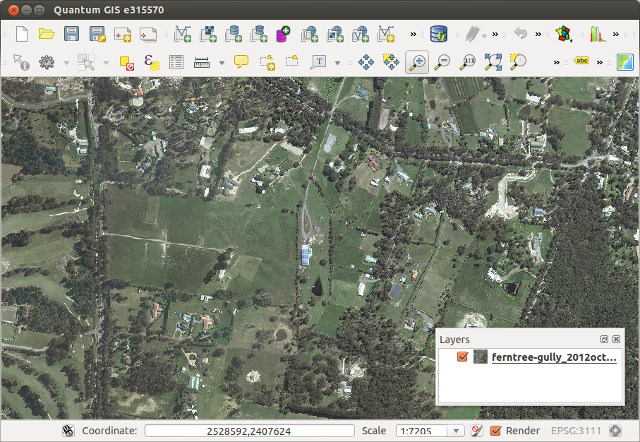
Let’s start with some simple white labels over an aerial image:

These labels aren’t very effective. The complex background makes them hard to read, especially the “Winton Shire” label at the bottom of the image. A quick and nasty way to improve readability is to add a black halo around the labels:

Sure, it’s easy to read the labels now, but they stand out way too much and it’s difficult to see anything here except the labels!

We can improve this somewhat through a better choice of halo colour:

This is much better. We’ve got readable labels which aren’t too domineering. Unfortunately the halo effect is still very prominent, especially where the background image varies a lot. In this case it works well for the labels toward the middle of the map, but not so well for the labels at the top and bottom.

A good way to improve this is to take advantage of blending (or “composition”) modes (which QGIS has native support for). The white labels will be most readable when there’s a good contrast with the background map, i.e. when the background map is dark. That’s why we choose a halo colour which is darker than the text colour (or vice versa if you’ve got dark coloured labels). Unfortunately, by choosing the mid-toned brown colour to make the halos blend in more, we are actually lightening up parts of this background layer and both reducing the contrast with the label and also making the halo more visible. By using the “darken” blend mode, the brown halo will only be drawn for pixels were the brown is darker then the existing background. It will darken light areas of the image, but avoid lightening pixels which are already dark and providing good contrast. Here’s what this looks like:

The most noticeable differences are the labels shown above darker areas – the “Winton Shire” label at the bottom and the “Etheridge Shire” at the top. For both these labels the halo is almost imperceptible whilst still subtly doing it’s part to make the label readable. (If you had dark label text with a lighter halo color, you can use the “lighten” blend mode for the same result).

The only issue with this map is that the halo is still very obvious around “Shire” in “Richmond Shire” and “McKinlay” on the left of the map. This can be reduced by applying a light blur to the halo:

There’s almost no loss of readability by applying this blur, but it’s made those last prominent halos disappear into the map. At first glance you probably wouldn’t even notice that there’s any halos being used here. But if we compare back against the original map (which used no halos) we can see the huge difference in readability:

Compare especially the Winton Shire label at the bottom, and the Richmond Shire label in the middle. These are much clearer on our tweaked map versus the above image.

Now for the good news… when QGIS 3.0 is released you’ll no longer have to rely on an external illustration/editing application to get this effect with your maps. In fact, QGIS 3.0 is bringing native support for applying many types of live layer effects to label buffers and background shapes, including blur. This means it will be possible to reproduce this technique directly inside your GIS, no external editing or tweaking required!

New map coloring algorithms in QGIS 3.0

It’s been a long time since I last blogged here. Let’s just blame that on the amount of changes going into QGIS 3.0 and move on…

One new feature which landed in QGIS 3.0 today is a processing algorithm for automatic coloring of a map in such a way that adjoining polygons are all assigned different color indexes. Astute readers may be aware that this was possible in earlier versions of QGIS through the use of either the (QGIS 1.x only!) Topocolor plugin, or the Coloring a map plugin (2.x).

What’s interesting about this new processing algorithm is that it introduces several refinements for cartographically optimising the coloring. The earlier plugins both operated by pure “graph” coloring techniques. What this means is that first a graph consisting of each set of adjoining features is generated. Then, based purely on this abstract graph, the coloring algorithms are applied to optimise the solution so that connected graph nodes are assigned different colors, whilst keeping the total number of colors required minimised.

The new QGIS algorithm works in a different way. Whilst the first step is still calculating the graph of adjoining features (now super-fast due to use of spatial indexes and prepared geometry intersection tests!), the colors for the graph are assigned while considering the spatial arrangement of all features. It’s gone from a purely abstract mathematical solution to a context-sensitive cartographic solution.

The “Topological coloring” processing algorithm

Let’s explore the differences. First up, the algorithm has an option for the “minimum distance between features”. It’s often the case that features aren’t really touching, but are instead just very close to each other. Even though they aren’t touching, we still don’t want these features to be assigned the same color. This option allows you to control the minimum distance which two features can be to each other before they can be assigned the same color.

The biggest change comes in the “balancing” techniques available in the new algorithm. By default, the algorithm now tries to assign colors in such a way that the total number of features assigned each color is equalised. This avoids having a color which is only assigned to a couple of features in a large dataset, resulting in an odd looking map coloration.

Balancing color assignment by count – notice how each class has a (almost!) equal count

Another available balancing technique is to balance the color assignment by total area. This technique assigns colors so that the total area of the features assigned to each color is balanced. This mode can be useful to help avoid large features resulting in one of the colors appearing more dominant on a colored map.

Balancing assignment by area – note how only one large feature is assigned the red color

The final technique, and my personal preference, is to balance colors by distance between colors. This mode will assign colors in order to maximize the distance between features of the same color. Maximising the distance helps to create a more uniform distribution of colors across a map, and avoids certain colors clustering in a particular area of the map. It’s my preference as it creates a really nice balanced map – at a glance the colors look “randomly” assigned with no discernible pattern to the arrangement.

Balancing colors by distance

As these examples show, considering the geographic arrangement of features while coloring allows us to optimise the assigned colors for cartographic output.

The other nice thing about having this feature implemented as a processing algorithm is that unlike standalone plugins, processing algorithms can be incorporated as just one step of a larger model (and also reused by other plugins!).

QGIS 3.0 has tons of great new features, speed boosts and stability bumps. This is just a tiny taste of the handy new features which will be available when 3.0 is released!

Creating custom colour schemes in PyQGIS

In my last post I explored some of the new colour related features available in QGIS 2.6. At the end of that post I hinted at the possibility of creating QGIS colour schemes using python. Let’s take a look…

We’ll start with something nice and easy – a colour scheme which contains a predefined set of colours (e.g., standard company colours). This is done by subclassing QgsColorScheme and implementing the required methods ‘schemeName‘, ‘fetchColors‘ and ‘clone‘. It’s all fairly self explanatory – most of the important stuff happens in fetchColors, which returns a list of QColor/string pairs. Here’s a sample:

from PyQt4.QtCore import *
from PyQt4.QtGui import *

class QgsCgaLightColorScheme(QgsColorScheme):
    def __init__(self, parent=None): 
        QgsColorScheme.__init__(self)
 
    def schemeName(self):
        return "CGA Colors!"
 
    def fetchColors(self,context='', basecolor=QColor()):
        return [[QColor('#555555'),'Gray'],
                    [QColor('#5555FF'),'Light Blue'],
                    [QColor('#55FF55'),'Light Green'],
                    [QColor('#55FFFF'),'Light Cyan'],
                    [QColor('#FF5555'),'Light Red'],
                    [QColor('#FF55FF'),'Light Magenta'],
                    [QColor('#FFFF55'),'Yellow'],
                    [QColor('#FFFFFF'),'White']]
    def flags(self):
        return QgsColorScheme.ShowInAllContexts
 
    def clone(self):
        return QgsCgaLightColorScheme()

cgaScheme = QgsCgaLightColorScheme()
QgsColorSchemeRegistry.instance().addColorScheme(cgaScheme)

This scheme will now appear in all colour buttons and colour picker dialogs:

CGA colours… what your map was missing!

If you only wanted the scheme to appear in the colour picker dialog, you’d modify the flags method to return QgsColorScheme.ShowInColorDialog instead.

QgsColorSchemes can also utilise a “base colour” when generating their colour list. Here’s a sample colour scheme which generates slightly randomised variations on the base colour. The magic again happens in the fetchColors method, which copies the hue of the base colour and generates random saturation and value components for the returned colours.

from PyQt4.QtCore import *
from PyQt4.QtGui import *
import random

class QgsRandomColorScheme(QgsColorScheme):
    def __init__(self, parent=None): 
        QgsColorScheme.__init__(self)

    def schemeName(self):
        return "Random colors!"

    def fetchColors(self, context='', basecolor=QColor() ):
        noColors = random.randrange(30)
        minVal = 130;
        maxVal = 255;
        colorList = []
        for i in range(noColors):
            if basecolor.isValid():
                h = basecolor.hue()
            else:
                #generate random hue
                h = random.randrange(360);

            s = random.randrange(100,255)
            v = random.randrange(100,255)

            colorList.append( [ QColor.fromHsv( h, s, v), "random color! " + str(i) ] )

        return colorList

    def flags(self):
        return QgsColorScheme.ShowInAllContexts

    def clone(self):
        return QgsRandomColorScheme()

randomScheme = QgsRandomColorScheme()
QgsColorSchemeRegistry.instance().addColorScheme(randomScheme)

Here’s the random colour scheme in action… note how the colours are all based loosely around the current red base colour.

Randomised colours

You may also have noticed the context argument for fetchColors. This can be used to tweak the returned colour list depending on the context of the colour picker. Possible values include ‘composer‘, ‘symbology‘, ‘gui‘ or ‘labelling‘.

One final fun example… here’s a colour scheme which grabs its colours using the Colour Lovers API to fetch a random popular palette from the site:

from PyQt4.QtCore import *
from PyQt4.QtGui import *
from xml.etree import ElementTree
import urllib2
import random

class colorLoversScheme(QgsColorScheme):

    def __init__(self, parent=None): 
        QgsColorScheme.__init__(self)
        xmlurl = 'http://www.colourlovers.com/api/palettes/top'

        headers = { 'User-Agent' : 'Mozilla/5.0' }
        req = urllib2.Request(xmlurl, None, headers)
        doc = ElementTree.parse(urllib2.urlopen(req)).getroot()

        palettes = doc.findall('palette')
        palette = random.choice(palettes)

        title = palette.find('title').text
        username = palette.find('userName').text
        attrString = title + ' by ' + username
        colors = ['#'+c.text for c in palette.find('colors').findall('hex')]

        self.color_list = [[QColor(c), attrString] for c in colors]

    def schemeName(self):
        return "Color lovers popular palette"

    def fetchColors(self, context='', basecolor=QColor()):
        return self.color_list

    def flags(self):
        return QgsColorScheme.ShowInAllContexts

    def clone(self):
        return colorLoversScheme()

loversScheme = colorLoversScheme()      
QgsColorSchemeRegistry.instance().addColorScheme( loversScheme )

Clicking a colour button will now give us some daily colour scheme inspiration…

Grabbing a palette from the Colours Lovers site

Grabbing a palette from the Colours Lovers site

Ok, now it’s over to all you PyQGIS plugin developers – time to go wild!

What’s new in QGIS 2.6 – Tons of colour improvements!

With one month left before the release of QGIS 2.6, it’s time to dive into some of the new features it will bring… starting with colours.

Working with colours is a huge part of cartography. In QGIS 2.4 I made a few changes to improve interaction with colours. These included the ability to copy and paste colours by right clicking on a colour button, and dragging-and-dropping colours between buttons. However, this was just the beginning of the awesomeness awaiting colours in QGIS 2.6… so let’s dive in!

Part 1 – New colour picker dialog

While sometimes it’s best to stick with an operating system’s native dialog boxes, colour pickers are one exception to this. That’s because most native colours pickers are woefully inadequate, and are missing a bunch of features which make working with colours much easier. So, in QGIS 2.6, we’ve taken the step of rolling out our very own colour picker:

New QGIS colour picker

Before starting work on this, I conducted a review of a number of existing colour picker implementations to find out what works and what doesn’t. Then, I shamelessly modelled this new dialog off the best bits of all of these! (GIMP users will find the new dialog especially familiar – that’s no coincidence, it’s a testament to how well crafted GIMP’s colour picker is.)

The new QGIS colour picker features:

  • Colour sliders and spin boxes for Hue, Saturation, Value, Red, Green and Blue colour components
  • An opacity slider (no more guessing what level of transparency “189” corresponds to!)
  • A text entry box which accepts hex colours, colour names and CSS rgb(#,#,#) type colours. (The drop down arrow you can see on this box in the screenshot above allows you to specify the display format for colours, with options like #RRGGBB and #RRGGBBAA)
  • A grid of colour swatches for storing custom colours
  • A visual preview of the new colour compared to the previous colour
  • Support for dragging and dropping colours into and out of the dialog
  • A colour wheel and triangle method for tweaking colours (by the way, all these colour widgets are reusable, so you can easily dump them into your PyQGIS plugins)
    Colour wheel widget
  • A colour palettes tab. This tab supports adding and removing colours from a palette, creating new palettes and importing and exporting colours from a GPL palette file. (We’ll explore colour palettes in more detail later in this post.)
    Colour palettes
  • A colour sampler! This tab allows you to sample a colour from under the mouse pointer. Just click the “Sample color” button, and then click anywhere on the screen (or press the space bar if you’re sampling outside of the QGIS window). You even get the choice of averaging the colour sample over a range of pixels. (Note that support for sampling is operating system dependant, and currently it is not available under OSX.)
    Built in colour sampler! Woohoo!

Part 2 – New colour button menus

Just like the new colour dialog is heavily based off other colour dialog implementations, this new feature is inspired by Microsoft’s excellent colour buttons in their recent Office versions (I make no claim to originality here!). Now, all QGIS colour buttons come with a handy drop down menu which allows you to quickly choose from some frequently used colour shortcuts. You’ve got the previously available options of copying and pasting colours from 2.4, plus handy swatches for recently used colours and for other standard colours.

colour_menu

Handy colour menu for buttons

Part 3 – Colour palettes

You may have noticed in the above screenshot the “Standard colors” swatches, and wondered what these were all about.  Well, QGIS 2.6 has extensive support for color palettes. There’s a few different “built-in” color palettes:

  • The “Standard colors” palette. This palette can be modified through the Options → Colors tab. You can add, remove, edit, and rename colours, as well as import color schemes from a GPL palette file. These standard colours apply to your QGIS installation, so they’ll be available regardless of what project you’re currently working on.

    Customising the standard colours

    Customising the standard QGIS colours

  • The “Project colors” palette. This can be accessed via the Project Properties → Default styles tab. This palette is saved inside the .qgs project file, so it’s handy for setting up a project-specific colour scheme.
  • The “Recent colors” palette. This simply shows colours you’ve recently used within QGIS.

You can easily create new colour palettes directly from the colour picker dialog. Behind the scenes, these palettes are saved into your .qgis/palettes folder as standard GPL palette files, which makes it nice and easy to modify them in other apps or transfer them between installations. It’s also possible to just dump a stack of quality palettes directly into this folder and they’ll be available from within QGIS.

Perhaps the best bit about colour schemes in QGIS is that they can be created using PyQGIS plugins, which opens up tons of creative possibilities… More on this in a future blog post!

So there we go. Tons of improvements for working with colours are heading your way in QGIS 2.6, which is due out on the 24th October.

(Before we end, let’s take a quick look at what the competition offers over in MapInfo land. Yeah… no thanks. You might want to invest some development time there Pitney Bowes!)

Colour shortcuts in QGIS 2.4

Quick poll… what’s the most frustrating thing about GIS? Fighting with colour plotters? Trying to remember GDAL command line syntax? MapInfo’s new ribbon interface* [1]? All of the above?

Wrong!

It’s getting a colour from here:

colour1

…all the way over to here:

colour2

Since the dawn of GIS humanity has struggled with this simple task* [2]. We’ve come up with multiple techniques for solving this problem, ranging from the RSI inducing “select and copy red value, alt-tab, paste, alt-tab, select and copy green value, alt-tab, paste, etc….” method, through to chanting “70, 145, 160… 70, 145, 160… 70, 145, 150… 70, 145, 150” to ourselves as we frantically try and rearrange dialogs to find the destination colour picker, all the while avoiding strange looks from co-workers.

Fortunately, QGIS 2.4 is coming to the rescue! Now, you can right click on any of QGIS’ colour picker buttons for a handy copy/paste colour shortcut menu. Pasting colours works from a whole range of formats, including hex codes, color names, and css-style “rgb” and “rgba” strings.

Fixed!

Problem solved!

Even better, you can just drag colours from one colour button to another:

Fixed again...

… and solved again…

Or, drag a colour from GIMP and drop it onto a QGIS colour button:

x

… and yet again!

Or even drag a colour from a QGIS button directly onto a shape in Inkscape! All this win is coming your way in QGIS 2.4, due June 2014.

[1] Pre-empting the inevitable flood of complaints when this new interface is rolled out
[2] I assume

And now… colour preview modes in QGIS’ map canvas

As a quick follow-up to my last post on colour preview modes for the print composer in QGIS 2.4, this feature has also been added to the main map canvas window! Now it’s even easier to adjust your symbol colours and immediately see how they’d appear under a range of different circumstances:

Colour previews modes for the map canvas

Colour previews modes for the map canvas


Colour blindness and grayscale previews in QGIS 2.4

Since QGIS 2.4 is nearing feature freeze it seems like a good time to start exploring some of the great new features in this release. So, let’s get started with my most recent addition to QGIS’ print composer… preview modes!

As every first year cartography text book will tell you, it’s important to know your target media and audience when creating a usable map. Some important considerations are whether or not your map will be photocopied or printed in black and white, and whether you need to consider colour blind map readers in your audience. In the past, designing maps with these considerations has been a time consuming, tedious process. You’d have to export your map, open it in another graphics editing program, apply some colour transform, work out what issues there are, flip back to QGIS, make your changes and repeat. If you’re working with a tight deadline it can be difficult to justify the time this all takes.

QGIS 2.4 will help to make this whole process a lot simpler. In the print composer there’s now an option to enable a number of different live “preview modes“. These include grayscale, monochrome, and two colour blindness simulations (Protanope and Deuteranope).

Composer preview modes in QGIS 2.4

Composer preview modes in QGIS 2.4

These preview modes are live, so you can continue to edit and tweak the colours in your composition while a preview mode is active! For a quick demonstration, let’s start with this creatively coloured thematic map:

bad_colored_map

While it might not be the most aesthetically pleasing map, at least the thematic colours can be easily matched to their corresponding values in the legend. Let’s see what would happen if we photocopied this map. This is as easy as activating the “Simulate photocopy (grayscale)” preview mode:

greyscalepreview

Hmm… not so usable now. The five thematic colours have been reduced to just three discernible colours. Oh well, at least we haven’t had to export our map to find this out, and it’s nice and easy to adjust the colours and composition to work for photocopies without having to leave QGIS to test the results!

Let’s see how this map would look to someone with colour blindness, by activating the “Simulate colour blindness (Protanope)” mode:

color_blindness

In this case, our map isn’t too bad. The different classes are still discernible and the map can be interpreted by someone with protanopia.

So there we have it – now it’s easy to determine how our map outputs will look under different circumstances and adjust them to suit! Composer preview modes will be a part of the upcoming 2.4 release of QGIS, which is due out at the end of June 2014.

Update:

This feature has also been added to the main map canvas.

Coming soon in QGIS Part 2 – Color control for raster layers

Continuing on from part 1, another feature I’ve recently pushed to QGIS is the ability to control the hue, saturation and colour of a raster layer. This builds off the excellent work done by Alexander Bruy (who added brightness and contrast controls for raster layers), and it’s another step in my ongoing quest to cut down the amount of map design tweaking required outside of QGIS. Let’s step through these new features and see what will be available when version 2.0 is released in June…

First up is the ability to tweak the saturation of a layer. Saturation basically refers to the intensity of a colour, with low saturation resulting in a more washed out, greyer image, and high saturation resulting in more vibrant and colourful images. Here’s a WMS layer showing an aerial view of Victoria at its driest, least appealing and most bushfire ready state:

Original layer

Raster layer before saturation controls…

Let’s tweak the saturation a bit to see if we can make it more appealing. In the Style tab under raster layer properties, you’ll see a new “Saturation and hue” section. For this layer I’ll bump the saturation up from its default value of zero:

Saturation settings

Saturation settings

Which results in something like this:

Resultant layer!

… and after increasing the saturation!

Ah, much better. This actually looks like somewhere I’d like to live. A bit over-the-top perhaps, but it IS handy to make quick adjustments to raster colours in this way without the need for any external programs.

How about turning an image grayscale? I regularly have to do this with street directory basemaps, and until now couldn’t find a satisfactory way of doing this in QGIS. Previously I’ve tried using various command line utilities, but never found one which could turn an image grayscale without losing embedded georeferencing tags. (I did manage to achieve it once in QGIS using a convoluted approach involving the raster calculator and some other steps I’ve thankfully forgotten.)

But now, you can forget about all that frustration and quickly turn a raster grayscale by using a control right inside the layer properties! You even get a choice of desaturation methods, including lightness, luminosity or average. Best part about this is you can then right click on the layer to save the altered version out to a full-resolution georeferenced image.

grayscale

Street map in grayscale… woohoo!

Lastly, there’s the colourise option. As expected, this behaves in a similar fashion to the colourise tools in GIMP and Photoshop. It allows you to tint a layer to a specified colour. Let’s take a WMS layer of Melbourne, tweak the brightness and contrast, and colourise it blue…

colorize_settings

Tweaking the colourize settings

… and the end result wouldn’t be out of place in Ingress or some mid 90′s conspiracy flick!

colorized

Colorized WMS layer

These changes are just a tiny, tiny part of what QGIS 2.0 has to offer. It’s looking to be a sensational release and I can’t wait for final version in June!

  • Page 1 of 1 ( 8 posts )
  • colour

Back to Top

Sustaining Members