In my last post I explored some of the new colour related features available in QGIS 2.6. At the end of that post I hinted at the possibility of creating QGIS colour schemes using python. Let’s take a look…
We’ll start with something nice and easy – a colour scheme which contains a predefined set of colours (e.g., standard company colours). This is done by subclassing QgsColorScheme and implementing the required methods ‘schemeName‘, ‘fetchColors‘ and ‘clone‘. It’s all fairly self explanatory – most of the important stuff happens in fetchColors, which returns a list of QColor/string pairs. Here’s a sample:
from PyQt4.QtCore import *
from PyQt4.QtGui import *

class QgsCgaLightColorScheme(QgsColorScheme):
    def __init__(self, parent=None):
        QgsColorScheme.__init__(self)

    def schemeName(self):
        return "CGA Colors!"

    def fetchColors(self,context='', basecolor=QColor()):
        return [[QColor('#555555'),'Gray'],
                    [QColor('#5555FF'),'Light Blue'],
                    [QColor('#55FF55'),'Light Green'],
                    [QColor('#55FFFF'),'Light Cyan'],
                    [QColor('#FF5555'),'Light Red'],
                    [QColor('#FF55FF'),'Light Magenta'],
                    [QColor('#FFFF55'),'Yellow'],
                    [QColor('#FFFFFF'),'White']]
    def flags(self):
        return QgsColorScheme.ShowInAllContexts

    def clone(self):
        return QgsCgaLightColorScheme()

cgaScheme = QgsCgaLightColorScheme()
QgsColorSchemeRegistry.instance().addColorScheme(cgaScheme)
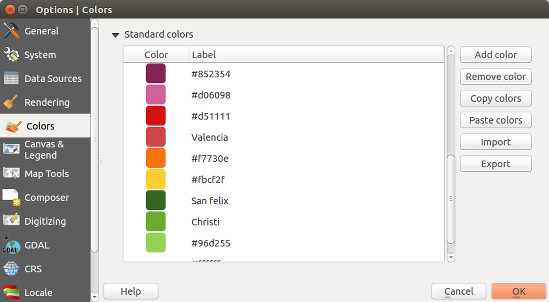
This scheme will now appear in all colour buttons and colour picker dialogs:

CGA colours… what your map was missing!
If you only wanted the scheme to appear in the colour picker dialog, you’d modify the flags method to return QgsColorScheme.ShowInColorDialog instead.
QgsColorSchemes can also utilise a “base colour” when generating their colour list. Here’s a sample colour scheme which generates slightly randomised variations on the base colour. The magic again happens in the fetchColors method, which copies the hue of the base colour and generates random saturation and value components for the returned colours.
from PyQt4.QtCore import *
from PyQt4.QtGui import *
import random

class QgsRandomColorScheme(QgsColorScheme):
    def __init__(self, parent=None):
        QgsColorScheme.__init__(self)

    def schemeName(self):
        return "Random colors!"

    def fetchColors(self, context='', basecolor=QColor() ):
        noColors = random.randrange(30)
        minVal = 130;
        maxVal = 255;
        colorList = []
        for i in range(noColors):
            if basecolor.isValid():
                h = basecolor.hue()
            else:
                #generate random hue
                h = random.randrange(360);

            s = random.randrange(100,255)
            v = random.randrange(100,255)

            colorList.append( [ QColor.fromHsv( h, s, v), "random color! " + str(i) ] )

        return colorList

    def flags(self):
        return QgsColorScheme.ShowInAllContexts

    def clone(self):
        return QgsRandomColorScheme()

randomScheme = QgsRandomColorScheme()
QgsColorSchemeRegistry.instance().addColorScheme(randomScheme)
Here’s the random colour scheme in action… note how the colours are all based loosely around the current red base colour.

Randomised colours
You may also have noticed the context argument for fetchColors. This can be used to tweak the returned colour list depending on the context of the colour picker. Possible values include ‘composer‘, ‘symbology‘, ‘gui‘ or ‘labelling‘.
One final fun example… here’s a colour scheme which grabs its colours using the Colour Lovers API to fetch a random popular palette from the site:
from PyQt4.QtCore import *
from PyQt4.QtGui import *
from xml.etree import ElementTree
import urllib2
import random

class colorLoversScheme(QgsColorScheme):

    def __init__(self, parent=None):
        QgsColorScheme.__init__(self)
        xmlurl = 'http://www.colourlovers.com/api/palettes/top'

        headers = { 'User-Agent' : 'Mozilla/5.0' }
        req = urllib2.Request(xmlurl, None, headers)
        doc = ElementTree.parse(urllib2.urlopen(req)).getroot()

        palettes = doc.findall('palette')
        palette = random.choice(palettes)

        title = palette.find('title').text
        username = palette.find('userName').text
        attrString = title + ' by ' + username
        colors = ['#'+c.text for c in palette.find('colors').findall('hex')]

        self.color_list = [[QColor(c), attrString] for c in colors]

    def schemeName(self):
        return "Color lovers popular palette"

    def fetchColors(self, context='', basecolor=QColor()):
        return self.color_list

    def flags(self):
        return QgsColorScheme.ShowInAllContexts

    def clone(self):
        return colorLoversScheme()

loversScheme = colorLoversScheme()
QgsColorSchemeRegistry.instance().addColorScheme( loversScheme )
Clicking a colour button will now give us some daily colour scheme inspiration…
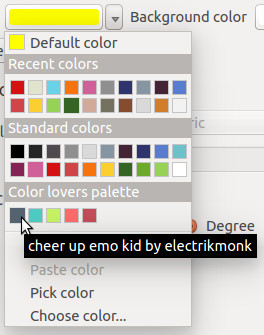
Grabbing a palette from the Colours Lovers site
Ok, now it’s over to all you PyQGIS plugin developers – time to go wild!