


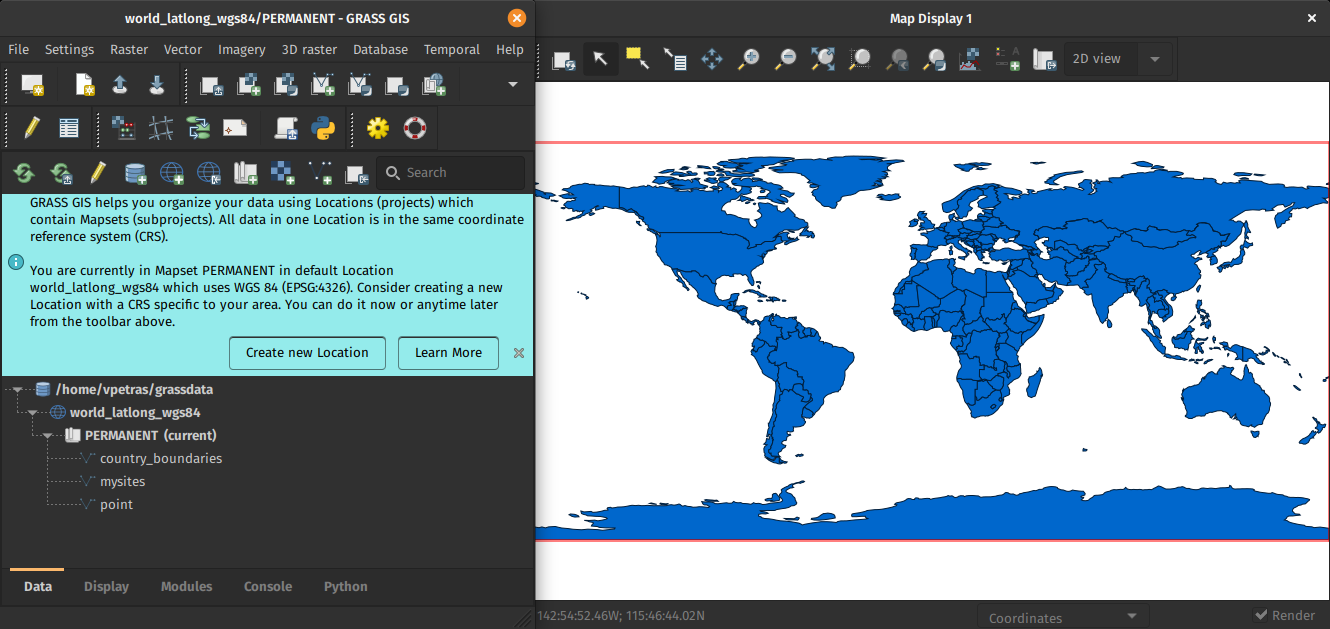
Using leafmap with actinia in a Jupyter notebook
This blog post gives an overview of how to easily perform a geodata analysis of an online available dataset (here: a GeoTIFF file) with actinia and display the result in Leafmap browser-based.
The post Using leafmap with actinia in a Jupyter notebook appeared first on Markus Neteler Consulting.
GRASS GIS 8.3.2 released
The GRASS GIS 8.3.2 maintenance release contains more than 30 changes compared to 8.3.1. This new patch release includes important fixes and improvements to the GRASS GIS modules and the graphical user interface (GUI), making it even more stable for daily work.
The post GRASS GIS 8.3.2 released appeared first on Markus Neteler Consulting.
Celebrating 18 Years of the Open Source Geospatial Foundation (OSGeo)
The Open Source Geospatial Foundation (OSGeo) today celebrates its 18th anniversary, underscoring its pivotal role in the development of open source geospatial software and its impact on the world. Founded in 2006, OSGeo’s mission is to support and promote the collaborative development of open geospatial technologies and data. Over the years, it has become a cornerstone of the open geospatial community, fostering innovation, education and adoption of open source geospatial software worldwide.
The post Celebrating 18 Years of the Open Source Geospatial Foundation (OSGeo) appeared first on Markus Neteler Consulting.
GRASS GIS Annual Report 2023
The GRASS GIS Annual Report for 2023 highlights a year of significant achievements and developments in the GRASS GIS project, which celebrated its 40th anniversary. Here’s a summary of the report: Community Meeting: The GRASS GIS Community Meeting was held in June at the Czech Technical University in Prague, bringing together a diverse group of […]
The post GRASS GIS Annual Report 2023 appeared first on Markus Neteler Consulting.
Translating Open Source Software with Weblate: A GRASS GIS Case Study
Open source software projects thrive on the contributions of the community, not only for the code, but also for making the software accessible to a global audience. One of the critical aspects of this accessibility is the localization or translation of the software’s messages and interfaces. In this context, Weblate (https://weblate.org/) has proven to be […]
The post Translating Open Source Software with Weblate: A GRASS GIS Case Study appeared first on Markus Neteler Consulting.
QGIS 3D Tiles – thanks to Cesium Ecosystem Grant!
We’ve recently had the opportunity to implement a very exciting feature in QGIS 3.34 — the ability to load and view 3D content in the “Cesium 3D Tiles” format! This was a joint project with our (very talented!) partners at Lutra Consulting, and was made possible thanks to a generous ecosystem grant from the Cesium project.
Before we dive into all the details, let’s take a quick guided tour showcasing how Cesium 3D Tiles work inside QGIS:
What are 3D tiles?
Cesium 3D Tiles are an OGC standard data format where the content from a 3D scene is split up into multiple individual tiles. You can think of them a little like a 3D version of the vector tile format we’ve all come to rely upon. The 3D objects from the scene are stored in a generalized, simplified form for small-scale, “zoomed out” maps, and in more detailed, complex forms for when the map is zoomed in. This allows the scenes to be incredibly detailed, whilst still covering huge geographic regions (including the whole globe!) and remaining responsive and quick to download. Take a look at the incredible level of detail available in a Cesium 3D Tiles scene in the example below:
Where can you get 3D tile content?
If you’re lucky, your regional government or data custodians are already publishing 3D “digital twins” of your area. Cesium 3D Tiles are the standard way that these digital twin datasets are being published. Check your regional data portals and government open data hubs and see whether they’ve made any content available as 3D tiles. (For Australian users, there’s tons of great content available on the Terria platform!).
Alternatively, there’s many datasets available via the Cesium ion platform. This includes global 3D buildings based on OpenStreetMap data, and the entirety of Google’s photorealistic Google Earth tiles! We’ve published a Cesium ion QGIS plugin to complement the QGIS 3.34 release, which helps make it super-easy to directly load datasets from ion into your QGIS projects.
Lastly, users of the OpenDroneMap photogrammetry application will already have Cesium 3D Tiles datasets of their projects available, as 3D tiles are one of the standard outputs generated by OpenDroneMap.
Why QGIS?
So why exactly would you want to access Cesium 3D tiles within QGIS? Well, for a start, 3D Tiles datasets are intrinsically geospatial data. All the 3D content from these datasets are georeferenced and have accurate spatial information present. By loading a 3D tiles dataset into QGIS, you can easily overlay and compare 3D tile content to all your other standard spatial data formats (such as Shapefiles, Geopackages, raster layers, mesh datasets, WMS layers, etc…). They become just another layer of spatial information in your QGIS projects, and you can utilise all the tools and capabilities you’re familiar with in QGIS for analysing spatial data along with these new data sources.
One large drawcard of adding a Cesium 3D Tile dataset to your QGIS project is that they make fantastic 3D basemaps. While QGIS has had good support for 3D maps for a number of years now, it has been tricky to create beautiful 3D content. That’s because all the standard spatial data formats tend to give generalised, “blocky” representations of objects in 3D. For example, you could use an extruded building footprint file to show buildings in a 3D map but they’ll all be colored as idealised solid blocks. In contrast, Cesium 3D Tiles are a perfect fit for a 3D basemap! They typically include photorealistic textures, and include all types of real-world features you’d expect to see in a 3D map — including buildings, trees, bridges, cliffsides, etc.
What next?
If you’re keen to learn even more about Cesium 3D Tiles in QGIS, you can check out the recent “QGIS Open Day” session we presented. In this session we cover all the details about 3D tiles and QGIS, and talk in depth about what’s possible in QGIS 3.34 and what may be coming in later releases.
Otherwise, grab the latest QGIS 3.34 and start playing…. you’ll quickly find that Cesium 3D Tiles are a fun and valuable addition to QGIS’ capabilities!
Our thanks go to Cesium and their ecosystem grant project for funding this work and making it possible.
GRASS GIS 8.3.1 released
What’s new in a nutshell The GRASS GIS 8.3.1 maintenance release provides more than 60 changes compared to 8.3.0. This new patch release brings in important fixes and improvements in GRASS GIS modules and the graphical user interface (GUI) which stabilizes the new single window layout active by default. Some of the most relevant changes […]
The post GRASS GIS 8.3.1 released appeared first on Markus Neteler Consulting.
GRASS GIS 8.3.0 released
What’s new in a nutshell The GRASS GIS 8.3.0 release provides more than 360 changes compared to the 8.2 branch. This new minor release brings in many fixes and improvements in GRASS GIS modules and the graphical user interface (GUI) which now has the single window layout by default. Some of the most relevant changes […]
The post GRASS GIS 8.3.0 released appeared first on Markus Neteler Consulting.
QGIS 3.28 improvements for working with ESRI formats and services
The QGIS 3.28 release is an extremely exciting release for all users who work in mixed software workplaces, or who need to work alongside users of ESRI software. In this post we’ll be giving an overview of all the new tools and features introduced in 3.28 which together result in a dramatic improvement in the workflows and capabilities in working with ESRI based formats and services. Read on for the full details…!
Before we begin, we’d like to credit the following organisations for helping fund these developments in QGIS 3.28:
- Naturstyrelsen, Denmark
- Provincie Gelderland, Netherlands
- Uppsala Universitet, Department of Archaeology and Ancient History
- Gemeente Amsterdam
- Provincie Zuid-Holland, Netherlands
FileGeodatabase (GDB) related improvements
The headline item here is that QGIS 3.28 introduces support for editing, managing and creating ESRI FileGeodatabases out of the box! While older QGIS releases offered some limited support for editing FileGeodatabase layers, this required the manual installation of a closed source ESRI SDK driver… which unfortunately resulted in other regressions in working with FileGeodatabases (such as poor layer loading speed and random crashes). Now, thanks to an incredible reverse engineering effort by the GDAL team, the open-source driver for FileGeodatabases offers full support for editing these datasets! This means all QGIS users have out-of-the-box access to a fully functional, high-performance read AND write GDB driver, no further action or trade-offs required.
Operations supported by the GDAL open source driver include:
- Editing existing features, with full support for editing attributes and curved, 3D and measure-value geometries
- Creating new features
- Deleting features
- Creating, adding and modifying attributes in an existing layer
- Full support for reading and updating spatial indexes
- Creating new indexes on attributes
- “Repacking” layers, to reduce their size and improve performance
- Creating new layers in an existing FileGeodatabase
- Removing layers from FileGeodatabases
- Creating completely new, empty FileGeodatabases
- Creating and managing field domains
On the QGIS side, the improvements to the GDAL driver meant that we could easily expose feature editing support for FileGeodatabase layers for all QGIS users. While this is a huge step forward, especially for users in mixed software workplaces, we weren’t happy to rest there when we had the opportunity to further improve GDB support within QGIS!
So in QGIS 3.28 we also introduced the following new functionality when working with FileGeodatabases:
FileGeodatabase management tools
QGIS 3.28 introduces a whole range of GUI based tools for managing FileGeodatabases. To create a brand new FileGeodatabase, you can now right click on a directory from the QGIS Browser panel and select New – ESRI FileGeodatabase:

After creating your new database, a right click on its entry will show a bunch of available options for managing the database. These include options for creating new tables, running arbitrary SQL commands, and database-level operations such as compacting the database:

You’re also able to directly import existing data into a FileGeodatabase by simply dragging and dropping layers onto the database!
Expanding out the GDB item will show a list of layers present in the database, and present options for managing the fields in those layers. Alongside field creation, you can also remove and rename existing fields.

Field domain handling
QGIS 3.28 also introduces a range of GUI tools for working with field domains inside FileGeodatabases. (GeoPackage users also share in the love here — these same tools are all available for working with field domains inside this standard format too!) Just right click on an existing FileGeodatabase (or GeoPackage) and select the “New Field Domain” option. Depending on the database format, you’ll be presented with a list of matching field domain types:

Once again, you’ll be guided through a user-friendly dialog allowing you to create your desired field domain!

After field domains have been created, they can be assigned to fields in the database by right-clicking on the field name and selecting “Set Field Domain”:

Field domains can also be viewed and managed by expanding out the “Field domains” option for each database.
Relationship discovery
Another exciting addition in QGIS 3.28 (and the underlying GDAL 3.6 release) is support for discovering database relationships in FileGeodatabases! (Once again, GeoPackage users also benefit from this, as we’ve implemented full support for GeoPackage relationships via the “Related Tables Extension“).
Expanding out a database containing any relationships will show a list of all discovered relationships:

(You can view the full description and details for any of these relationships by opening the QGIS Browser “Properties” panel).
Whenever QGIS 3.28 discovers relationships in the database, these related tables will automatically be added to your project whenever any of the layers which participate in the relationship are opened. This means that users get the full experience as designed for these databases without any manual configuration, and the relationships will “just work”!
Dataset Grouping
Lastly, we’ve improved the way layers from FileGeodatabases are shown in QGIS, so that layers are now grouped according to their original dataset groupings from the database structure:

Edit ArcGIS Online / Feature Service layers
While QGIS has had read-only support for viewing and working with the data in ArcGIS Online (AGOL) vector layers and ArcGIS Server “feature service” layers for many years, we’ve added support for editing these layers in QGIS 3.28. This allows you to take advantage of all of QGIS’ easy to use, powerful editing tools and directly edit the content in these layers from within your QGIS projects! You can freely create new features, delete features, and modify the shape and attributes of existing features (assuming that your user account on the ArcGIS service has these edit permissions granted, of course). This is an exciting addition for anyone who has to work often with content in ArcGIS services, and would prefer to directly manipulate these layers from within QGIS instead of the limited editing tools available on the AGOL/Portal platforms themselves.
This new functionality will be available immediately to users upon upgrading to QGIS 3.28 — any users who have been granted edit capabilities for the layers will see that the QGIS edit tools are all enabled and ready for use without any further configuration on the QGIS client side.
Filtering Feature Service layers
We’ve also had the opportunity to introduce filter/query support for Feature Service layers in QGIS 3.28. This is a huge performance improvement for users who need to work with a subset of a features from a large Feature Service layer. Unfortunately, due to the nature of the Feature Service protocol, these layers can often be slow to load and navigate on a client side. By setting a SQL filter to limit the features retrieved from the service the performance can be dramatically increased, as only matching features will ever be requested from the backend server. You can use any SQL query which conforms to the subset of SQL understood by ArcGIS servers (see the Feature Service documentation for examples of supported SQL queries).

What’s next?
While QGIS 3.28 is an extremely exciting release for any users who need to work alongside ESRI software, we aren’t content to rest here! The exciting news is that in QGIS 3.30 we’ll be introducing a GUI driven approach allowing users to create new relationships in their FileGeodatabase (and GeoPackage!) databases.
At North Road we’re always continuing to improve the cross-vendor experience for both ESRI and open-source users through our continued work on the QGIS desktop application and our SLYR conversion suite. If you’d like to chat to us about how we can help your workplace transition from a fully ESRI stack to a mixed or fully open-source stack, just contact us to discuss your needs.
SLYR Update — November 2022
Our SLYR tool is the complete solution for full compatibility between ArcMap, ArcGIS Pro and QGIS. It offers a powerful suite of conversion tools for opening ESRI projects, styles and other documents directly within QGIS, and for exporting QGIS documents for use in ESRI software.
A lot has changed since our last SLYR product update post, and we’ve tons of very exciting improvements and news to share with you all! In this update we’ll explore some of the new tools we’ve added to SLYR, and discuss how these tools have drastically improved the capacity for users to migrate projects from the ESRI world to the open-source world (and vice versa).
ArcGIS Pro support
The headline item here is that SLYR now offers a powerful set of tools for working with the newer ArcGIS Pro document formats. Previously, SLYR offered support for the older ArcMap document types only (such as MXD, MXT, LYR, and PMF formats). Current SLYR versions now include tools for:
Directly opening ArcGIS Pro .lyrx files within QGIS
LYRX files can be dragged and dropped directly onto a QGIS window to add the layer to the current project. All the layer’s original styling and other properties will be automatically converted across, so the resultant layer will be an extremely close match to the original ArcGIS Pro layer! SLYR supports vector layers, raster layers, TIN layers, point cloud layers and vector tile layers. We take great pride in just how close the conversion results are to how these layers appear in ArcGIS Pro… in most cases you’ll find the results are nearly pixel perfect!
In addition to drag-and-drop import support, SLYR also adds support for showing .lyrx files directly in the integrated file browser, and also adds tools to the QGIS Processing Toolbox so that users can execute bulk conversion operations, or include document conversion in their models or custom scripts.
ArcGIS Pro map (mapx) and project (aprx) conversion
Alongside the LYRX support, we’ve also added support for the ArcGIS Pro .mapx and .aprx formats. Just like our existing .mxd conversion, you can now easily convert entire ArcGIS Pro maps for direct use within QGIS! SLYR supports both the older ArcGIS Pro 2.x project format and the newer 3.x formats.
Export from QGIS to ArcGIS Pro!
Yes, you read that correctly… SLYR now allows you to export QGIS documents into ArcGIS Pro formats! This is an extremely exciting development… for the first time ever QGIS users now have the capacity to export their work into formats which can be supplied directly to ESRI users. Current SLYR versions support conversion of map layers to .lyrx format, and exporting entire projects to the .mapx format. (We’ll be introducing support for direct QGIS to .aprx exports later this year.)
We’re so happy to finally provide an option for QGIS users to work alongside ArcGIS Pro users. This has long been a pain point for many organisations, and has even caused organisations to be ineligible to tender for jobs which they are otherwise fully qualified to do (when tenders require provision of data and maps in ArcGIS compatible formats).
ArcGIS Pro .stylx support
Alongside the other ArcGIS Pro documents, SLYR now has comprehensive support for reading and writing ArcGIS Pro .stylx databases. We’ve dedicated a ton of resources in ensuring that the conversion results (both from ArcGIS Pro to QGIS and from QGIS to ArcGIS Pro) are top-notch, and we even handle advanced ArcGIS Pro symbology options like symbol effects!
Take a look below how even very advanced ArcGIS Pro style libraries convert beautifully to QGIS symbol libraries:

ArcMap Improvements
While we’ve been focusing heavily on the newer ArcGIS Pro formats, we’ve also improved our support for the older ArcMap documents. In particular, SLYR now offers more options for converting ArcMap annotation layers and annotation classes to QGIS supported formats. Users can now convert Annotation layers and classes directly over to QGIS annotation layer or alternatively annotation classes can be converted over to the OGC standard GeoPackage format. When exporting annotation classes to GeoPackage the output database is automatically setup with default styling rules, so that the result can be opened directly in QGIS and will be immediately visualised to match the original annotation class.
Coming soon…
While all the above improvements are already available for all SLYR license holders, we’ve got many further improvements heading your way soon! For example, before the end of 2022 we’ll be releasing another large SLYR update which will introduce support for exporting QGIS projects directly to ArcGIS Pro .aprx documents. We’ve also got many enhancements planned which will further improve the quality of the converted documents. Keep an eye on this blog and our social media channels for more details as they are available…
You can read more about our SLYR tool at the product page, or contact us today to discuss licensing options for your organisation.
Crowd funding alert: Point Clouds, Elevation Profiles and 3D Map view improvements!
Together with our partners at Lutra Consulting and Hobu, we have once again have collated your feature requests for even MORE point cloud and QGIS elevation improvements and are ready to start working on them!
Here’s a taster of what to expect if our latest crowd funding campaign is successful:
- Point cloud data management, transformation and analysis via incorporation of PDAL within the QGIS “Processing” toolbox
- Optimised handling of large datasets to speed up your 3D maps, including dynamic data loading for complex 3D scenes
- Combine multiple LAS/LAZ point cloud files into a single “virtual” point cloud for easy data management and display
- Elevation profile tool embedded into print layouts, totally customizable, more efficient and with the ability to export profile data to CSV and DXF
- General improvements to QGIS 3D map views, including an enhanced 3D measuring tool, additional camera controls and improving the configuration dialog options and functionality.
To find out more, check out the ‘Detailed proposal and deliverables’ section on the main crowd funding page. You may want to get some popcorn ready, it really is exciting!
We need your help to make this work possible. If you’d like to see these enhancements, pledge to the crowdfunding campaign before October 24, 2022.

Securely accessing ArcGIS Online (AGOL) and enterprise ArcGIS Portal sites through QGIS (2022 update!)
We’re often contacted for advice regarding our recommendations for securely accessing content on ArcGIS Online (AGOL) or enterprise ArcGIS Portal deployments from within QGIS. While we ran through our recommended setup in an older post, we thought it was time for a 2022 update for our recommendations. In this version we’ve updated some of the descriptions and screenshots for newer QGIS releases, and have added explicit instructions on accessing ArcGIS Online content too.
This post details step-by-step instructions in setting up both AGOL/ArcGIS Portal and QGIS to enable this integration. First, we’ll need to create an application on the server in order to enable QGIS users to securely authenticate with the server. The process for this varies between AGOL and ArcGIS Portal, so we’ve separated the guidelines into two sections below:
ArcGIS Portal
Creating an application
Logon to the Portal, and from the “Content” tab, click the “Add Item” option. Select “An application” from the drop down list of options:

Set the type of the application as “Desktop”

You can fill out the rest of this dialog as you see fit. Suggested values are:
- Purpose: Ready to Use
- Platform: Qt
- URL: https://qgis.org
- Tags: QGIS, Desktop, etc
Now – here comes a trick. Portal will force you to attach a file for the application. It doesn’t matter what you attach here, so long as it’s a zip file. While you could attach a zipped copy of the QGIS installer, that’s rather wasteful of server space! We’d generally just opt for a zip file containing a text file with a download link in it.
Click Add Item when you’re all done filling out the form, and the new application should be created on the Portal.
Registering the Application
The next step is to register the application on Portal, so that you can obtain the keys required for the OAuth2 logon using it. From the newly created item’s page, click on the “Settings” tab:

Scroll right to the bottom of this page, and you should see a “Register” button. Press this. Set the “App type” to “Native“.
Add two redirect URIs to the list (don’t forget to click “Add” after entering each!):
- The Portal’s public address, e.g. https://mydomain.com/portal
- http://127.0.0.1:7070

Finally, press the “Register” button in the dialog. If all goes well then the App Registration section in the item settings should now be populated with details. From here, copy the “App ID” and “Secret” strings, we’ll need these later:

Determine Request URLs
One last configuration setting we’ll need to determine before we fire up QGIS is the Portal’s OAuth Request and Token URLs. These are usually found by appending /sharing/rest/oauth2/authorize and /sharing/rest/oauth2/token to the end of your Portal’s URL.
For instance, if your public Portal URL is http://mydomain.com/portal, then the URLs will be:
Request URL: http://mydomain.com/portal/sharing/rest/oauth2/authorize
Token URL: http://mydomain.com/portal/sharing/rest/oauth2/token
You should be able to open both URLs directly in a browser. The Request URL will likely give a “redirect URL not specified” error, and the Token URL will give a “client_id not specified” error. That’s ok — it’s enough to verify that the URLs are correct.
When this is all done we can skip ahead to the client-side configuration below.
ArcGIS Online (AGOL)
Registering an application on AGOL must be done by an account administrator. So first, we’ll logon to AGOL using an appropriate account, and then head over to the “Content” tab. We’ll then hit the “New Item” button to start creating our application:

From the available item types select the “Application” option:

We’ll then select the “Mobile” application type, and enter “https://qgis.org” as the application URL (it actually doesn’t matter what we enter here!):

Lastly, we can enter a title for the application and complete all the metadata options as desired, then hit the “Save” button to create the application. AGOL should then take us over to the applications content page (if not, just open that page manually). From the application summary page, click across to the “Settings” tab:

Scroll right down to the “Credentials” section at the bottom of this page and click the “Register application” button:

Enter the following “Redirect URLs”, by copying each value and then hitting “Add”
- localhost
- http://127.0.0.1:7070
- https://127.0.0.1:7070
Set the “Application environment” to Browser and then click “Register” button to continue:

You’ll be taken back to the application Settings page, but should now see an Client ID value and option to show the Client Secret. Copy the “Client ID” and “Client Secret” (there’s a “copy to clipboard” button for this) as we’ll need these later:

We’re all done on the AGOL side now, so it’s time to fire up QGIS!
Creating an QGIS OAuth2 Authentication Configuration
From your QGIS application, select Options from the Settings menu. Select the Authentication tab. We need to create a new authentication configuration, so press the green + button on the right hand side of the dialog. You’ll get a new dialog prompting you for Authentication details.
You may be asked to create a “Master Password” when you first create an authentication setup. If so, create a secure password there before continuing.
There’s a few tricks to this setup. Firstly, it’s important to ensure that you use the exact same settings on all your client machines. This includes the authentication ID field, which defaults to an auto-generated random string. (While it’s possible to automatically deploy the configuration as part of a startup or QGIS setup script, we won’t be covering that here!).
So, from the top of the dialog, we’ll fill in the “Name” field with a descriptive name of the Portal site. You then need to “unlock” the “Id” field by clicking the little padlock icon, and then you’ll be able to enter a standard ID to identify the Portal. The Id field is very strict, and will only accept a 7 letter string! Since you’ll need to create a different authentication setup for each individual ArcGIS Portal site you access, make sure you choose your ID string accordingly. (If you’re an AGOL user, then you’ll only need to create one authentication setup which will work for any AGOL account you want to access).

Drop down the Authentication Type combo box, and select “OAuth2 Authentication” from the list of options. There’s lots of settings we need to fill in here, but here’s what you’ll need:
- Grant flow: set to “Authorization Code”
- Request URL:
- For ArcGIS Portal services: enter the Request URL we determined in the previous step, e.g. http://mydomain.com/portal/sharing/rest/oauth2/authorize
- For AGOL services: enter https://www.arcgis.com/sharing/rest/oauth2/authorize
- Token URL:
- For ArcGIS Portal services: enter the Token URL from the previous step, e.g. http://mydomain.com/portal/sharing/rest/oauth2/token
- For AGOL services: enter https://www.arcgis.com/sharing/rest/oauth2/token
- Refresh Token URL: leave empty
- Redirect URL: leave as the default http://127.0.0.1:7070 value
- Client ID: enter the App ID (or Client ID) from the App Registration information (see earlier steps)
- Client Secret: enter the App Secret (or Client Secret) from the App Registration information (see earlier steps)
- Scope: leave empty
- API Key: leave empty
- For AGOL services only: you’ll also need to set the “Token header” option under the “Advanced” heading. This needs to be “X-Esri-Authorization” (without the quotes!)
That’s it — leave all the rest of the settings at their default values, and click Save.
You can close down the Options dialog now.
Adding the Connection Details
Lastly, we’ll need to setup the server connection as an “ArcGIS Rest Server Connection” in QGIS. This is done through the QGIS “Data Source Manager” dialog, accessed through the Layer menu. Click the “ArcGIS REST Server” tab to start with, and then press “New” in the Server Connections group at the top of this dialog.
Enter a descriptive name for the connection, and then enter the connection URLs. These will vary depending on whether you’re connecting to AGOL or an ArcGIS Portal server:
ArcGIS Online Connection
- URL: This will be something similar to “https://services###.arcgis.com/########/arcgis/rest/services/”, but will vary organisation by organisation. You can determine your organisation’s URL by visiting the overview page for any dataset published on your AGOL account, and looking under the “Details” sidebar. Copy the address from the “Source: Feature Service” link and it will contain the correct URL parameters for your organisation. (Just make sure you truncate the link to end after the “arcgis/rest/services” part, you don’t require the full service endpoint URL)
- Community endpoint URL: https://www.arcgis.com/sharing/rest/community
- Content endpoint URL: https://www.arcgis.com/sharing/rest/content
ArcGIS Portal Connection
- URL: the REST endpoint associated with your Portal, e.g. “https://mydomain.com/arcgis/rest/services”
- Community endpoint URL (optional): This will vary depending on the server setup, but will generally take the form “https://mydomain.com/portal/sharing/rest/community”
- Content endpoint URL (optional): This will vary depending on the server setup, but will generally take the form “https://mydomain.com/portal/sharing/rest/content”
Lastly, select the new OAuth2 configuration you just created under the “Authentication” group:

Click OK, and you’re done! When you try to connect to the newly added connection, you’ll automatically be taken to the AGOL or ArcGIS Portal’s logon screen in order to authenticate with the service. After entering your details, you’ll then be connected securely to the server and will have access to all items which are shared with your user account!
We’ve regularly use this setup for our enterprise clients, and have found it to work flawlessly in recent QGIS versions. If you’ve found this useful and are interested in other “best-practice” recommendations for mixed Open-Source and ESRI workplaces, don’t hesitate to contact us to discuss your requirements… at North Road we specialise in ensuring flawless integration between ESRI based systems and the Open Source geospatial software stack.
GRASS GIS 8.2.0 released
The 8.2.0 release of GRASS GIS is now available with results from the GSoC 2021 and many other additions. A new grass.jupyter package is now included for interacting with Jupyter notebooks. Single window graphical user interface is available in GUI settings. r.series and three other modules are newly parallelized. Additionally, the release includes a series […]
The post GRASS GIS 8.2.0 released appeared first on Markus Neteler Consulting.
GRASS GIS 8.0.1 released
This is an update release of the GRASS GIS 8.0 series. Download source code tarball at https://grass.osgeo.org/grass80/source/grass-8.0.1.tar.gz https://grass.osgeo.org/grass80/source/grass-8.0.1.md5sum For further release details (bug fixes and enhancements), see https://trac.osgeo.org/grass/wiki/Grass8/NewFeatures80 The GRASS GIS 8.0.1 release provides more than 20 fixes and improvements with respect to the release 8.0.0. What’s Changed Important fixes utils/mkhtml: fix print warning/fatal message […]
The post GRASS GIS 8.0.1 released appeared first on Markus Neteler Consulting.
GRASS GIS 8.0.0 released! Finally…
Overview of changes After more than 3 year of development the first stable release GRASS GIS 8.0.0 is available. Efforts have concentrated on making the user experience even better, providing many new useful additional functionalities to modules and further improving the graphical user interface. Breaking news: new graphical user interface with entirely rewritten startup sequence! […]
The post GRASS GIS 8.0.0 released! Finally… appeared first on Markus Neteler Consulting.
GRASS GIS 8.0.0RC2 released
Overview of changes
After more than 3 year of development the first stable release GRASS GIS 8.0.0 is available. Efforts have concentrated on making the user experience even better, providing many new useful additional functionalities to modules and further improving the graphical user interface.
Breaking news: new graphical user interface with entirely rewritten startup sequence!
This re-establishes user experience compatibility with QGIS and other connected software packages.
The GRASS GIS 8.0.0 release provides more than 1,300 fixes and improvements with respect to the release 7.8.6.
With the introduction of the semantic label raster metadata class, the temporal database was modified to version 3. Hence, to be able to read and process GRASS 7.x space-time datasets, users will be prompted to run t.upgrade. If users want to read newly created space-time datasets back in GRASS 7.x, they can run t.downgrade.
Launching the software
The user experience of the graphical user interface has been completely rewritten: no more clumsy selection screens – just enter the menu system directly!
And on command line, GRASS GIS now starts versionless, i.e. as grass.
Download and detailed list of changes
See https://github.com/OSGeo/grass/releases/tag/8.0.0RC2
Thanks to all contributors!
The post GRASS GIS 8.0.0RC2 released appeared first on Markus Neteler Consulting.
GRASS GIS 7.8.5 released
What’s new in a nutshell 
As a follow-up to the previous GRASS GIS 7.8.4 we have published the new release GRASS GIS 7.8.5 with more than 80 improvements. This minor release offers new wxGUI fixes across the tree. Also the addon extension manager received various stability fixes. VRT raster map with tiled raster maps can now be properly exported and imported in the native GRASS GIS raster format.
The overview of new features in the 7.8 release series is available at new features in GRASS GIS 7.8. See also our detailed announcement with the full list of changes and bugs fixed at https://trac.osgeo.org/grass/wiki/Release/7.8.5-News.
Binaries/Installer download:
- winGRASS 7.8.5/standalone: 32bit standalone installer | 64bit standalone installer
- winGRASS 7.8.5/OSGeo4W: 32bit OSGeo4W installer | 64bit OSGeo4W installer
- Mac
- Linux
- Debian
- Fedora/Centos/EPEL
- Ubuntu
- … further binary packages for other Linux distributions will follow shortly, please check at software downloads
Source code download:
- https://grass.osgeo.org/grass78/source/
- https://grass.osgeo.org/grass78/source/grass-7.8.5.tar.gz
- To get the GRASS GIS 7.8.5 source code directly from GitHub, see here.
First time users may explore the first steps tutorial after installation.
About GRASS GIS
The Geographic Resources Analysis Support System (https://grass.osgeo.org/), commonly referred to as GRASS GIS, is an Open Source Geographic Information System providing powerful raster, vector and geospatial processing capabilities. It can be used either as a stand-alone application or as backend for other software packages such as QGIS and R geostatistics or in the cloud. It is distributed freely under the terms of the GNU General Public License (GPL). GRASS GIS is a founding member of the Open Source Geospatial Foundation (OSGeo).
The GRASS Development Team, Dec 2020
The post GRASS GIS 7.8.5 released appeared first on Markus Neteler Consulting.
OSGeo at FOSDEM 2021 (Online) – Call for Participation for the geospatial devroom
 Call for Participation for FOSDEM 2021 geospatial devroom
Submission Deadline: 26.12.2020
FOSDEM is the largest free and open source developers meeting in Europe, with 8000+ participants. It normally takes place in Brussels (Belgium).
FOSDEM 2021 will be an online event. We will have a geospatial devroom again. The geospatial devroom will be on Saturday, 6 February 2021. In 2021 it will be our opportunity to bring our global community to FOSDEM.
The geospatial devroom is the place to talk about the state of the art of open, geo-related data, free and open source geospatial software and its ecosystem. This includes standards and tools, e.g. spatial databases, online mapping tools, geospatial services, used for collecting, storing, delivering, analysing, and visualizing geodata.
We are looking for you to be part of the geospatial devroom. The geospatial devroom aims to host talks about geospatial topics, GIS, and geodata projects, standards and open data.
Please submit your talk till 26. December 2020.
You find detailed information about the CfP at:
https://www.osgeo.org/foundation-news/osgeo-at-fosdem-2021-online-call-for-participation/
We hope you will submit a talk or come around at FOSDEM 2021.
See you at FOSDEM 2021
The post OSGeo at FOSDEM 2021 (Online) – Call for Participation for the geospatial devroom appeared first on Markus Neteler Consulting.
MapScaping podcast: GRASS GIS probably doesn’t get the attention it deserves

In episode 86 of MapScaping podcast, Markus Neteler talks about the functionality offered (the topological vector engine, 2D and 3D raster analysis, image processing and available programming interfaces), and whom GRASS GIS is for.
Markus is the cofounder of mundialis, a Bonn based business. He is also the Chairman of the GRASS GIS Project Steering Committee.
Enjoy the podcast and the transcript!
The post MapScaping podcast: GRASS GIS probably doesn’t get the attention it deserves appeared first on Markus Neteler | Geospatial Analysis | Remote sensing | GRASS GIS.
