Related Plugins and Tags

QGIS Planet

Visualization of borehole logs with QGIS

At Oslandia, we have been working on a component based on the QGIS API for the visualization of well and borehole logs.

This component is aiming at displaying data collected vertically along wells dug underground. It mainly focuses on data organized in series of contiguous samples, and is generic enough to be used for both vertical (where the Y axis corresponds to a depth underground) and horizontal data (where the X axis corresponds to time for example). One of the main concerns was to ensure good display performances with an important volume of sample points (usually hundred of thousands sample points).

We have already been working on plot components in the past, but for specific QGIS plugins (both for timeseries and stratigraphic logs) and thought we will put these past experiences to good use by creating a more generic library.

We decided to represent sample points as geometry features in order to be able to reuse the rich symbology engine of QGIS. This allows users to represent their data whatever they like without having to rewrite an entire symbology engine. We also benefit from all the performance optimizations that have been added and polished over the years (on-the-fly geometry simplification for example).

Albeit written in Python, we achieved good display performances. The key trick was to avoid copy of data between the sample points read by QGIS and the Python graphing component. It is achieved thanks to the fact that the PyQGIS API has some functions that respect the buffer protocol.

You can have a look at the following video to see this component integrated in an existing plugin.

Visualization of borehole logs withing QGIS

It is distributed as usual under an open source license and the code repository can be found on GitHub.

Do not hesitate to contact us ( [email protected] ) if you are interested in any enhancements around this component.

New QGIS geometry editing tool: trim/extend

Oslandia is continuing to improve QGIS to offer the draftsman the same experience as with the computer-aided design (CAD) software on the market.
Today we introduce you to the “trim/extend” tool.

As its name suggests, this tool, well known to CAD draftsmen, allows you to trim / shorten or extend segments.

However, where CAD tools impose some limitations – such as using on the end of polyline segments and only on 2D objects – we wanted to go further in QGIS:
– you can modify any segment of a line or polygon geometry and not just its end;
– you can of course modify multi geometries;
– you can hang on to 3D points.

Click to view our demo video.

The tool will be available in version 3.6, but you can use it now in the development version, via the advanced Windows installer for example

This tool was developed thanks to the funding of the Megève Town Hall, which we would like to thank in particular.

It is still possible to improve the tool by offering:

– multiple selection of limits and entities to be modified;
– an option to modify the two selected entities up to their intersection point;
– better support for curved geometries in the future;
– to add topology support when using the tool.

Would you like to participate in its improvement or the development of QGIS?

Need a study or support to move from CAD to GIS?

Do not hesitate to contact us.

Follow us also on twitter or Linkedin to be informed about our new CAD tools in QGIS.

QGIS 3 compiling on Windows

As the Oslandia team work exclusively on GNU/Linux, the exercise of compiling QGIS 3 on Windows 8 is not an everyday’s task :). So we decided to share our experience, we bet that will help some of you.

Cygwin

The first step is to download Cygwin and to install it in the directory C:\cygwin (instead of the default C:\cygwin64). During the installation, select the lynx package:


Once installed, you have to click on the Cygwin64 Terminal icon newly created on your desktop:

Then, we’re able to install dependencies and download some other installers:

[pastacode lang=”bash” manual=”%24%20cd%20%2Fcygdrive%2Fc%2FUsers%2Fhenri%2FDownloads%0A%24%20lynx%20-source%20rawgit.com%2Ftranscode-open%2Fapt-cyg%2Fmaster%2Fapt-cyg%20%3E%20apt-cyg%0A%24%20install%20apt-cyg%20%2Fbin%0A%24%20apt-cyg%20install%20wget%20git%20flex%20bison%0A%24%20wget%20http%3A%2F%2Fdownload.microsoft.com%2Fdownload%2FD%2F2%2F3%2FD23F4D0F-BA2D-4600-8725-6CCECEA05196%2Fvs_community_ENU.exe%0A%24%20chmod%20u%2Bx%20vs_community_ENU.exe%0A%24%20wget%20https%3A%2F%2Fcmake.org%2Ffiles%2Fv3.7%2Fcmake-3.7.2-win64-x64.msi%0A%24%20wget%20http%3A%2F%2Fdownload.osgeo.org%2Fosgeo4w%2Fosgeo4w-setup-x86_64.exe%0A%24%20chmod%20u%2Bx%20osgeo4w-setup-x86_64.exe” message=”” highlight=”” provider=”manual”/]

CMake

The next step is to install CMake. To do that, double clic on the file cmake-3.7.2-win64-x64.msi previously downloaded with wget. You should choose the next options during the installation:


Visual Studio

Then, we have to install Visual Studio and C++ tools. Double click on the vs_community_ENU.exe file and select the Custom installation. On the next page, you have to select Visual C++ chekbox:


OSGeo4W

In order to compile QGIS, some dependencies provided by the OSGeo4W installer are required. Double click on osgeo4w-setup-x86_64.exe and select the Advanced Install mode. Then, select the next packages:

  •  expat
  • fcgi
  • gdal
  • grass
  • gsl-devel
  • iconv
  • libzip-devel
  • libspatialindex-devel
  • pyqt5
  • python3-devel
  • python3-qscintilla
  • python3-nose2
  • python3-future
  • python3-pyyaml
  • python3-mock
  • python3-six
  • qca-qt5-devel
  • qca-qt5-libs
  • qscintilla-qt5
  • qt5-devel
  • qt5-libs-debug
  • qtwebkit-qt5-devel
  • qtwebkit-qt5-libs-debug
  • qwt-devel-qt5
  • sip-qt5
  • spatialite
  • oci
  • qtkeychain

QGIS

To start this last step, we have to create a file C:\OSGeo4W\OSGeo4W-dev.bat containing something like:

[pastacode lang=”bash” manual=”%40echo%20off%20%0Aset%20OSGEO4W_ROOT%3DC%3A%5COSGeo4W64%0Acall%20%22%25OSGEO4W_ROOT%25%5Cbin%5Co4w_env.bat%22%20%0Acall%20%22%25OSGEO4W_ROOT%25%5Cbin%5Cqt5_env.bat%22%20%0Acall%20%22%25OSGEO4W_ROOT%25%5Cbin%5Cpy3_env.bat%22%20%0Aset%20VS140COMNTOOLS%3D%25PROGRAMFILES(x86)%25%5CMicrosoft%20Visual%20Studio%2014.0%5CCommon7%5CTools%5C%20%0Acall%20%22%25PROGRAMFILES(x86)%25%5CMicrosoft%20Visual%20Studio%2014.0%5CVC%5Cvcvarsall.bat%22%20amd64%20%0Aset%20INCLUDE%3D%25INCLUDE%25%3B%25PROGRAMFILES(x86)%25%5CMicrosoft%20SDKs%5CWindows%5Cv7.1A%5Cinclude%20%0Aset%20LIB%3D%25LIB%25%3B%25PROGRAMFILES(x86)%25%5CMicrosoft%20SDKs%5CWindows%5Cv7.1A%5Clib%20%0Apath%20%25PATH%25%3B%25PROGRAMFILES%25%5CCMake%5Cbin%3Bc%3A%5Ccygwin%5Cbin%20%0A%40set%20GRASS_PREFIX%3D%22%25OSGEO4W_ROOT%25%5Capps%5Cgrass%5Cgrass-7.2.1%20%0A%40set%20INCLUDE%3D%25INCLUDE%25%3B%25OSGEO4W_ROOT%25%5Cinclude%20%0A%40set%20LIB%3D%25LIB%25%3B%25OSGEO4W_ROOT%25%5Clib%3B%25OSGEO4W_ROOT%25%5Clib%20%0A%0A%40cmd%20″ message=”” highlight=”” provider=”manual”/]

According to your environment, some variables should probably be adapted. Then in the Cygwin terminal:

[pastacode lang=”bash” manual=”%24%20cd%20C%3A%5C%0A%24%20git%20clone%20git%3A%2F%2Fgithub.com%2Fqgis%2FQGIS.git%0A%24%20.%2FOSGeo4W-dev.bat%0A%3E%20cd%20QGIS%2Fms-windows%2Fosgeo4w” message=”” highlight=”” provider=”manual”/]

In this directory, you have to edit the file package-nightly.cmd to replace:

[pastacode lang=”bash” manual=”cmake%20-G%20Ninja%20%5E” message=”” highlight=”” provider=”manual”/]

by:

[pastacode lang=”bash” manual=”cmake%20-G%20%22Visual%20Studio%2014%202015%20Win64%22%20%5E” message=”” highlight=”” provider=”manual”/]

Moreover, we had to update the environment variable SETUAPI_LIBRARY according to the current position of the Windows Kits file SetupAPI.Lib:

[pastacode lang=”bash” manual=”set%20SETUPAPI_LIBRARY%3DC%3A%5CProgram%20Files%20(x86)%5CWindows%20Kits%5C8.1%5CLib%5Cwinv6.3%5Cum%5Cx64%5CSetupAPI.Lib” message=”” highlight=”” provider=”manual”/]

And finally, we just have to compile with the next command:

[pastacode lang=”markup” manual=”%3E%20package-nightly.cmd%202.99.0%201%20qgis-dev%20x86_64″ message=”” highlight=”” provider=”manual”/]

Victory!

And see you soon for the generation of OSGEO4W packages 😉

Source

https://github.com/qgis/QGIS/blob/ab859c9bdf8a529df9805ff54e7250921a74d877/doc/msvc.t2t


QGIS versioning plugin

We developped a tool to manage data history, branches, and to work offline with your PostGIS-stored data and QGIS. Read more to get the insight of QGIS Versioning plugin.

The QGIS plugin is available in QGIS plugin repository, and you can `fork it on GitHub too https://github.com/Oslandia/qgis-versioning !

Introduction

Even if the necessity of data versioning often arises, no standard solution exist for databases.

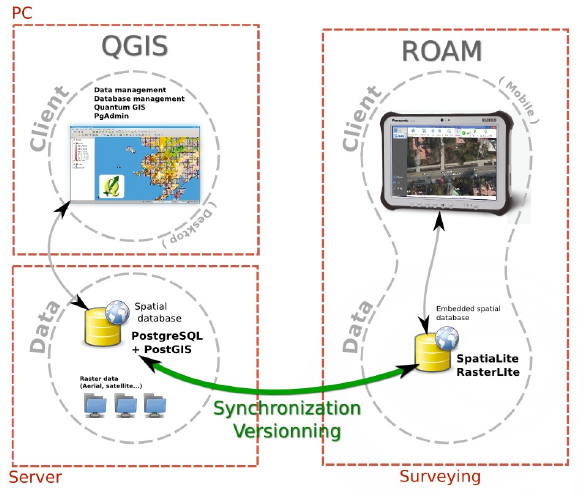
The GeoGit project proposes a solution to store versioned geospatial data. There is also an existing plugin for QGIS, pgversion, which uses views and triggers to version a PostGIS database. Unfortunately those solutions were not adapted to the specific constrains of this project, namely: using a PostGIS database as the main repository (excludes GeoGit) and the ability to working off-line (excludes pgversion).The project we developed QGIS/PostGIS versioning looks like the following.


Design

The database is stored in a PostGIS schema, the complete schema is versioned (i.e. not individual tables). Revisions are identified by a revision number. A revision table in the versioned schema, called ‘revisions’, keeps track of the date, author, commit message and branch of all revisions.

Once a table structure is defined, three operations can be performed on rows: INSERT, DELETE and UPDATE. To be able to track history, every row is kept in the tables. Deleted rows are marked as such and updated rows are a combined insertion-deletion where the deleted and added rows are linked to one another as parent and child.|

A total of five columns are needed for versioning the first branch:

PRIMARY KEY
a unique identifier across the table

branch_rev_begin
revision when this record was inserted

branch_rev_end
last revision for which this record exist (i.e. revision when it was deleted minus one)

branch_parent
in case the row has been inserted as the result of an update, this fields stores the hid of the row that has been updated

branch_child
in case the row has been marked as deleted as the result of an update, this field stores the hid of the row that has been inserted in its place.

For each additional branch, four additional columns are needed (the ones with the prefix branch_).

Note:
If the branch_rev_begin is null, it means that a row belongs to another branch.

SQL views are used to see the database for a given revision number. If we note ‘rev’ the revision we want to see. For each table, the condition for a row to be present is the view is::

(branch_rev_end IS NULL OR branch_rev_end >= rev) AND branch_rev_begin <= rev

In the special case of the current revision, or head revision, the condition reads::

branch_rev_end IS NULL AND branch_rev_begin IS NOT NULL

Note:
Since elements are not deleted (but merely marked as such) from an historized table, care must be taken with the definition of constrains, in particular the conceptual unicity of a field values.

Withing the PostGIS database, the views on revisions must be read-only  and historized tables should not be edited directly. This is a basic principle for version control: editions must be made to working copies an then committed to the database. Please note that by default PostGIS 9.3 creates updatable views.
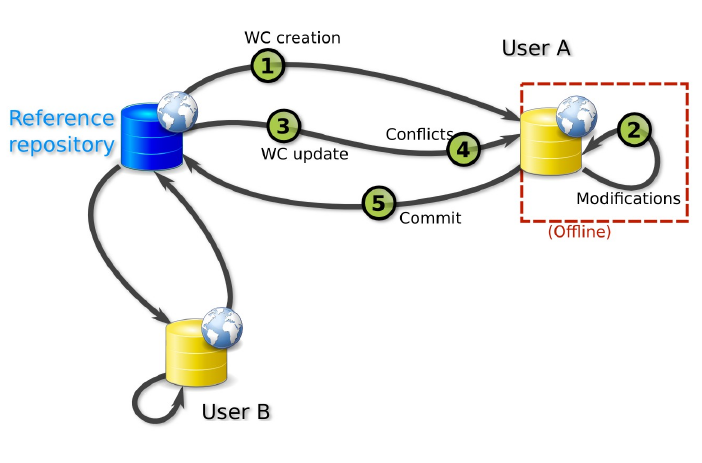
Workflow schema

This setup allows for multiple users to use and edit data offline from a central repository, and commit their modifications concurrently.

Working copies

Two kinds of working copies are available:

SpatiaLite working copies
They are meant to be used off-line. They consist of the versioned tables of a given versioned database (i.e. PostGIS schema) or any subset. For each table, only the elements that have not been marked as deleted in the head revision need to be present. Furthermore only a subset of the elements the user needs to edit can be selected (e.g. a spatial extend).  To create a working copy (i.e. to checkout), tables from the versioned schema (or the aforementioned subsets) are converted to a SpatiaLite database using ogr2ogr.

PostGIS working copies
They are meant to be used when the connection to the original database will remain available. They are quite similar to pgversion working copies since they only store differences from a given revision (the one checked out).

The following description is aimed at understanding the inner workings of the qgis versioning plugin. The user does not need to perform the described operations manually.

For each versioned table in the working copy, a view is created with the suffix _view (e.g. mytable_view). Those views typically filters out the historization columns and shows the head revision. A set of triggers is defined to allow updating on those views (DELETE, UPDATE and INSERT).

The DELETE trigger simply marks the end revision of a given record.

The INSERT trigger create a new record and fills the branch_rev_begin field.

The UPDATE trigger create a new record and fills the branch_rev_begin and branch_parent fields. It then marks the parent record as deleted, and fills the branch_rev_end and branch_child fields.

Updating the working copy

Changes can be made to the database while editing the working copy. In order to reconcile those edition, the user needs to update the working copy.

When updating, a set of records can be in conflicts: the records for which the end revision has been set since the initial checkout or last update if any.

Multiple editions can be made to the same record. Therefore the child relation must be followed to the last child in order to present tu user with the latest state of a given conflicting feature.

Conflicts are stored in a table and identified with a conflict id and the tag ‘theirs’ or ‘mine’. A DELETE trigger on this table is used for conflict resolution. On deletion of ‘mine’, the working copy edition is discarded, on deletion of ‘theirs’ the working copy edition is appended to the feature history (i.e. the working copy feature becomes a child of the last state of the feature in the historized database).

Committing the editions to the versionned database

If a working copy is up to date, the editions can be integrated in the versioned database. This operation consists simply in the insertion of a record in the revisions table, and, for each versioned table, the update of rows that are different and inserting rows that are not present.

Branching

A branch can be created from any revision by adding the four history columns and setting the branch_rev_begin field of features that are present in their revision.

Plugin interface tutorial

Groups are used for all versioning operations in QGIS since the versions are for a complete PostGIS schema or SpatiaLite database.

The versioning toolbar will change depending on the group selected in the QGIS legend.

Note:
The group elements must share the same connection information (i.e. share the same database and schema for PostGIS working copies and revision views or share same SpatiaLite database for SpatiaLite working copies).

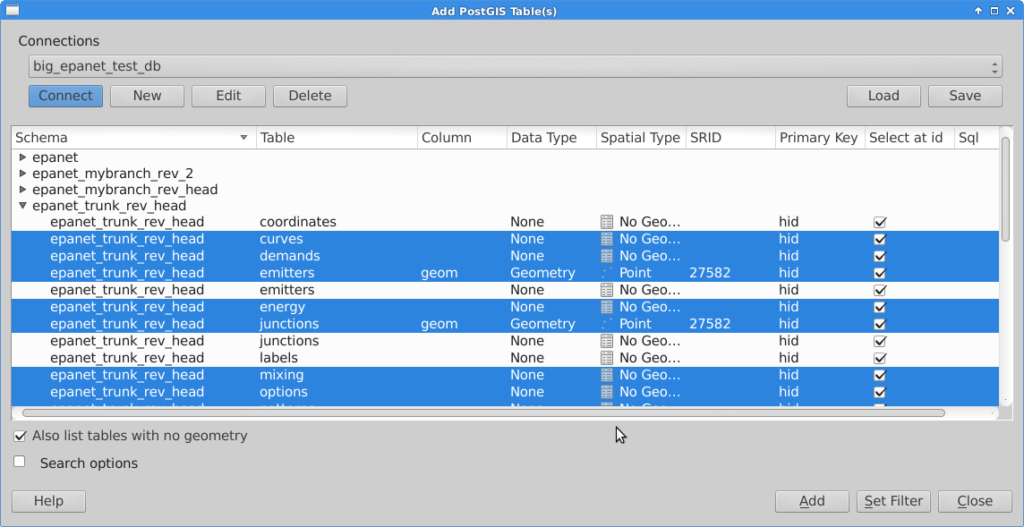
Versioning a PostGIS schema

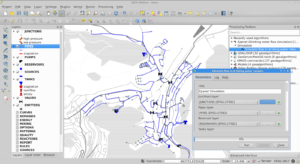
Starting with an unversioned database, import a number of layers from a schema that needs to be versioned into a QGIS project.

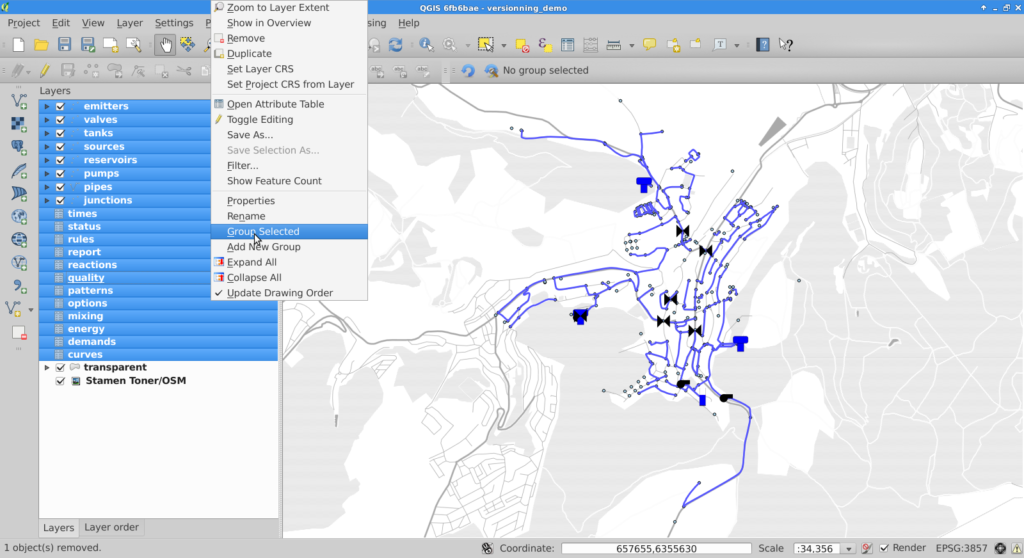
Once the layers are imported, they must be grouped together.

Selecting the newly created group will cause the versioning toolbar to display the historize button (green V). On click a confirmation is requested to version the database schema.

The versioned layers are imported in a new group and the original layers are removed from the project.

Note:
The symobology is not kept in the process.

Working with a versioned PostGIS schema

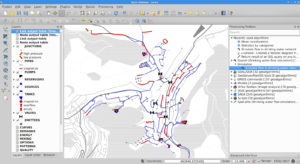
Versioned layers can be imported in QGIS. The layers must be from a head revision or a view on any revision.


Once the layers are in QGIS, they must be grouped.


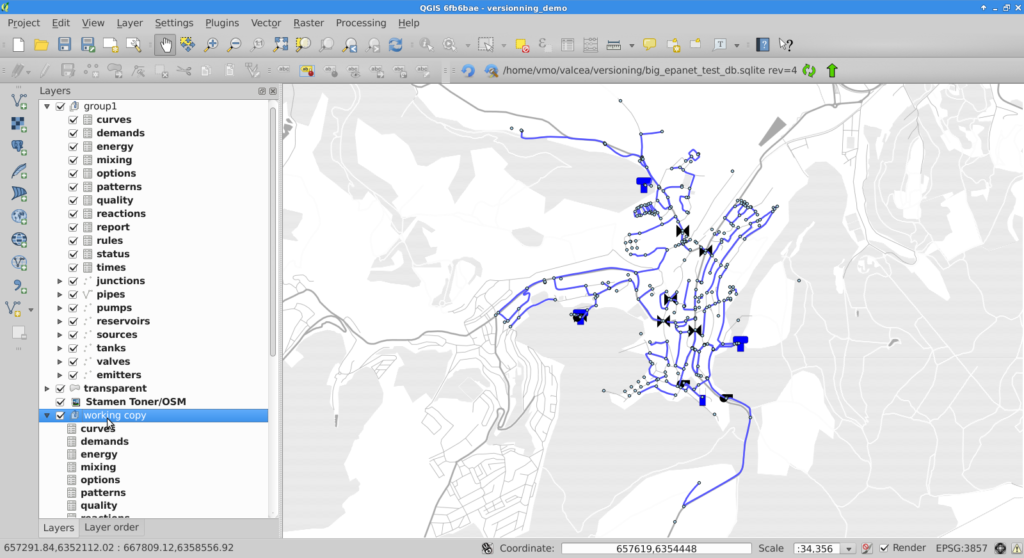
For PostGIS groups at head revision, the versioning plugin allows the user to create a SpatiaLite or a PostGIS working copy, create a view on a given revision or create a branch. A corresponding group will be imported in QGIS.

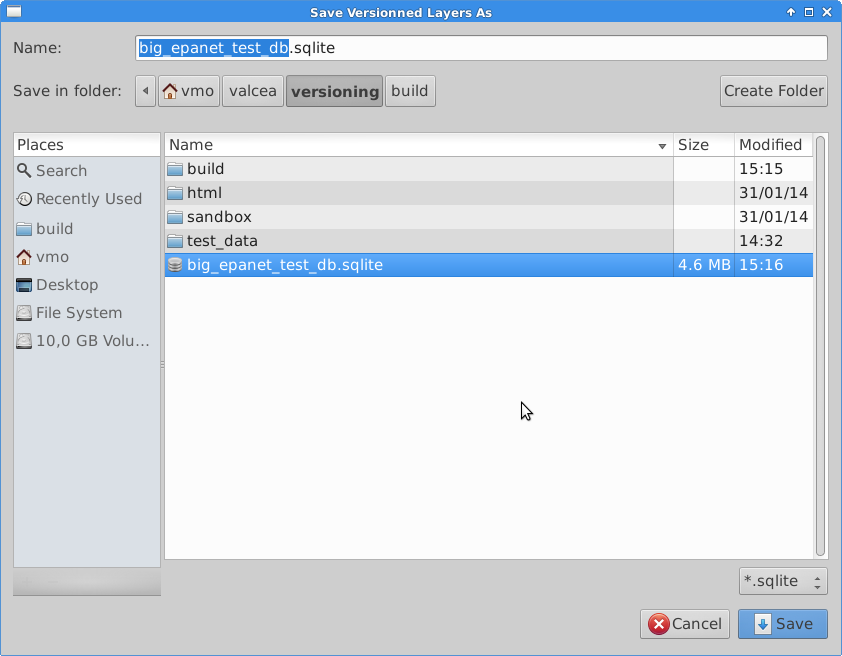
If the user chooses to create a SpatiaLite working copy, he will be asked to select a file to store the working copy.


Commiting changes

Once the working copy is imported in QGIS, the user can start edition of its layers. With SpatiaLite working copies, this edition can be done off-line.

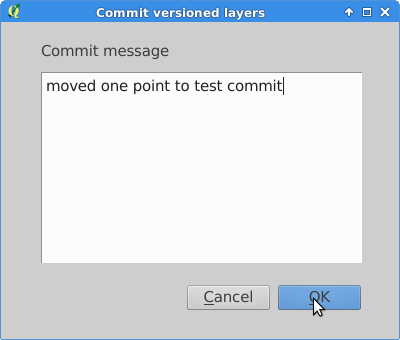
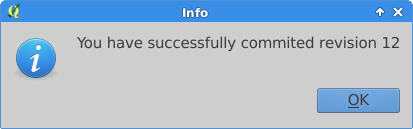
When the user is done with edition, he can commit the changes to the database and if commit is feasible (i.e. the working copy is up to date with the versioned database), he will be prompted for a commit message and subsequently be informed of the revision number he committed.


If the commit is not feasible, the user will be informed that he must update his working copy prior to commit.

Resolving conflicts

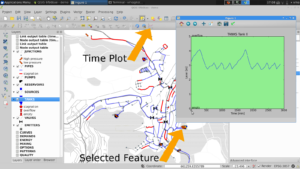
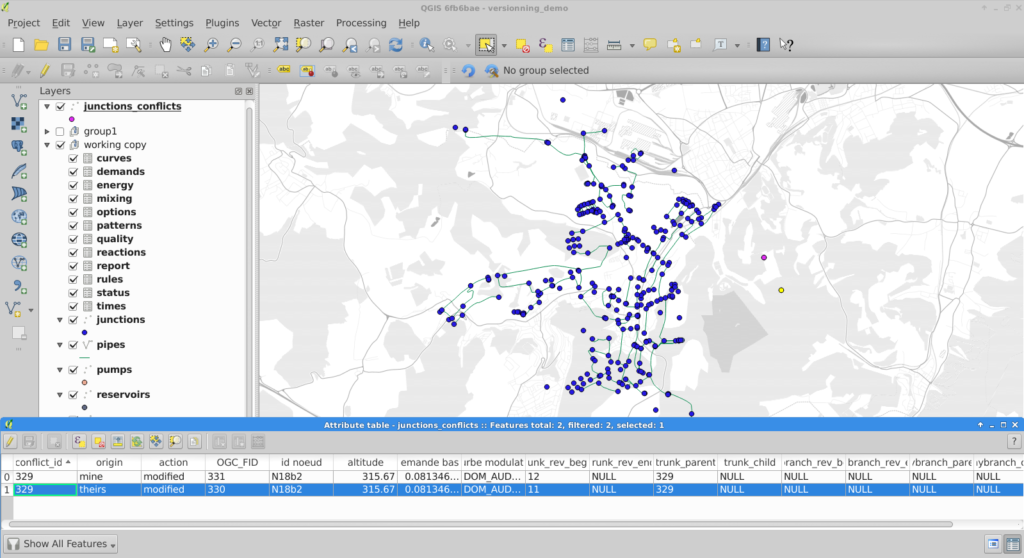
Conflicts are detected during update, the user is informed, and conflicts layers are imported into QGIS.

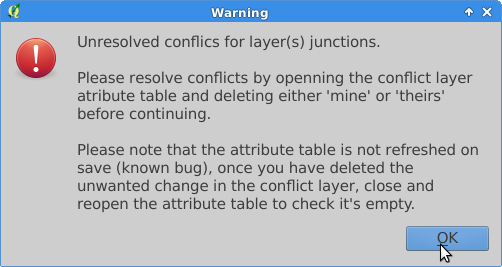
To resolve conflicts, the user can open the conflict layer’s attribute table. Selected entries are also selected on the map canvas and the user can decide which version, either his or the database’s, he wants to keep. User version is tagged with ‘mine’ and database version with ‘theirs’. The conflict is resolved by deleting the unwanted entry in the conflict layer.

Note:
On deletion of one conflict entry, both entries are removed (by a trigger) but the attribute table (and canvas) are not refreshed. As a workaround, the user can close and re-open the attribute table to see the actual state of the conflict table.

Once the conflict table is empty, the commit can be done.

Restrictions

Due to design choices and tools used for conversion to SpatiaLite, a number of restrictions apply to the versioned database:

  • |schemas, tables and branch names should not have space, caps or quotes
  • tables must have primary keys
  • columns are lowercase (because of conversion to SpatiaLite) but can have spaces (not that it’s recommended
  • geometry column is geom in PostGIS, GEOMETRY in SpatiaLite

Note
Do not edit OGC_FID or ROWID

Note
The constrains on the tables are be lost in the PostGIS to SpatiaLite conversion.

Known bug

The conflict layer won’t be loaded automatically is it has no geometry. The user will have to load it manually.

Masking features in QGIS 2.4

Have you ever wondered how to mask features on a map, so that only a particular zone is highlighted ? There have been a simple plugin to do that for a while. Called ‘Mask’, it allowed to turn a vector selection into a new memory layer with only one geometry made by the geometric inversion of the selection: the polygons that were selected get transformed into holes of a squared polygon bigger than the current extent.

One could then use this new layer, like any other one and apply a vector symbology on it. An opaque color to mask everything but the selection, or some semi-transparent color in order to only highlight the selection. It was very useful but came with some limitations, and especially the fact that no update of the ‘mask’ layer was done during an atlas printing.

Thanks to the support of Agence de l’Eau Adour Garonne, Oslandia has been developing some evolutions to the core of QGIS, as well as to the mask plugin.

The core part consists of a new feature renderer that can be used on any polygon vector layer, as a symbology element. It is called inverted polygon renderer and allows to apply any other renderer to polygons that have been inverted.
It was designed originally to allow only simple filling mode to be applied to the exterior ring of polygons, but it now allows to use more complex renderers like graduated, categorized or even rule-based renderers.

Inverted polygons: Simple usage

The simplest usage is to select the default sub renderer that is set to “single symbol” in order to have a uniform exterior fill of a layer.

Advanced usage

When the sub-renderer used by the inverted polygon renderer has different symbol categories, features are grouped by symbol category before being inverted and rendered. It then only makes sense when the symbology used is partly transparent, so that the different inverted polygons can be distinguished from each other.
This can be used for example to render a semi-transparent shapeburst fill around the current atlas feature.

In this example, we have an inverted polygon renderer with a rule-based sub renderer. The rule will only select the current atlas geometry, thanks to the expression $id=$atlasfeatureid.
The symbol used is made of two symbol layers: a semi-transparent blue simple fill and a shapeburst fill on top of it.
The polygon layer is then duplicated to also have a green “interior fill” for each polygon.
The output can be seen hereafter:

Label masking

When the map has labels enabled, this inverted polygon renderer is not sufficient to mask labels as well. When a user wants to highlight a particular zone on a map, she usually also wants to mask labels that are around, or at least make them less visible. The way QGIS handles labels out of the box is not directly compatible with this need. QGIS always displays labels on top of every other layers.

To circumvent this, the original ‘mask’ plugin has been enhanced in order to be aware of layers with labels. A new ‘mask’ layer can be computed and its geometry can be used to test whether a feature has to be labeled or not. The plugin exposes two special variables that are available for any expressions :

  • in_mask(srid) will return a boolean that tests if the current feature is in the mask. The parameter srid is the SRID projection code of the layer where this function is used.
  • $mask_geometry will return the current mask geometry

Different spatial predicates can be used to test if the current feature lies inside the highlighted zone. A different type of predicate will be used for polygon layers, line layers and point layers.

Suppose we have a map of some french départements with a background raster map, and some linear layer displaying rivers.

If we want to highlight only one département, we can use the mask plugin for that. We will first select it and call the plugin.

A fancy inverted polygon symbology, based on a shapeburst fill is created. We see here that we can choose the function that will be used for filtering the labeling. By default these functions are “pointOnSurface” for polygon layers and “intersects” for line layers.Here, we want both the départements layer and the rivers layers to see their labeling rules modified in order to hide the labels outside of the defined mask polygon.

By modifying the mask symbology, adding a little bit of transparency, we obtain the following result :

The plugin is able to interact with the atlas printing and will update its mask geometry as well as the labels that are allowed to be displayed.

The mask layer can also be saved with the project, using a memory layer if you use the Memory Layer Saver plugin, or using an OGR vector file format.

Here is a short video that shows how the plugin can be setup for a simple mask with an atlas print.

How to get the plugin ?

The new mask plugin is available in its 1.0 version on the QGIS official repository of plugins. It requires QGIS 2.4. We are currently investigating the addition of this label masking feature to the QGIS core. The idea would be to have a concept of “label layer” that could then be hidden by others, or even made partly transparent.

It is not an easy task, though, since it would require to rework parts of the labeling and rendering engine.
If you are interested by such a feature, please let us know !

QGIS plugin for water management

Oslandia releases today a new plugin for the QGIS processing framework, allowing for water distribution network simulation. It integrates the opensource EPANET simulation software. EPANET models water distribution networks. It’s a widely used public-domain simulation software developed by the US Environmental Protection Agency.

Hydraulic simulation is used to understand water distribution in distribution network, to forecast the impact of network alterations, to dimension network elements or study extreme case scenarios (e.g. important demand for firefighting, pipes breakages, interruption in supply).

QGIS provides a graphical user interface that can be used to import/edit/export hydraulic model elements and simulation parameters from various sources, launch simulation and visualize results directly inside QGIS.

Hydraulic model

A hydraulic model consists of junctions (POINT) and pipes (LINESTRING) along with various other elements like tanks, pumps and valves. Those elements can be stored as features in a spatially enabled database. Features attributes can be simple (e.g. pipe diameter) or complex (e.g. pumps characteristic curves or water consumption). Complex attributes are stored via a foreign key in other alphanumeric tables.

This is the kind of data QGIS is designed to handle. It can import/export them from/to a variety of sources and also display and edit them.

Simulation parameters

Simulation parameters and options (e.g. simulation time step or accuracy) are key-value pairs. The values can be stored in a table which columns are keys. Each set of simulation parameters is then a record in this table. This kind of table can be loaded in QGIS as a vector layer without geometry.

Integration in the processing framework

Once the hydraulic model and simulation parameters are loaded in QGIS, the simulation can be launched through the Processing toolbox. The plugin uses the standalone command line interface of EPANET (CLI) which path needs to be specified in processing Options and configuration.

The plugin assembles an EPANET input file, runs EPANET and parses its output to generate result layers.

One interesting aspect with processing modules is that they can be used for chained processing: the user can use other modules to do additional transformations of simulation results, as feeding them into another simulation model.

Result visualization

Simulation results are water pressure and velocity at all points in the network along with state of network elements (e.g. volume in tanks, power of pumps) for all simulation time steps . This represent a huge amount of data that are usually displayed either as time-plots or as map-plots of time aggregated data (e.g. max and min during simulation).

Results of particular interest are:

  • time-plots of:
    • volume in reservoirs
    • flow at pumps
    • pressure in pipes and at junctions
  • map-plots of:
    • low speed (stagnation)
    • high and low pressure (risk of breakage, unhappy consumer)
    • lack of level variation in reservoirs (stagnation)
    • empty reservoir
    • reservoir overflow
    • abnormal pressure (typical of error in the altitude of a node in the model)
    • flow direction

QGIS is naturally suited for map-plots. Time-aggregated simulation results are automatically joined to map layers when the result table is added to the map. Rule-based symbology is used to highlight zones of concern (e.g. low water velocity or empty reservoirs).

The matplotlib library provides 2D plotting facilities in python and QGIS provides an extensive set of selection tools (on the map or in tables). The plugin’s button plots the appropriate value depending on the selected feature type (e.g. water level for tanks, pressure for junctions).

Screencast

For a full demo of this plugin, see the following video :


Where and who

The plugin is available on GitHub and should be available soon on QGIS plugin repository : https://github.com/Oslandia/qgis-epanet

This work has been funded by European Funds. Many thanks to the GIS Office of Apavil, Valcea County (Romania). Oslandia has developped this plugin, and provides support and development around QGIS, PostGIS and this plugin. Get in touch if you need more : [email protected]

We are looking for a free dataset with full informations (pumps, tanks, valves, pipes and their characteristics…) to distribute with this plugin as a test case and demonstration. If you can provide this, mail us !

We also are implementing a Processing plugin for SWMM, the public domain Waste-water simulation tool. If you are interested to participate to the development, please contact us.

QGIS 2.4 release out, Oslandia inside

There is a new QGIS release out : version 2.4, codename Chugiak is now available. Binary packages for your platform have been generated, and you can directly download and try out this new release  of the famous Desktop GIS software. QGIS 2.4 has a lot of new features in all of its components. There is a visual changelog available where you can discover QGIS improvements.

Oslandia inside

Oslandia is a **QGIS core contributor**, and we have been busy improving QGIS 2.4. We contributed to various of these new features. Here are a few enhancements we developped.

Predefined scales mode for atlas maps

When working with atlas map items, you can now specify a predefined scale mode for the map. It will use the best fitting option from the list of predefined scales in you your project properties settings (see Project -> Project Properties -> General -> Project Scales to configure these predefined scales).

This feature has been funded by `the city of Uster

New Inverted Polygon renderer

The biggest feature Oslandia developped is the inverted Polygon renderer. This feature has been funded by Agence de l’Eau Adour-Garonne and mainly developped by Hugo Mercier.

A new renderer has been added for polygon features, allowing you to style everything outside your polygons. This can be useful for highlighting areas, or for creating cartographic masks. When used with new shapeburst style, you can now produce output as shown in the image for this entry.

New Mask Plugin

Alongside with the inverted polygon renderer feature, Oslandia developped a new Mask plugin. It enables you to make atlases focusing on the specific feature you are interested in, occulting the rest with a really nice effect. Furthermore, it helps masking the labels when you mask geometry objects.

This plugin has also be funded by Agence de l’Eau Adour Garonne.

Layered SVG export


Another feature implemented in this version is the ability to export layered SVG files. Beforehand, all features were exported as a single layer, whatever the QGIS layer was. Now you can use Inkscape or Illustrator and their layering capabilities to finish the design of your map with greater ease of use. There also is an option to vectorize labels.

This feature has been funded by Agence de Développement du Grand Amiénois (ADUGA).

WAsP format support

The WAsP format is the standard format for roughness and elevation in the wind science field. This format was not supported by QGIS until recently, when Vincent Mora added WAsP to QGIS supported GIS file formats. In fact, we did better as we implemented WAsP support in GDAL/OGR, so that any software using this library is now able to read and write WASP files. WAsP is available starting from GDAL/OGR >= 1.11.0.

This was an opportunity to add Vincent Mora as an official GDAL/OGR commiter, in charge of maintaining this driver. This feature will enable wind management operations to be completed on QGIS with a better user experience. No more file conversion before working on the GIS side.  We also developped a companion plugin to manage data simplification when needed. It is available in QGIS plugins repository.

With this work, QGIS becomes a great complement to opensource computational wind engineering softwares like ZephyTools.

This work has been funded by La Compagnie du Vent

Epanet Plugin

Oslandia has integrated the EPANET water distribution model inside QGIS Processing, as a plugin. Epanet integration has been funded by European funds and the GIS office of Apavil, Romania.

Vizitown Plugin

Vizitown is part of our efforts on 3D GIS development, alongside PostGIS 3D and more. It is a QGIS plugin allowing users to display QGIS layers in 3D in a Three.js / WebGL environment, in a browser. It can leverage PostGIS 3D, and display live data from the database, as well as other sources of data. It can display DEM, a raster background, 2D vector data draped on the DEM, 2.5D data (e.g. buildings), or real 3D Meshes. The user can set a symbology in QGIS and see the modifications live in the browser in 3D.

You can see Vizitown in action on Youtube. Vizitown has been developped with IG3 students from ESIPE

Multiple bugfixes

Oslandia also work continuously on improving QGIS quality, and we try to fix as many bugs as we can. These bugfixes are funded by our `QGIS support offer clients, and also by the french Ministère de l’environnement and Agence de l’Eau Adour-Garonne.

What next ?

We continue to work on new QGIS features, corrections, refactoring and integration with other tools. We namely studied a possible unification of all database-like features in QGIS, using SQLITE/Spatialite features. We intend to work on Native Read+Write support of Mapinfo TAB files.

We offer a wide range of services around QGIS, be it for training, assistance, development, or consulting in general.

We also propose `various support opportunities for QGIS. This is the best way for you to improve the quality of this software, contribute to its development, and ensure that you can work in good conditions without having to worry about potential bugs. Our team of experienced engineers, who contribute to QGIS core, will be available in any case of critical bug.

We can offer you personalized support, with specific conditions and fares. Do not hesitate to contact us at [email protected] .

PostGIS 3D &#8211; Foss4g video and workshop

The latest PostGIS and QGIS 3D enhancements presented at FOSS4G by Oslandia are available online.We suggest you to have a look on our PostGIS 3D / QGIS 3D video demonstration using SFCGAL library and the QGIS Horao plugin.

A step by step workshop, (really close to the video workflow) is also available online  https://github.com/Oslandia/Workshops/tree/master/FOSS4G_2013_PostGIS_3D

We can provide you the full virtual machine on demand, with proper software environment (6GB Virtual Box Image).

We would be really interested in having your advice on these new 3D features, and the use cases you could be interested in. Do not hesitate to get in touch.

Contact us at [email protected] for any information.

Understanding what's going on in ExtJS

Recently I had to pre-select a Node inside a TreePanel ExtJS widget. I tried many ways but failed because most of the time when I tried to:

  node.select();

that node would not yet be rendered into the browser's DOM and so the select would fail somewhere inside the extjs.js blob with something like "this ... undefined ...". What I needed was a "rendered" event, but there doesn't seem to be such an event for neither TreePanel not TreeNode or any of their superclasses. Diving into ExtJS code was not really very helpful because it's a framework that does things through layers and layers and as such is not trivial to understand quickly.

Thus, the same ole problem with JavaScript as ever: "show me all the events there are". However, surprisingly, in contrast to standard JavaScript, ExtJS has an easy standard way to accomplish this:

 
  Ext.util.Observable.capture( myTree, function(event) {                                                                                                        
                                         console.log("got an event in myTree");
                                         console.log(event); });

And quickly I discovered that there indeed is an obscure event that I can, out of alternatives, missuse to do what I want, which is expandnode.

Aparently, after a node is exapanded, all its children are put into the DOM and seem to be manipulable then. Thus:

        /*
         * select node with real_id - this is only called once
         * after the tree is rendered for the first time.
         * After that the listener itself is unregistered.
         */
        function select_node(node) {
          node.eachChild( function(child) { 
            if(child.attributes.real_id == real_id ) {
              child.select();
              categories_panel.un('expandnode', select_node);
            }
          });
        };
        myTree.on('expandnode', select_node);

Tomáš Pospíšek

  • Page 1 of 1 ( 10 posts )
  • development

Back to Top

Sustaining Members