Related Plugins and Tags

QGIS Planet

Creating reports in QGIS

QGIS 3 has a new feature: reports! In short, reports are the good old Altas feature on steroids.

Let’s have a look at an example project:

To start a report, go to Project | New report. The report window is quite similar to what we’ve come to expect from Print Composer (now called Layouts). The most striking difference is the report panel at the left side of the screen.

When a new report is created, the center of the report window is empty. To get started, we need to select the report entry in the panel on the left. By selecting the report entry, we get access to the Include report header and Include report footer checkboxes. For example, pressing the Edit button next to the Include report header option makes it possible to design the front page (or pages) of the report:

Similarly, pressing Edit next to the Include report footer option enables us to design the final pages of our report.

Now for the content! We can populate our report with content by clicking on the plus button to add a report section or a “field group”. A field group is basically an Atlas. For example, here I’ve added a field group that creates one page for each country in the Natural Earth countries layer that I have loaded in my project:

Note that in the right panel you can see that the Controlled by report option is activated for the map item. (This is equivalent to a basic Atlas setup in QGIS 2.x.)

With this setup, we are ready to export our report. Report | Export Report as PDF creates a 257 page document:

As configured, the pages are ordered by country name. This way, for example, Australia ends up on page 17.

Of course, it’s possible to add more details to the individual pages. In this example, I’ve added an overview map in Robinson projection (to illustrate again that it is now possible to mix different CRS on a map).

Happy QGIS mapping!

Freedom of projection in QGIS3

If you have already designed a few maps in QGIS, you are probably aware of a long-standing limitation: Print Composer maps were limited to the project’s coordinate reference system (CRS). It was not possible to have maps with different CRS in a composition.

Note how I’ve been using the past tense? 

Rejoice! QGIS 3 gets rid of this limitation. Print Composer has been replaced by the new Layout dialog which – while very similar at first sight – offers numerous improvements. But today, we’ll focus on projection handling.

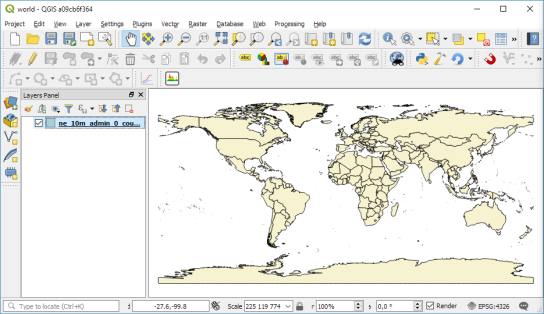
For example, this is a simple project using WGS84 as its project CRS:


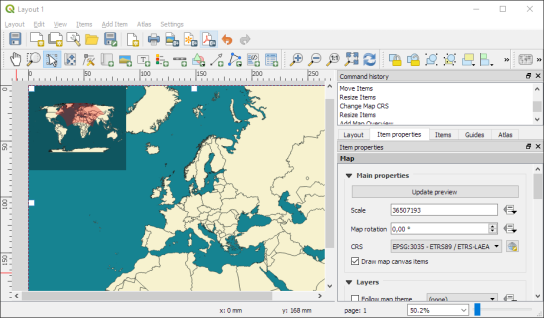
In the Layouts dialog, each map item now has a CRS property. For example, the overview map is set to World_Robinson while the main map is set to ETRS-LAEA:

As you can see, the red overview frame in the upper left corner is curved to correctly represent the extent of the main map.

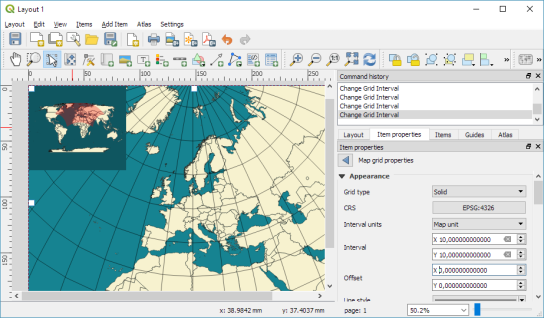
Of course, CRS control is not limited to maps. We also have full freedom to add map grids in yet another CRS:

This opens up a whole new level of map design possibilities.

Bonus fact: Another great improvement related to projections in QGIS3 is that Processing tools are now aware of layers with different CRS and will actively reproject layers. This makes it possible, for example, to intersect two layers with different CRS without any intermediate manual reprojection steps.

Happy QGIS mapping!

(Nederlands) QGIS gebruikersmiddagnieuws

Sorry, this entry is only available in the Dutch language

24 Days of QGIS 3.0 Features

If you’re not following @northroadgeo on Twitter, you’ve probably missed our recent “24 Days of QGIS” countdown. Over December, we’ve been highlighting 24 different features which are coming with the QGIS 3.0 release. We’ve collected all of these below so you can catch up:

We hope you enjoyed the series! In it we’ve only highlighted just a few of the hundreds of new features coming in QGIS 3.0. There’s also a lot of behind-the-scenes changes which we haven’t touched, e.g. a switch to Python 3 and Qt 5 libraries, a brand new, rewritten QGIS server, new QGIS web client, enhanced metadata integration, GeoNode integration, a cleaner, stabler, easier PyQGIS API, 1000s more unit tests, and so much more.

You can download a 3.0 beta from the QGIS webpage, and report feedback at https://issues.qgis.org. A huge thanks to the mammoth effort of all the QGIS contributors, this is going to be a great release!

2nd Mapping Water Bodies from Space Conference

Background

The post 2nd Mapping Water Bodies from Space Conference appeared first on GFOSS Blog | GRASS GIS Courses.

Climate Show 2018

The International Climate Show will be held at Palexpo, Geneva from

The post Climate Show 2018 appeared first on GFOSS Blog | GRASS GIS Courses.

38th Annual EARSeL Symposium

Climate change, overpopulation, overexploitaion of natural resources

The post 38th Annual EARSeL Symposium appeared first on GFOSS Blog | GRASS GIS and OSGeo News.

8th European Algae Industry Summit

Following the success of its previous editions, ACI’s 8th European A

The post 8th European Algae Industry Summit appeared first on GFOSS Blog | GRASS GIS and OSGeo News.

2nd International Electronic Conference on Remote Sensing

The 2nd International Electronic Conference on Remote Sensing (ECRS-

The post 2nd International Electronic Conference on Remote Sensing appeared first on GFOSS Blog | GRASS GIS and OSGeo News.

Copernicus for Agriculture – Industry Workshop


The post Copernicus for Agriculture – Industry Workshop appeared first on GFOSS Blog | GRASS GIS and OSGeo News.

EO & Copernicus Technologies

Earth observation and Copernicus – the European Copernicus Programme

The post EO & Copernicus Technologies appeared first on GFOSS Blog | GRASS GIS and OSGeo News.

3rd joint EARSeL LULC & NASA LCLUC Workshop

Following the success of the two previous EARSeL Special Interest Gr

The post 3rd joint EARSeL LULC & NASA LCLUC Workshop appeared first on GFOSS Blog | GRASS GIS and OSGeo News.

Wind and Renewable Energy 2018

With the grand success of Wind & Renewable Energy 2016, Conferen

The post Wind and Renewable Energy 2018 appeared first on GFOSS Blog | GRASS GIS and OSGeo News.

European Geosciences Union General Assembly 2018

The EGU General Assembly 2018 will bring together geoscientists from

The post European Geosciences Union General Assembly 2018 appeared first on GFOSS Blog | GRASS GIS and OSGeo News.

QGIS 3 compiling on Windows

As the Oslandia team work exclusively on GNU/Linux, the exercise of compiling QGIS 3 on Windows 8 is not an everyday’s task :). So we decided to share our experience, we bet that will help some of you.

Cygwin

The first step is to download Cygwin and to install it in the directory C:\cygwin (instead of the default C:\cygwin64). During the installation, select the lynx package:
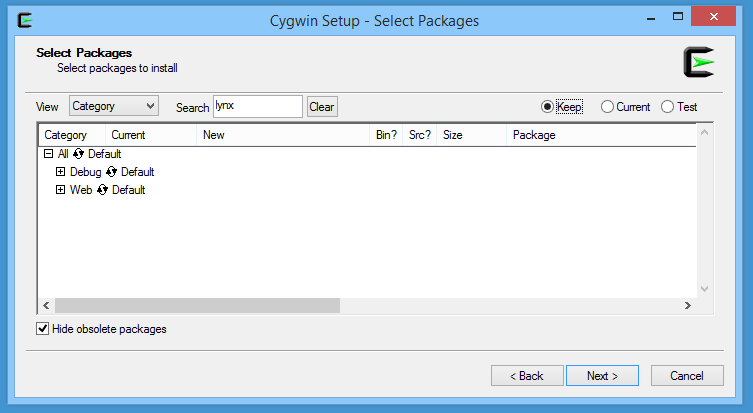
 

Once installed, you have to click on the Cygwin64 Terminal icon newly created on your desktop:
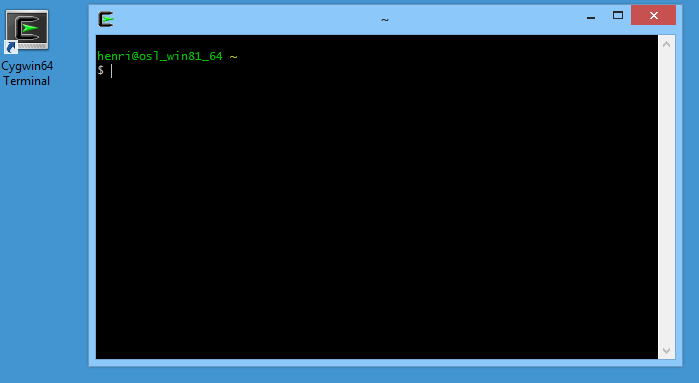
Then, we’re able to install dependencies and download some other installers:

[pastacode lang=”bash” manual=”%24%20cd%20%2Fcygdrive%2Fc%2FUsers%2Fhenri%2FDownloads%0A%24%20lynx%20-source%20rawgit.com%2Ftranscode-open%2Fapt-cyg%2Fmaster%2Fapt-cyg%20%3E%20apt-cyg%0A%24%20install%20apt-cyg%20%2Fbin%0A%24%20apt-cyg%20install%20wget%20git%20flex%20bison%0A%24%20wget%20http%3A%2F%2Fdownload.microsoft.com%2Fdownload%2FD%2F2%2F3%2FD23F4D0F-BA2D-4600-8725-6CCECEA05196%2Fvs_community_ENU.exe%0A%24%20chmod%20u%2Bx%20vs_community_ENU.exe%0A%24%20wget%20https%3A%2F%2Fcmake.org%2Ffiles%2Fv3.7%2Fcmake-3.7.2-win64-x64.msi%0A%24%20wget%20http%3A%2F%2Fdownload.osgeo.org%2Fosgeo4w%2Fosgeo4w-setup-x86_64.exe%0A%24%20chmod%20u%2Bx%20osgeo4w-setup-x86_64.exe” message=”” highlight=”” provider=”manual”/]

CMake

The next step is to install CMake. To do that, double clic on the file cmake-3.7.2-win64-x64.msi previously downloaded with wget. You should choose the next options during the installation:
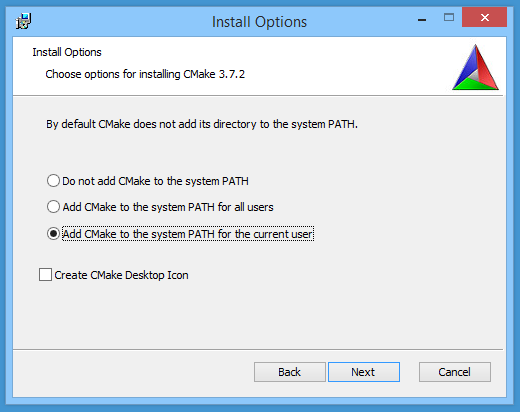
 

Visual Studio

Then, we have to install Visual Studio and C++ tools. Double click on the vs_community_ENU.exe file and select the Custom installation. On the next page, you have to select Visual C++ chekbox:
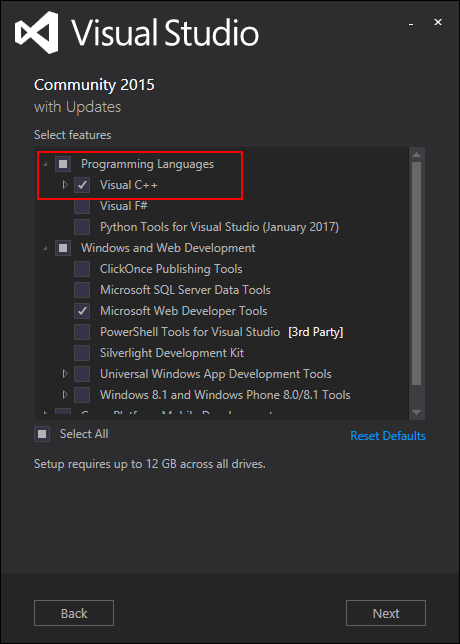


OSGeo4W

In order to compile QGIS, some dependencies provided by the OSGeo4W installer are required. Double click on osgeo4w-setup-x86_64.exe and select the Advanced Install mode. Then, select the next packages:

  •  expat
  • fcgi
  • gdal
  • grass
  • gsl-devel
  • iconv
  • libzip-devel
  • libspatialindex-devel
  • pyqt5
  • python3-devel
  • python3-qscintilla
  • python3-nose2
  • python3-future
  • python3-pyyaml
  • python3-mock
  • python3-six
  • qca-qt5-devel
  • qca-qt5-libs
  • qscintilla-qt5
  • qt5-devel
  • qt5-libs-debug
  • qtwebkit-qt5-devel
  • qtwebkit-qt5-libs-debug
  • qwt-devel-qt5
  • sip-qt5
  • spatialite
  • oci
  • qtkeychain

QGIS

To start this last step, we have to create a file C:\OSGeo4W\OSGeo4W-dev.bat containing something like:

[pastacode lang=”bash” manual=”%40echo%20off%20%0Aset%20OSGEO4W_ROOT%3DC%3A%5COSGeo4W64%0Acall%20%22%25OSGEO4W_ROOT%25%5Cbin%5Co4w_env.bat%22%20%0Acall%20%22%25OSGEO4W_ROOT%25%5Cbin%5Cqt5_env.bat%22%20%0Acall%20%22%25OSGEO4W_ROOT%25%5Cbin%5Cpy3_env.bat%22%20%0Aset%20VS140COMNTOOLS%3D%25PROGRAMFILES(x86)%25%5CMicrosoft%20Visual%20Studio%2014.0%5CCommon7%5CTools%5C%20%0Acall%20%22%25PROGRAMFILES(x86)%25%5CMicrosoft%20Visual%20Studio%2014.0%5CVC%5Cvcvarsall.bat%22%20amd64%20%0Aset%20INCLUDE%3D%25INCLUDE%25%3B%25PROGRAMFILES(x86)%25%5CMicrosoft%20SDKs%5CWindows%5Cv7.1A%5Cinclude%20%0Aset%20LIB%3D%25LIB%25%3B%25PROGRAMFILES(x86)%25%5CMicrosoft%20SDKs%5CWindows%5Cv7.1A%5Clib%20%0Apath%20%25PATH%25%3B%25PROGRAMFILES%25%5CCMake%5Cbin%3Bc%3A%5Ccygwin%5Cbin%20%0A%40set%20GRASS_PREFIX%3D%22%25OSGEO4W_ROOT%25%5Capps%5Cgrass%5Cgrass-7.2.1%20%0A%40set%20INCLUDE%3D%25INCLUDE%25%3B%25OSGEO4W_ROOT%25%5Cinclude%20%0A%40set%20LIB%3D%25LIB%25%3B%25OSGEO4W_ROOT%25%5Clib%3B%25OSGEO4W_ROOT%25%5Clib%20%0A%0A%40cmd%20″ message=”” highlight=”” provider=”manual”/]

According to your environment, some variables should probably be adapted. Then in the Cygwin terminal:

[pastacode lang=”bash” manual=”%24%20cd%20C%3A%5C%0A%24%20git%20clone%20git%3A%2F%2Fgithub.com%2Fqgis%2FQGIS.git%0A%24%20.%2FOSGeo4W-dev.bat%0A%3E%20cd%20QGIS%2Fms-windows%2Fosgeo4w” message=”” highlight=”” provider=”manual”/]

In this directory, you have to edit the file package-nightly.cmd to replace:

[pastacode lang=”bash” manual=”cmake%20-G%20Ninja%20%5E” message=”” highlight=”” provider=”manual”/]

by:

[pastacode lang=”bash” manual=”cmake%20-G%20%22Visual%20Studio%2014%202015%20Win64%22%20%5E” message=”” highlight=”” provider=”manual”/]

Moreover, we had to update the environment variable SETUAPI_LIBRARY according to the current position of the Windows Kits file SetupAPI.Lib:

[pastacode lang=”bash” manual=”set%20SETUPAPI_LIBRARY%3DC%3A%5CProgram%20Files%20(x86)%5CWindows%20Kits%5C8.1%5CLib%5Cwinv6.3%5Cum%5Cx64%5CSetupAPI.Lib” message=”” highlight=”” provider=”manual”/]

And finally, we just have to compile with the next command:

[pastacode lang=”markup” manual=”%3E%20package-nightly.cmd%202.99.0%201%20qgis-dev%20x86_64″ message=”” highlight=”” provider=”manual”/]

Victory!

And see you soon for the generation of OSGEO4W packages 😉

Source

https://github.com/qgis/QGIS/blob/ab859c9bdf8a529df9805ff54e7250921a74d877/doc/msvc.t2t


Data exploration with Data Plotly for QGIS3

Data Plotly is a new plugin by Matteo Ghetta for QGIS3 which makes it possible to draw D3 graphs of vector layer attribute values. This is a huge step towards making QGIS a one stop shop for data exploration!

Data Plotly adds a new panel where graphs can be configured and viewed. Currently, there are nine different plot types:

The following examples use tree cadastre data from the city of Linz, Austria.

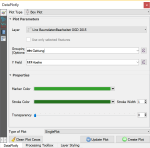
Scatter plots with both two and three variables are supported. After picking the attributes you want to visualize, press “Create plot”.

If you change some settings and press “Create plot” again, by default, the new graph will be plotted on top of the old one. If you don’t want that to happen, press “Clean plot canvas” before creating a new plot.

The plots are interactive and display more information on mouse over, for example, the values of a box plot:

Even aggregate expressions are supported! Here’s the mean height of trees by type (deciduous L or coniferous N):

For more examples, I strongly recommend to have a look at the plugin home page.

blog:podrecznik_do_qgis

W repozytorium Politechniki Krakowskiej zostało udostępnione elektroniczne wydanie podręcznika „Systemy informacji przestrzennej z QGIS, część I i II”, który ukazał się w roku 2017. W tym wydaniu dodano m.in. tematy związane z przetwarzaniem zdjęć satelitarnych oraz pracę z bazami danych przestrzennych.

  • <<
  • Page 50 of 141 ( 2819 posts )
  • >>

Back to Top

Sustaining Members