Related Plugins and Tags

QGIS Planet

Getting started with pygeoapi processes

Today’s post is a quick introduction to pygeoapi, a Python server implementation of the OGC API suite of standards. OGC API provides many different standards but I’m particularly interested in OGC API – Processes which standardizes geospatial data processing functionality. pygeoapi implements this standard by providing a plugin architecture, thereby allowing developers to implement custom processing workflows in Python.

I’ll provide instructions for setting up and running pygeoapi on Windows using Powershell. The official docs show how to do this on Linux systems. The pygeoapi homepage prominently features instructions for installing the dev version. For first experiments, however, I’d recommend using a release version instead. So that’s what we’ll do here.

As a first step, lets install the latest release (0.16.1 at the time of writing) from conda-forge:

conda create -n pygeoapi python=3.10
conda activate pygeoapi
mamba install -c conda-forge pygeoapi

Next, we’ll clone the GitHub repo to get the example config and datasets:

cd C:\Users\anita\Documents\GitHub\
git clone https://github.com/geopython/pygeoapi.git
cd pygeoapi\

To finish the setup, we need some configurations:

cp pygeoapi-config.yml example-config.yml  
# There is a known issue in pygeoapi 0.16.1: https://github.com/geopython/pygeoapi/issues/1597
# To fix it, edit the example-config.yml: uncomment the TinyDB option in the server settings (lines 51-54)

$Env:PYGEOAPI_CONFIG = "F:/Documents/GitHub/pygeoapi/example-config.yml"
$Env:PYGEOAPI_OPENAPI = "F:/Documents/GitHub/pygeoapi/example-openapi.yml"
pygeoapi openapi generate $Env:PYGEOAPI_CONFIG --output-file $Env:PYGEOAPI_OPENAPI

Now we can start the server:

pygeoapi serve

And once the server is running, we can send requests, e.g. the list of processes:

curl.exe http://localhost:5000/processes

And, of course, execute the example “hello-world” process:

curl.exe --% -X POST http://localhost:5000/processes/hello-world/execution -H "Content-Type: application/json" -d "{\"inputs\":{\"name\": \"hi there\"}}"

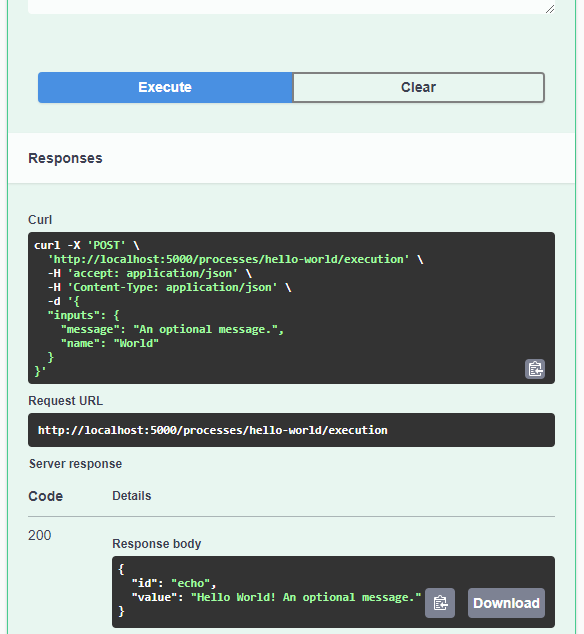
As you can see, writing JSON content for curl is a pain. Luckily, pyopenapi comes with a nice web GUI, including Swagger UI for playing with all the functionality, including the hello-world process:

It’s not really a geospatial hello-world example, but it’s a first step.

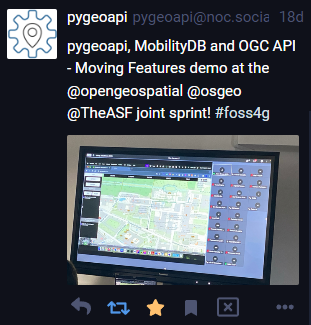
Finally, I wan’t to leave you with a teaser since there are more interesting things going on in this space, including work on OGC API – Moving Features as shared by the pygeoapi team recently:

So, stay tuned.

QGIS server 3.28 is officially OGC compliant

QGIS Server provides numerous services like WMS, WFS, WCS, WMTS and OGC API for Features. These last years, a lot of efforts were made to offer a robust implementation of the WMS 1.3.0 specification.

We are pleased to announce that QGIS Server LTR 3.28 is now certified against WMS 1.3.0.

This formal OGC certification process is performed once a year, specifically for the Long Term Release versions. But, as every change in QGIS source code is now tested against the formal OGC test suites (using OGC TeamEngine) to avoid any kind of regressions, you can always check any revision of the code against OGC failures in our Github continuous integration results.

All this has been possible thanks to the QGIS’s sustaining members and contributors.

QGIS Server 3.4.6 certified for WMS 1.3

We are very happy to announce that QGIS 3.4.6 LTR is now OGC certified as a reference implementation : qgis_server_ogc_badge_2019

The OGC certification program gives a third party validation that the a web service is compliant with the standard.

The certification process requires manual work, so we will only certify on version for each LTR.  This was not enough, so we build a OGC CI test platform that is checking compliance every night for WMS and WFS, so that you can check by yourself any specific version commit.

However WMS 1.3 is only the basics, if you rely on other services like WFS, WCS, or advanced capabilities like Raster or Vector Elevation, we are looking for supporters!

As the future is almost now If you want QGIS to be on the cutting edge with the upcoming WFS3, a JSON-REST modern version of WFS, please get in touch. We’d love to push this both into QGIS server and Desktop.

QGIS Server 3 : OGC Certification work for WFS 1.1.0

QGIS Server is an open source OGC data server which uses QGIS engine as backend. It becomes really awesome because a simple desktop qgis project file can be rendered as web services with exactly the same rendering, and without any mapfile or xml coding by hand.

QGIS Server provides a way to serve OGC web services like WMS, WCS, WFS and WMTS resources from a QGIS project, but can also extend services like GetPrint which takes advantage of QGIS’s map composer power to generate high quality PDF outputs.

Since the 3.0.2 version, QGIS Server is certified as an official OGC reference implementation for WMS 1.3.0 and reports are generated in a daily continuous integration to avoid regressions.


Thus, the next step was naturally to take a look at the WFS 1.1.0 thanks to the support of the QGIS Grant Program

Side note, this Grant program is made possible thanks to your direct sponsoring and micro-donations to QGIS.org.

TEAM Engine test suite for WFS 1.1.0

We use a tool provided by the OGC Compliance Program to run dedicated tests on the server : Teamengine (Test, Evaluation, And Measurement Engine).

Test suites are available through a web interface. However, for the needs of continuous integration, these tests have to be run without user interaction. In the case of WMS 1.3.0, nothing more easy than using the REST API:

$ curl "http://localhost:8081/teamengine/rest/suites/wms/1.20/run?queryable=queryable&basic=basic&capabilities-url=http://172.17.0.2/qgisserver?REQUEST=GetCapabilities%26SERVICE=WMS%26VERSION=1.3.0%26MAP=/data/teamengine_wms_130.qgs


However, the WFS 1.1.0 test suite does not provide a REST API and makes the situation less straightforward. We switched to using TEAM Engine directly from command line:

$ cd te_base
$ ./bin/unix/test.sh -source=wfs/1.1.0/ctl/main.ctl -form=params.xml

The params.xml file allows to configure underlying tests. In this particular case, the GetCapabilities URL of the QGIS Server to test is given.  Results are available thanks to the viewlog.sh shell script:

$ ./bin/unix/viewlog.sh -logdir=te_base/users/root/ -session=s0001
Test wfs:wfs-main type Mandatory (s0001) Failed (InheritedFailure)
   Test wfs:readiness-tests type Mandatory (s0001/d68e38807_1) Failed (InheritedFailure)
      Test ctl:SchematronValidatingParser type Mandatory (s0001/d68e38807_1/d68e588_1) Failed
      Test wfs:basic-main type Mandatory (s0001/d68e38807_1/d68e636_1) Failed (InheritedFailure)
         Test wfs:run-GetCapabilities-basic-cc-GET type Mandatory (s0001/d68e38807_1/d68e636_1/d68e28810_1) Failed (InheritedFailure)
            Test wfs:wfs-1.1.0-Basic-GetCapabilities-tc1 type Mandatory (s0001/d68e38807_1/d68e636_1/d68e28810_1/d68e1095_1) Passed
               Test ctl:assert-xpath type Mandatory (s0001/d68e38807_1/d68e636_1/d68e28810_1/d68e1095_1/d68e1234_1) Passed
            Test wfs:wfs-1.1.0-Basic-GetCapabilities-tc2 type Mandatory (s0001/d68e38807_1/d68e636_1/d68e28810_1/d68e1100_1) Passed
               Test ctl:assert-xpath type Mandatory (s0001/d68e38807_1/d68e636_1/d68e28810_1/d68e1100_1/d68e1305_1) Passed
            Test wfs:wfs-1.1.0-Basic-GetCapabilities-tc3 type Mandatory (s0001/d68e38807_1/d68e636_1/d68e28810_1/d68e1105_1) Passed
               Test ctl:assert-xpath type Mandatory (s0001/d68e38807_1/d68e636_1/d68e28810_1/d68e1105_1/d68e1558_1) Passed
               Test ctl:assert-xpath type Mandatory (s0001/d68e38807_1/d68e636_1/d68e28810_1/d68e1105_1/d68e1582_1) Passed
               Test ctl:assert-xpath type Mandatory (s0001/d68e38807_1/d68e636_1/d68e28810_1/d68e1105_1/d68e1606_1) Passed
...
...

Finally, a Python script has been written to read these logs and generate HTML report easily readable. Thanks to our QGIS-Server-CertifSuite, providing the continuous integration infrastructure with Docker images, these reports are also generated daily.

Bugfix and Conclusion

First results were clear: a lot of work is necessary to have a QGIS Server certified for WFS 1.1.0!

We started fixing the issues one by one:

And now we have a much better support than 6 months ago

However, some work still need to be done to finally obtain the OGC certification for WFS 1.1.0. To be continued!

Please contact us if you want QGIS server to become a reference implementation for all OGC service !

QGIS Server certified as official OGC reference implementation

We are very excited to announce that QGIS Server has been successfully certified as a compliant WMS 1.3 server against the OGC certification platform, and moreover, it is even considered as a reference implementation now!

This is the first step on our roadmap of having a fast, compliant and bullet proof web map server that is straightforward to publish from a classical QGIS project.

What does it mean?

Having a certified server means that QGIS Server successfully passes the automated and semi automated tests that ensure we are 100% compliant with the standards. That means you can trust QGIS to be used by any WMS client seamlessly.
Moreover, that certification is now powered by a continuous integration system that checks every night in developement versions if we still pass the tests.

Daily compliance reports are available on the new test.qgis.org website.

What’s next?

Building the automated testing platform and getting officially certified was only the first step. We now are starting to certify the WFS services, thanks to the latest grant application program support.

We also want QGIS server development to be performance-driven. The following projects are particularly relevant:

  • MS-Perf produces benchmark reports with MapServer and GeoServer.
  • graffiti  and PerfSuite tools have been designed to create a really light tool, easy to enrich with new datasets and performance tests, and easy to integrate in continuous integration systems. It compares QGIS-ltr, QGIS-rel and QGIS-dev nightlies for the same scenarios in details and produces html reports. It can also graph performance history for the development version to track regressions or improvements.

Many thanks to the supporters and voting members that helped bootstrap all those testing platforms and offer them to the community.

If you want to support or give a hand on the QGIS desktop client side, we think that area would deserve some love too!

Markus Neteler joins the management of mundialis in Bonn

Press release

From March 2016 onwards, Dr. Markus Neteler, a prominent head of the Open Source GIS scene, will join the management board of mundialis GmbH & Co. KG in Bonn, Germany. Founded in 2015, mundialis combines remote sensing and satellite data analysis in the field of Big Data with Open Source WebGIS solutions.

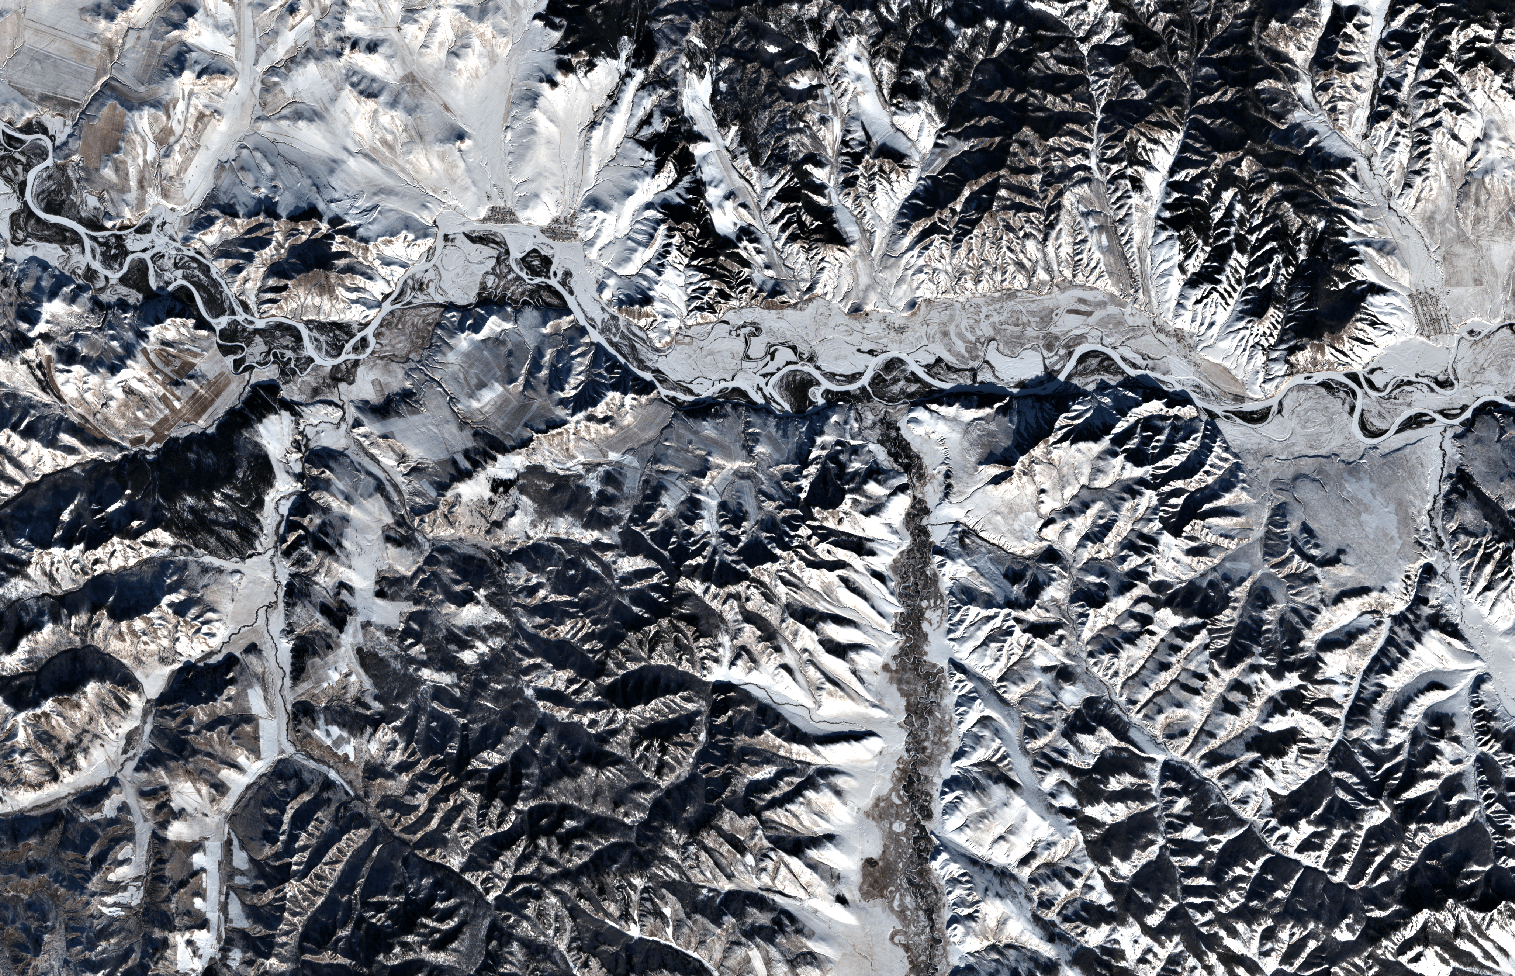
Since 2008, Dr. Neteler was the head of the GIS and remote sensing unit at the Edmund Mach Foundation in Trento (Italy) and worked in this capacity on numerous projects related to biodiversity, environmental and agricultural research. He is also a founding member of the Open Source Geospatial Foundation (OSGeo), a nonprofit organization with headquarters in Delaware (USA), that promotes the development and use of free and open source geographic information systems (GIS). Since 1998 he coordinated the development of the well known GRASS GIS software project, a powerful Open Source GIS that supports processing of time series of several thousand raster, 3D raster or vector maps in a short time. Mongolia as seen by Sentinel-2A

Markus will keep his role as “Mr. GRASS” at mundialis, especially because the company also sees itself as a research and development enterprise that puts its focus on the open source interfaces between geoinformation and remote sensing. Although a new company, mundialis offers more than 50 years of experience in GIS, due to the background of its management. Besides Neteler, there are Till Adams and Hinrich Paulsen, both at the same time the founders and CEOs of terrestris in Bonn, a company that develops Open Source GIS solutions since 2002. These many years of experience in the construction of WebGIS and Geoportal architectures using free software as well as in the application of common OGC standards – are now combined with mundialis’ expertise in the processing of big data with spatial reference and remote sensing data.

Contact: http://www.mundialis.de/

The post Markus Neteler joins the management of mundialis in Bonn appeared first on GFOSS Blog | GRASS GIS Courses.

Share and manage your Data with QGIS Cloud and WFS-T

A lot of people are using QGIS Cloud as a service with ready to use QGIS webclient. It’s very easy to publish data and share maps in this way. But QGIS Cloud has more power under the hood. A not so obvious feature of QGIS Cloud is the option to share your data via Web Feature Service (WFS) and manage them via Web Feature Service Transactional (WFS-T). “The basic Web Feature Service allows querying and retrieval of features. A transactional Web Feature Service (WFS-T) allows creation, deletion, and updating of features” (Wikipedia). With WFS-T you have full access to your vector data for editing over the web. Since QGIS Server includes WFS-T functionality, you can manage and edit your data served by QGIS Cloud from every client supporting WFS-T. In addition, with QGIS Cloud Pro you have the option to control access to your published WFS.

How to setup a QGIS Cloud WFS-T in few steps:

  1. Setup a QGIS Project containing the data you like to pubish as WFS-T

  2. Load local vector data of your choice to your project.

  3. Define vector layers you wish to publish and set the appropriate settings for them in the following way:
    • open the Project Properties -> OWS Server tab.
    • scroll to the WFS-Capabilities section and setup the appropriate settings. Tick Published, Update, Insert and Delete for every layer you want to publish.

  • additionally you can set the published fields of every layer in the Layer Properties -> Fields tab.

  • Publish the project on QGIS Cloud.
    • save the project. (If you don’t have installed the QGIS Cloud plugin, than install it from the official QGIS Plugin Repository)
    • open the QGIS Cloud plugin and log in your QGIS Cloud account. (If you don’t have a QGIS Cloud account, sign up a new account).
    • upload the local data to your QGIS Cloud database (if you don’t have a QGIS Cloud database, create one from the QGIS Cloud plugin).
    • publish the project via QGIS Cloud plugin.
    • that’s it!

Have a look at the Services tab of the QGIS Cloud Plugin. There you will find the URL for Public WMS. Your just created WFS has the same URL. Now you can start working with WFS and WFS-T.

Working with WFS-T in QGIS Desktop

You can access your WFS-T with QGIS or any other client which supports WFS and WFS-T. As an example here we show how to access WFS with QGIS Desktop:

  1. Open the QGIS WFS Server connections dialog (Layer -> Add WFS Layer … ).
  2. Add a new connection
  3. Give the connection a name of your choice and add the above created URL
  4. Click connect and you will see the just published WFS layers
  5. Add one or more of them to your project

Thus you have set the Update, Insert and Delete options for the WFS, these layers can be edited in QGIS like any other editable layer.

All the services published under QGIS Cloud Free are public and accessible by everyone. If you need resctricted access , you can order the QGIS Cloud Pro plan.

Follow @QGISCloud on Twitter for QGISCloud related news and infos.

FOSSGIS 2013: GeoPackage, das Shapefile der Zukunft

Der GeoPackage-Standard ist im Januar 2013 vom OGC als Draft veröffentlicht worden. Er vereint die Speicherung von Vektor- und Rasterdaten im verbreiteten SQLite DB-Fileformat. Vektoren werden im SpatiaLite-Format und Rasterdaten wie MBTiles gespeichert.

Präsentation

FOSSGIS 2011: SDI-Architektur mit verteilter Datenhaltung

Aggregation von OGC Diensten

Um OGC-Dienste verschiedener Anbieter (z.B. Bundesländer) zu einem zentralen Dienst zusammenzufassen, müssen neben der Kaskadierung noch einige weitere Operationen ausgeführt werden. Eine hohe Performance und Ausfallsicherheit kann mit einem Tile-Cache auf Basis der aggregierten Dienste gewährleistet werden. Dieser Vortrag zeigt die Problempunkte, die es bei bei einer solchen SDI-Architektur zu berücksichtigen gilt und stellt entsprechende Lösungen vor.

Präsentation

  • Page 1 of 1 ( 12 posts )
  • ogc

Back to Top

Sustaining Members