Related Plugins and Tags

QGIS Planet

FOSSGIS 2014 slides

Neues in QGIS 2.2

Nach dem lange erwarteten Release von QGIS 2.0 im September 2013, sind ab diesem Jahr neue Versionen im Viermonatszyklus geplant. Es werden die neuen Funktionen in QGIS 2.2, wie z.B. DB-Relationen mit verschachtelten Formularen, die erweiterten Methoden zur Transformierung geographischer Koordinatensysteme, zahlreiche Verbesserungen im Print Composer und ein komplett überarbeiteter DXF Export vorgestellt. Zusätzlich wird eine Vorschau auf das multithreaded Rendering gegeben und die neuen Mitglieder im Project Steering Committee vorgestellt

Links:

Mobile Kartenviewer mit Openlayers 3

Mit OpenLayers 3 steht eine komplette Neuentwicklung der funktionsreichen OpenLayers-Bibliothek zur Verfügung. Die verbesserte Unterstützung mobiler Geräte war ein primäres Ziel der neuen Version. Dieser Vortrag stellt den JQuery Mobile basierten OL3 Mobile Viewer vor, der erweiterte Funktionen wie automatische Kartenausrichtung oder Positionsnachführung bietet. Es wird auch ein Vergleich mit anderen Viewern, wie der auf Bootstrap und AngularJS aufbauenden Neuentwicklung von Swisstopo angestellt.

Links:

Two book recommendations

I recently finished reading two books which may be of interest to open-source GIS users – “PostGIS Cookbook” and “The PyQGIS Programmer’s Guide“, both of which I highly recommend:

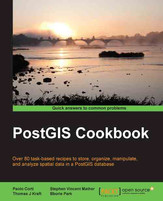
PostGIS Cookbook

PostGIS CookbookI’ve been a fan of Stephen Mather’s blog for a while now, and have consistently found it to be a great source of trustworthy information and creative solutions to GIS problems. So when I first saw mention of his work on the PostGIS Cookbook I knew it would be a must-read for me. PostGIS is an essential part of my daily toolkit, and I’ll quickly devour any tutorial or guide which can lead me to better ways to put it to use. And that’s exactly what this book is! It’s full of tips and guides which has inspired me in a lot of techniques I’d never tried or even thought possible in PostGIS.

It’s important to point out that this book isn’t a training manual or beginner’s guide to PostGIS. It assumes readers are already familiar with using PostGIS and have a good understanding of GIS software in general. (If you’re looking for a book to start from scratch with PostGIS, PostGIS in Action is a better fit). I think that’s really what makes this book stand out though. There’s currently not a lot of books available covering PostGIS, and as far as I’m aware the PostGIS Cookbook is the only book available which is targeted to experienced PostGIS users.

Highlights for me are:

  • A great explanation and write up on optimised KNN filtering in PostGIS (something which often trips me up)
  • The detailed guide to topologically correct simplification of features
  • The exploration of PgRouting, which is a great introduction to PostGIS’ routing abilities
  • The “PostGIS and the web” chapter – I really wasn’t expecting this, but it’s quite eye opening (I’m going to have to do some digging into GeoDjango sometime)

The only criticism I have with this book is that it jumps around a lot between operating systems. While most of the code is provided for both Linux/OSX and Windows, there’s occasional examples which only have code for one specific operating system. It’s a little jarring and assumes the user is well versed in their particular operating system to workaround these omissions.

Overall, I strongly recommend the PostGIS Cookbook, and would consider it a must have for anyone serious about expanding their PostGIS abilities. (Also, looks like the publisher, Packt, have a two-for-one sale going at the moment, so it’s a good time to grab this title).

The PyQGIS Programmer’s Guide

The PyQGIS Programmer's GuideThe second book I’ve just finished reading is Gary Sherman’s “The PyQGIS Programmer’s Guide“. For those who are unaware, Gary was the original founder of QGIS back in 2002, so you can be confident that he knows exactly what he’s writing about. In The PyQGIS Programmer’s Guide  Gary has created an in-depth guide on how to get started with programming for QGIS using python. It takes readers all the way from simple scripts right through to developing QGIS plugins and standalone applications based on the QGIS API.

This book fills an important void in the literature available for QGIS. Previously, the PyQGIS Developer Cookbook was the only available guide for QGIS python scripting, and unfortunately it’s a little out-of-date now. PyQGIS scripting can be a steep learning curve and that’s why this book is so appreciated.

It would be valuable to have some python knowledge and experience prior to reading this book. While the “Python Basics” chapter quickly runs through an introduction to the language, the book makes no claims to be a comprehensive python tutorial. But if you’ve dabbled in the language before and have familiarity with the python way of doing things you’ll easily be able to follow along.

Highlights are:

  • The “Tips and Techniques” chapter, which is a great mini-reference for performing a range of common tasks in PyQGIS (including loading layers, changing symbol styles, editing feature attributes, etc).
  • A complete tutorial for creating a QGIS plugin
  • A guide to debugging PyQGIS code and plugins

I’d definitely recommend that anyone who wants to get started with PyQGIS start with Gary’s work – you’ll find it the perfect place to begin.

What are all these QGIS file types? Why do I need them

After I added the new QGIS Layer Definition feature in QGIS I have noticed some indirect feedback regarding its use. I thought I would do this post in order to clear things up regarding the new feature so that we are all on the same page.

Some of this feedback, or I could say confusion, was mainly "Why not use the qml format?" or "How is it different from a project file". I can understand this confusion because they do kind of look and act the same however they are a little different.

I'm going to work my way up from the bottom up in terms of file levels and their use.

The QML file (.qml)

It contains: Style information

The QML (.qml) file in QGIS is a style file. It contains an export of the style information, including labels, from a layer. The .qml file however has no reference to the layer. This means I can share a .qml file with you and you can apply it to your own data without needing the data I exported it from. QML files are handy if you have one, or more, layers but have a collection of different style that you want to apply to them.

Style files can only be only be applied to a layer once it is opened. The recent Ordance Survey release of styles is a prefect QML use case.

The Layer Definition file (.qlr)

It contains: Layer source pointer + Style information

This newest feature, also in plugin form for 2.0 and 2.2, is a Layer Definition file. This file contains the reference - or pointer - to the data source plus any style information. This is like a the ArcGIS .lyr file, although maybe not as fully feature rich just yet. The use case for this file is simple: To have a single file to can open a data source bringing in all the related style information. These files also allow you to mask the underlying datasource in a easy to open file.

One of my use cases is to open MS SQL layers. Rather then having to go to the MS SQL connection dialog, connect, select and load, then style. I can simply add a .qlr file that points to the correct MS SQL layer pre styled.

In the future a .qlr file may hold a reference to more then one layer. The Ordance Survey or Natural Earth stuff could also be done with a QLR in order too allow just opening a single file.

The Project file (.qgs)

It contains: Layer source pointer + Style information + Composers + a whole heap of other stuff

The Project file is the highest level file that QGIS has. This holds more then just a list of layers, it also holds order, groups, composers, marcos, etc. I don't really need to explain any of this because you already know.

Why not just extend QML (style file) or QGS (project file)?

In software development we have this thing called SRP (Single Responsibility Principle), and while it can be tricky to follow at times I think it can also apply in cases like this. Sometimes have a single file meaning many different things can be worse then having a many different files with one use case each.

Could I have extended QML to support datasource too? Sure. Easy. However I don't think it made any sense. The use case of the QML is to store only the style and to be applied after the layer is loaded. Who says I have the datasource you used in the first place? In this case the QML is the most portable format because it doesn't point to a data source. I could have just stored the layer reference and ignored it in the normal places we import QML, yes but now you start to muddy the water on what a QML is. If your answer to "What is a QML file?" is "Well sometimes it opens a layer, and sometimes it's just the style" that to me is a smell.

The project file stores a lot of different things and I could have used that as a base, but again I think it starts to muddy the waters. The project file also contains a lot of other things that we just don't need, composers, etc. I have started working on a Import from Project function, just like the plugin of the same function, however I don't think this process is a smooth as using something like a QLR file to bring in layers. Giving someone a full project just so then can import a single layer from it feels like giving someone a full toolbox when all they want is a screwdriver. Just give me the screwdriver, I don't care for the other stuff.

What are all these QGIS file type. And why do I need them

After I added the new QGIS Layer Definition feature in QGIS I have noticed some indirect feedback regarding its use. I thought I would do this post in order to clear things up regarding the new feature so that we are all on the same page.

Some of this feedback, or I could say confusion, was mainly "Why not use the qml format?" or "How is it different from a project file". I can understand this confusion because they do kind of look and act the same however they are a little different.

I'm going to work my way up from the bottom up in terms of file levels and their use.

The QML file (.qml)

It contains: Style information

The QML (.qml) file in QGIS is a style file. It contains an export of the style information, including labels, from a layer. The .qml file however has no reference to the layer. This means I can share a .qml file with you and you can apply it to your own data without needing the data I exported it from. QML files are handy if you have one, or more, layers but have a collection of different style that you want to apply to them.

Style files can only be only be applied to a layer once it is opened. The recent Ordance Survey release of styles is a prefect QML use case.

The Layer Definition file (.qlr)

It contains: Layer source pointer + Style information

This newest feature, also in plugin form for 2.0 and 2.2, is a Layer Definition file. This file contains the reference - or pointer - to the data source plus any style information. This is like a the ArcGIS .lyr file, although maybe not as fully feature rich just yet. The use case for this file is simple: To have a single file to can open a data source bringing in all the related style information. These files also allow you to mask the underlying datasource in a easy to open file.

One of my use cases is to open MS SQL layers. Rather then having to go to the MS SQL connection dialog, connect, select and load, then style. I can simply add a .qlr file that points to the correct MS SQL layer pre styled.

In the future a .qlr file may hold a reference to more then one layer. The Ordance Survey or Natural Earth stuff could also be done with a QLR in order too allow just opening a single file.

The Project file (.qgs)

It contains: Layer source pointer + Style information + Composers + a whole heap of other stuff

The Project file is the highest level file that QGIS has. This holds more then just a list of layers, it also holds order, groups, composers, marcos, etc. I don't really need to explain any of this because you already know.

Why not just extend QML (style file) or QGS (project file)?

In software development we have this thing called SRP (Single Responsibility Principle), and while it can be tricky to follow at times I think it can also apply in cases like this. Sometimes have a single file meaning many different things can be worse then having a many different files with one use case each.

Could I have extended QML to support datasource too? Sure. Easy. However I don't think it made any sense. The use case of the QML is to store only the style and to be applied after the layer is loaded. Who says I have the datasource you used in the first place? In this case the QML is the most portable format because it doesn't point to a data source. I could have just stored the layer reference and ignored it in the normal places we import QML, yes but now you start to muddy the water on what a QML is. If your answer to "What is a QML file?" is "Well sometimes it opens a layer, and sometimes it's just the style" that to me is a smell.

The project file stores a lot of different things and I could have used that as a base, but again I think it starts to muddy the waters. The project file also contains a lot of other things that we just don't need, composers, etc. I have started working on a Import from Project function, just like the plugin of the same function, however I don't think this process is a smooth as using something like a QLR file to bring in layers. Giving someone a full project just so then can import a single layer from it feels like giving someone a full toolbox when all they want is a screwdriver. Just give me the screwdriver, I don't care for the other stuff.

Re-Projecting Vector Layers in QGIS

QGIS can re-project a layer using both on-the-fly re-projection for the current session; and by saving a copy of the layer with a new Co-ordinate Reference System (CRS) defined.

On the fly

This is useful when a layer only needs to be re-projected for the current session.

Add the layer. If the CRS is known, QGIS will re-project it if necessary.

To check which CRS has been specified for the layer, right click on the layer in the Layers Panel, select Properties, and then select the General tab.

QGIS Layers Property

QGIS Layers Property


To save a new copy

It is a good practice to save a copy of a layer once it has been re-projected. This is to ensure the new CRS and transformations are permanently assigned to it. This avoids transformation errors when it is added to later map documents.

To save a copy:-

  1. Right click on the layer in the Layers Panel , select Save As.
  2. In the Save Vector layer as dialog, specify the filename, plus the new Co-ordinate Reference System. It is possible to add a symbology reference scale and new attributes. It is a good idea to add the new layer to the map to check it is correctly projected.
QGIS Save Vector Layer Dialog

QGIS Save Vector Layer Dialog


3D viz with QGIS & three.js

If you are looking for a tool to easily create 3D visualizations of your geodata, look no further! Qgis2threejs is a plugin by Minoru Akagi which exports terrain data combined with the map canvas image and optional vector data to an html file which can be viewed in 3D in any web browser which supports WebGL. To do that, this plugin uses the Three.js library.

This is the result of my first experiments with Qgis2threejs. In the following sections, I will show the steps to reproduce it.

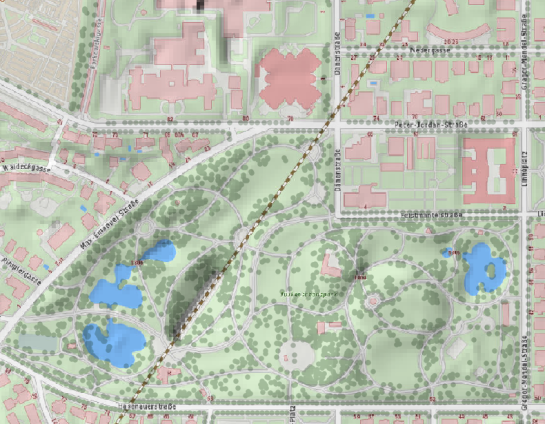
Türkenschanzpark, Vienna

click for the interactive version (requires WebGL-capable browser)

1. The data

The building blocks of this visualization are:

  • elevation data and the hillshade derived from this data
  • a base map (WMTS from basemap.at in my case)
  • OSM building data provided by Geofabrik and
  • tree data from the city of Vienna

Load all datasets into QGIS.

2. Preparing the map

Qgis2threejs will overlay the map (as rendered in the QGIS map area) on top of the elevation model. You can combine any number of layers to create your map. I just loaded a basemap.at WMTS and a hillshade layer. To add a nice tree shadow effect, I also added the tree layer (dark grey, 50% transparency, multiply blending).

tuerkenschanzpark_map

3. Preparing the vector features

The vector features in the visualization are buildings and trees. The buildings are based on an OSM building layer. The trees are create from two point layers: one point layer to create the tree trunks (cylinder shape) and a duplicate of this point layer to create the tree crowns (sphere shape).

Load the data and choose the desired fill colors.

4. Using Qgis2threejs

Now we can start Qgis2threejs. The first tab is used to configure the terrain. Just pick the correct elevation data layer. I didn’t modify any of the other default settings.

qgis2threejs_dem

The second tab provides the settings for the vector data. As mentioned in the previous section, the trees are created from two point layers and the buildings are based on a polygon layer. The tree crowns are spheres with a radius size 3 and a z value of 5 above the surface. The tree trunks are cylinders. Finally, the buildings have a height of 10.

qgis2threejs_vector

That’s it! Just press “run” and wait. When the export is finished, your default browser (or a different one, if you specify another one in the plugin settings) will open automatically and display the results.
The visualization is interactive. You can tilt the visualization using the left mouse button, pan using the right mouse button, and zoom using the mouse wheel. I found that Firefox used around 1.6 GB of RAM to render this example.

5. Share your visualization

In the browser window, you will see where Qgis2threejs stored the html and associated Javascript files. To share your visualization, you just need to copy these files onto a webserver.

I would love to see what you come up with. Please share a link in the comments.


OSGeo-Live 7.9 Released

OSGeo today announced that the OSGeo-Live GIS software collection version 7.9 has been released, featuring more than fifty open source, standards compliant geospatial desktop applications, web applications and frameworks.

Release Highlights:
This release is a modernization update to last year’s 7.0 release including new versions of the software but preserving much of the core build and operating system. In addition we’ve added a number of small fixes and updated document translations.

OSGeo-Live Lightning Presentation:
The OSGeo-Live Lightning Presentation which explains the breadth of OSGeo software is now bundled with OSGeo-Live. It is often presented by conference organisors, or keynote speakers. The presentation may be given as is, or modified to align with time constraints, presenter’s interest, or conference focus. http://live.osgeo.org/livedvd/docs/en/presentation/

Applications:
Twenty two geospatial programs have been updated to newer versions. The core geospatial stack has also been upgraded from UbuntuGIS, and the base operating system has been updated to Xubuntu 12.04.4 LTS, including all the latest security and bug fixes, and web browser updates.

About OSGeo-Live:
OSGeo-Live is a self-contained bootable DVD, USB flash drive and Virtual Machine based upon Ubuntu Linux. OSGeo-Live is pre-configured with a wide variety of robust open source geospatial software. All applications can be trialled without installing anything on your computer, simply by booting the computer from a DVD or USB drive, or running in a Virtual Machine environment. Each featured package is accompanied by both a publication quality one page descriptive summary and a short tutorial on how to get started using it. http://live.osgeo.org

OSGeo-Live includes:

  • Over sixty quality geospatial Open Source applications installed and pre-configured
  • Free world maps and geodata
  • One page overview and quick start guide for every application
  • Overviews of key OGC standards
  • Translations to multiple languages

Credits
Over 180 people have directly helped with OSGeo-Live packaging, documenting and translating, and thousands have been involved in building the packaged software. Developers, packagers, documenters and translators include:
Activity Workshop, Agustín Dí­ez, Aikaterini Kapsampeli, Alan Beccati, Alan Boudreault, Alessandro Furieri, Alexander Bruy, Alexander Kleshnin, Alexander Muriy, Alexandre Dube, Alexey Ardyakov, Alex Mandel, Amy Gao, Andrea Antonello, Andrea Yanza, Andrey Syrokomskiy, Andry Rustanto, Angelos Tzotsos, Anna Muñoz, Antonio Falciano, Anton Novichikhin, Anton Patrushev, Argyros Argyridis, Ariel Núñez, Assumpció Termens, Astrid Emde, Barry Rowlingson, Benjamin Pross, Brian Hamlin, Bruno Binet, Bu Kun, Cameron Shorter, Christophe Tufféry, Christos Iossifidis, Cristhian Pin, Damian Wojsław, Dane Springmeyer, Daniel Kastl, Daria Svidzinska, David Mateos, Denis Rykov, Diego González, Diego Migliavacca, Dimitar Misev, Dmitry Baryshnikov, Dominik Helle, Edgar Soldin, Eike Hinderk Jürrens, Elena Mezzini, Eric Lemoine, Erika Pillu, Estela Llorente, Etienne Delay, Etienne Dube, Evgeny Nikulin, Fran Boon, François Prunayre, Frank Gasdorf, Frank Warmerdam, Friedjoff Trautwein, Gavin Treadgold, Giuseppe Calamita, Grald Fenoy, Grigory Rozhentsov, Guy Griffiths, Hamish Bowman, Haruyuki Seki, Henry Addo, Hernan Olivera, Howard Butler, Hyeyeong Choe, Ian Edwards, Ian Turton, Ilya Filippov, Jackie Ng, Jan Drewnak, Jane Lewis, Javier Rodrigo, Javier Sánchez, Jesús Gómez, Jim Klassen, Jing Wang, Jinsongdi Yu, Jody Garnett, Johan Van de Wauw, John Bryant, Jorge Arévalo, Jorge Sanz, José Antonio Canalejo, José Vicente Higón, Judit Mays, Klokan Petr Pridal, Kristof Lange, kuzkok, Lance McKee, Lars Lingner, Luca Delucchi, Lucía Sanjaime, Mage Whopper, Manuel Grizonnet, Marc-André Barbeau, Marco Curreli, Marco Puppin, Marc Torres, Margherita Di Leo, Maria Vakalopoulou, Mario Andino, Mark Leslie, Massimo Di Stefano, Matthias Streulens, Mauricio Miranda, Mauricio Pazos, Maxim Dubinin, Michaël Michaud, Michael Owonibi, Micha Silver, Mike Adair, Milena Nowotarska, M Iqnaul Haq Siregar, Nacho Varela, Nadiia Gorash, Nathaniel V. Kelso, Ned Horning, Nobusuke Iwasaki, Oliver Tonnhofer, Òscar Fonts, Otto Dassau, Pasquale Di Donato, Patric Hafner, Paul Meems, Pavel, Pedro-Juan Ferrer, Pirmin Kalberer, Raf Roset, Regina Obe, Ricardo Pinho, Roald de Wit, Roberta Fagandini, Roberto Antolin, Roberto Antolí­n, Roger Veciana, Ruth Schoenbuchner, Samuel Mesa, Scott Penrose, Sergey Grachev, Sergio Baños, Simon Cropper, Simon Pigot, Stefan A. Tzeggai, Stefan Hansen, Stefan Steiniger, Stephan Meissl, Steve Lime, Takayuki Nuimura, Thierry Badard, Thomas Baschetti, Thomas Gratier, Tom Kralidis, Toshikazu Seto, Trevor Wekel, Valenty González, Vera, Xianfeng Song, Yoichi Kayama, Zhengfan Lin

Sponsoring organisations

  • The Open Source Geospatial Foundation OSGeo provides the primary development and hosting infrastructure and personnel for the OSGeo-Live project, and infrastructure for many of the software projects themselves. http://osgeo.org
  • LISAsoft provides sustaining resources and staff toward the management and packaging of software onto the Live DVD. http://www.lisasoft.com
  • Information Center for the Environment (ICE) at the University of California, Davis provides hardware resources and development support to the OSGeo Live project. http://ice.ucdavis.edu
  • Remote Sensing Laboratory at the National Technical University of Athens, provides hardware resources and development support to the OSGeo-Live project. http://www.ntua.gr
  • The DebianGIS and UbuntuGIS teams provide and quality-assure many of the core packages. http://wiki.debian.org/DebianGis and https://wiki.ubuntu.com/UbuntuGIS

The post OSGeo-Live 7.9 Released appeared first on GFOSS Blog | GRASS GIS Courses.

The PyQGIS Programmer's Guide

The PyQGIS Programmer’s Guide is now available in both paperback and PDF. A sample chapter is also available for download.

The book is fully compatible with the QGIS 2.x series of releases.

QGIS Layer Definitions (An ArcGIS like .lyr function for QGIS)

NOTE Just to clarify. This is not adding the ability to open ArcGIS .lyr files.

One of the reasons that I love working and being part of the QGIS project is how quickly you can take it from not having a needed feature to having said feature. A good example of this is a recent addition I added related to having a ArcGIS .lyr like feature. For those who don't use Arc, the .lyr file is a pretty much a file that points to the data, contains all the styling, and other information, you can then just add this file and it will do all the other magic for you.

A quote from the ArcGIS page on the topic

A layer can exist outside your map as a layer file (.lyr). This makes it easy for others to access the layers you've built. You can share layers over the network and by e-mail. When users add a layer file to their maps, it will draw exactly as it was saved as long as they can get access to the data referenced by the layer. A common way that users help support this is to use relative paths to each layer's data source.

A question came up on GIS.SE asking Does QGIS have the equivalent of ArcGIS's Layer (*.LYR) file?. To which the answer was. "Not really". Which of course was true. At the time.

That got me thinking. Why couldn't we have a feature like this? It would be handy to have as it would let you create layer shortcuts and the ability to a load layers quickly from a single place without worrying about were the data comes from. The XML that we need to recreate the layer on project load was already stored in the project file under the maplayer node. It already has everything we need we can just write that out to disk and create a new file type. After some digging into the API I found QgsMapLayer::writeLayerXML() and Bingo! .qlr was born.

Because I personally, and some others I talked to, didn't really like just "Save as Layer File.." as it sounds a bit vauge, we picked "QGIS Layer Definition file".

A QGIS Layer Deinition File is simply the XML maplayer node, with the id removed, saved to disk as a .qlr format.

Saving one is as simple as Right Click Layer -> Save As Layer Definition File..

qlrsave.png

and loading Layer -> Add from Layer Definition File...

qlrload.png

Simple!

The layer file will store any of the styles, labels, edit widgets, etc, that you have defined for that layer so it's just a matter of adding the file and you are good to go.

Like I said at the start it's simply the XML maplayer node, so if you move the data or want to change the datasource just open the file in a text editor and change it.

<!DOCTYPE qgis-layer-definition>
<maplayer minimumScale="-4.65661e-10" maximumScale="1e+08" simplifyDrawingHints="1" minLabelScale="0" maxLabelScale="1e+08" simplifyDrawingTol="1" geometry="Polygon" simplifyMaxScale="1" type="vector" hasScaleBasedVisibilityFlag="0" simplifyLocal="1" scaleBasedLabelVisibilityFlag="0">
  <datasource>F:/gis_data/cadastre.shp</datasource>
  <title></title>
  <abstract></abstract>
  <keywordList>
    <value></value>
  </keywordList>
  <layername>cadastre</layername>
  ... {style, etc}
</maplayer

This will work with any layer supported in QGIS, expect special plugin layers.

I will add loading from the browser dock before the release aswell once I get some time.

Can we get it in an older QGIS version?

All the methods that I used for this feature are exposed to the Python API. Once I get some free time I plan on making a plugin that is aimed at QGIS <2.3 to give those users the same feature. Keep an eye out for it in the plugin installer.

QGIS Layer Definitions (An ArcGIS like .lyr function for QGIS)

NOTE Just to clarify. This is not adding the ability to open ArcGIS .lyr files.

One of the reasons that I love working and being part of the QGIS project is how quickly you can take it from not having a needed feature to having said feature. A good example of this is a recent addition I added related to having a ArcGIS .lyr like feature. For those who don't use Arc, the .lyr file is a pretty much a file that points to the data, contains all the styling, and other information, you can then just add this file and it will do all the other magic for you.

A quote from the ArcGIS page on the topic

A layer can exist outside your map as a layer file (.lyr). This makes it easy for others to access the layers you've built. You can share layers over the network and by e-mail. When users add a layer file to their maps, it will draw exactly as it was saved as long as they can get access to the data referenced by the layer. A common way that users help support this is to use relative paths to each layer's data source.

A question came up on GIS.SE asking Does QGIS have the equivalent of ArcGIS's Layer (*.LYR) file?. To which the answer was. "Not really". Which of course was true. At the time.

That got me thinking. Why couldn't we have a feature like this? It would be handy to have as it would let you create layer shortcuts and the ability to a load layers quickly from a single place without worrying about were the data comes from. The XML that we need to recreate the layer on project load was already stored in the project file under the maplayer node. It already has everything we need we can just write that out to disk and create a new file type. After some digging into the API I found QgsMapLayer::writeLayerXML() and Bingo! .qlr was born.

Because I personally, and some others I talked to, didn't really like just "Save as Layer File.." as it sounds a bit vauge, we picked "QGIS Layer Definition file".

A QGIS Layer Deinition File is simply the XML maplayer node, with the id removed, saved to disk as a .qlr format.

Saving one is as simple as Right Click Layer -> Save As Layer Definition File..

Alt Text

and loading Layer -> Add from Layer Definition File...

Alt Text

Simple!

The layer file will store any of the styles, labels, edit widgets, etc, that you have defined for that layer so it's just a matter of adding the file and you are good to go.

Like I said at the start it's simply the XML maplayer node, so if you move the data or want to change the datasource just open the file in a text editor and change it.

<!DOCTYPE qgis-layer-definition>
<maplayer minimumScale="-4.65661e-10" maximumScale="1e+08" simplifyDrawingHints="1" minLabelScale="0" maxLabelScale="1e+08" simplifyDrawingTol="1" geometry="Polygon" simplifyMaxScale="1" type="vector" hasScaleBasedVisibilityFlag="0" simplifyLocal="1" scaleBasedLabelVisibilityFlag="0">
  <datasource>F:/gis_data/cadastre.shp</datasource>
  <title></title>
  <abstract></abstract>
  <keywordList>
    <value></value>
  </keywordList>
  <layername>cadastre</layername>
  ... {style, etc}
</maplayer

This will work with any layer supported in QGIS, expect special plugin layers.

I will add loading from the browser dock before the release aswell once I get some time.

Can we get it in an older QGIS version?

All the methods that I used for this feature are exposed to the Python API. Once I get some free time I plan on making a plugin that is aimed at QGIS <2.3 to give those users the same feature. Keep an eye out for it in the plugin installer.

IntraMaps Roam - A Python QGIS data collection app

For the last couple of months I, though Digital Mapping Solutions, have been working on a tablet friendly data collection application that has been built on Python and QGIS. For those of you who have seen my QMap project I started a year or so ago you can consider this a reincarnation of that project, and that project retired. Most of the code has been reworked and using the QGIS libs gave me full flexibility in layout and workflow.

IntraMaps Roam (or Roam for short) is a standalone, fully bundled, Python application that was created to do data collection with a QGIS backend. The primary use of Roam is in a disconnected setup were one might not have internet connection, however Roam is using QGIS so will support any data format QGIS does. You can can use Roam in a connected environment, if your internet premits, by having WFS and WMS layers, or direct database connections; it's up to you. Roam forms also allow for custom logic to be added to each form using Python so you can add your own workflow if needed.

Roam Map Window Roam Data Capture

The binary package comes with a config manager application that can be used to create and manage Roam projects

Config Manager Config Manager

The release page contains links to the 2.0 installers. The wiki contains all the information to get started. You can also take a look at the FAQ for the common questions.

Roam has been a great exercise in using and bundling QGIS libs with a Python application, which I have never done before but turned out to be pretty easy. Being a fully bundled application means you don't need to install QGIS, or Python, on the client in order to run the application. Everything is in a nice bundled exe.

As Roam is based on PyQt and QGIS it is under the GPL2 license. Pull requests are welcome.

Currently Roam is only being packaged for Windows, because that was our first priority, however there isn't a lot of Windows only stuff in the code itself so creating a version for OS X and Linux shouldn't be too hard for someone with the know how.

Links

Happy mapping!?

Build and deploy c++ QGIS custom application on windows

After a lot of troubles, I managed to compile and deploy a QGIS c++ app on windows. This small guide will describe the steps I followed. This has been tested on win xp and windows 7, both in 32 bits.

Development environment

Your app must be built using MSVC 9.0 (2008) since QGIS in OSGeo’s package was built with it. Hence, MinGW cannot be used.

  1. Install Microsoft Visual Studio Express 2008.
  2. Install QGIS and Qt libs using OSGeo4W installer
  3. Install Qt Creator
  4. If you want a debugger,you should install CDB. This can be achieved by installing Windows SDK environment. In the installation process, only select Debugging toos for windows.

I wasn’t able to use the compiler yet, so I am not 100% sure about 4.

Now, if you want to build using Qt Creator, it must be started in a proper environment. Adapt this batch to launch Qt Creator:

ECHO Setting up QGIS DEV ENV

set PYTHONPATH=

set OSGEO4W_ROOT=C:\OSGeo4W
call "%OSGEO4W_ROOT%\bin\o4w_env.bat"

@set QMAKESPEC=win32-msvc2008
@set PATH=%OSGEO4W_ROOT%\bin;%OSGEO4W_ROOT%\apps\qgis-dev\bin;%PATH%

@set INCLUDE=%INCLUDE%;%OSGEO4W_ROOT%\include;%OSGEO4W_ROOT%\apps\qgis-dev\include
@set LIB=%LIB%;%OSGEO4W_ROOT%\lib;%OSGEO4W_ROOT%\apps\qgis-dev\lib

path %OSGEO4W_ROOT%\bin;%SYSTEMROOT%\System32;%SYSTEMROOT%;%SYSTEMROOT%\System32\wbem;C:\Progra~1\Git\bin;C:\Qt\qtcreator-3.0.1\bin;%PATH%

set VS90COMNTOOLS=C:\Program Files\Microsoft Visual Studio 9.0\Common7\Tools\
call "C:\Program Files\Microsoft Visual Studio 9.0\VC\vcvarsall.bat" x86

start "Qt Creator" /B C:\Qt\qtcreator-3.0.1\bin\qtcreator.exe %*

Then, you need to configure a proper kit in Qt Creator.

  1. Go to Options -> Build & Run -> Compilers and check that Microsoft Visual C++ Compiler 9.0 is correctly detected.
  2. Then in Qt Versions tab, add Qt from the OSGeO installation, normally c:\OSGeo4W\bin\qmake.exe
  3. In Debuggers tab, add cdb.exe found in c:\Debugging tools for windows\ 
  4. Finally, check in Kits that it is properly configured.

Building the application

This is what looks like an application project file.

QT += core gui xml
greaterThan(QT_MAJOR_VERSION, 4): QT += widgets
TARGET = hfp
TEMPLATE = app
SOURCES += YOURSOURCES
HEADERS +=YOUR HEADERS
FORMS += YOUR FORMS
RESOURCES += images/images.qrc

win32:CONFIG(Release, Debug|Release) {
 LIBS += -L"C:/OSGeo4W/lib/" -lQtCore4
 LIBS += -L"C:/OSGeo4W/lib/" -lQtGui4
 LIBS += -L"C:/OSGeo4W/lib/" -lQtXml4
 LIBS += -L"C:/OSGeo4W/apps/qgis-dev/lib/" -lqgis_core
 LIBS += -L"C:/OSGeo4W/apps/qgis-dev/lib/" -lqgis_gui
}
else:win32:CONFIG(Debug, Debug|Release) {
 PRE_TARGETDEPS += C:/OSGeo4W/lib/QtCored4.lib
 PRE_TARGETDEPS += C:/OSGeo4W/lib/QtGuid4.lib
 PRE_TARGETDEPS += C:/OSGeo4W/lib/QtXmld4.lib
 LIBS += -L"C:/OSGeo4W/lib/" -lQtCored4
 LIBS += -L"C:/OSGeo4W/lib/" -lQtGuid4
 LIBS += -L"C:/OSGeo4W/lib/" -lQtXmld4
 LIBS += -L"C:/OSGeo4W/apps/qgis-dev/lib/" -lqgis_core
 LIBS += -L"C:/OSGeo4W/apps/qgis-dev/lib/" -lqgis_gui
}
win32:{
 INCLUDEPATH += C:/OSGeo4W/include
 DEPENDPATH += C:/OSGeo4W/include
 INCLUDEPATH += C:/OSGeo4W/apps/qgis-dev/include
 DEPENDPATH += C:/OSGeo4W/apps/qgis-dev/include
 DEFINES += GUI_EXPORT=__declspec(dllimport) CORE_EXPORT=__declspec(dllimport)
}
unix {
 LIBS += -L/usr/local/lib/ -lqgis_core -lqgis_gui
 LIBS += -L/usr/local/lib/qgis/plugins/ -lgdalprovider
 INCLUDEPATH += /usr/local/include/qgis
 DEFINES += GUI_EXPORT= CORE_EXPORT=
}

Remarks

  • GUI_EXPORT and CORE_EXPORT must be set to __declspec(dllimport). I don’t know exactly what it means, but I found out reading this thread, with some hazardous tries. If you don’t set these, you won’t be able to call any variable defined as extern in QGIS (e.g. cursors).
  • Qt release libraries shall not be mixed up with debug config in your project. In other words, use release libs for release mode and debug libs for debug mode.

With this, you should be able to compile your QGIS application in Qt Creator!

You can find some coding examples on github which are a bit old but still useful to start.

Now, to get the whole potential of QGIS libs, you must initialize the QgsApplication in your main window class:

#if defined(Q_WS_WIN)
  QString pluginPath = "c:\\OSGeo4W\\apps\\qgis-dev\\plugins";
  QString prefixPath = "c:\\OSGeo4W\\apps\\qgis-dev\\";
#else
  QString pluginPath = "/usr/local/lib/qgis/plugins/";
  QString prefixPath = "/usr/local";
#endif

  QgsApplication::setPluginPath( pluginPath );
  QgsApplication::setPrefixPath( prefixPath, true);
  QgsApplication::initQgis();

Deploying on windows

Since QGIS is not to be installed on the target computer, the built app will not be able to find the path declared in previous code.
There is probably a better approach, but here is a way to solve this:
Change the path to

  QString pluginPath = "c:\\myapp\\qgis\plugins";
  QString prefixPath = "c:\\myapp\\qgis";

This means you must deploy the app to this exact location: c:\myapp. In this directory, you need to create a qgis folder in which you will copy c:\OSGeo4W\apps\qgis-dev\resources and c:\OSGeo4W\apps\qgis-dev\plugins.

Besides, this you will need to copy some DLLs to be able to run the applications. You might want to use the dependency walker to find which are needed.

The batch file hereafter creates a folder on the building machine that will contain all the needed files in my case (it might be different in your case).

rmdir c:\myapp /Q /S
mkdir c:\myapp
mkdir c:\myapp\iconengines
mkdir c:\myapp\qgis
mkdir c:\myapp\qgis\resources
mkdir c:\myapp\qgis\plugins

copy PATHTOMYAPP\build-myapp-Desktop-Release\release\myapp.exe c:\myapp\
copy c:\OSGeo4W\bin\QtCore4.dll c:\myapp\
copy c:\OSGeo4W\bin\QtGui4.dll c:\myapp\
copy c:\OSGeo4W\bin\QtXml4.dll c:\myapp\
copy c:\OSGeo4W\bin\QtNetwork4.dll c:\myapp\
copy c:\OSGeo4W\bin\QtSvg4.dll c:\myapp\
copy c:\OSGeo4W\bin\QtWebKit4.dll c:\myapp\

copy c:\OSGeo4W\bin\zlib_osgeo.dll c:\myapp\
copy c:\OSGeo4W\bin\msvcr71.dll c:\myapp\
copy c:\OSGeo4W\bin\phonon4.dll c:\myapp\
copy c:\OSGeo4W\bin\proj.dll c:\myapp\
copy c:\OSGeo4W\bin\geos_c.dll c:\myapp\
copy c:\OSGeo4W\bin\gdal110.dll c:\myapp\
copy c:\OSGeo4W\bin\ogdi_32b1.dll c:\myapp\
copy c:\OSGeo4W\bin\libexpat.dll c:\myapp\
copy c:\OSGeo4W\bin\xerces-c_3_1.dll c:\myapp\
copy c:\OSGeo4W\bin\LIBPQ.dll c:\myapp\
copy c:\OSGeo4W\bin\SSLEAY32.dll c:\myapp\
copy c:\OSGeo4W\bin\LIBEAY32.dll c:\myapp\
copy c:\OSGeo4W\bin\krb5_32.dll c:\myapp\
copy c:\OSGeo4W\bin\comerr32.dll c:\myapp\
copy c:\OSGeo4W\bin\k5sprt32.dll c:\myapp\
copy c:\OSGeo4W\bin\gssapi32.dll c:\myapp\
copy c:\OSGeo4W\bin\hdf_fw.dll c:\myapp\
copy c:\OSGeo4W\bin\mfhdf_fw.dll c:\myapp\
copy c:\OSGeo4W\bin\jpeg_osgeo.dll c:\myapp\
copy c:\OSGeo4W\bin\jpeg12_osgeo.dll c:\myapp\
copy c:\OSGeo4W\bin\netcdf.dll c:\myapp\
copy c:\OSGeo4W\bin\geotiff.dll c:\myapp\
copy c:\OSGeo4W\bin\libtiff.dll c:\myapp\
copy c:\OSGeo4W\bin\sqlite3.dll c:\myapp\
copy c:\OSGeo4W\bin\spatialite4.dll c:\myapp\
copy c:\OSGeo4W\bin\freexl.dll c:\myapp\
copy c:\OSGeo4W\bin\iconv.dll c:\myapp\
copy c:\OSGeo4W\bin\libxml2.dll c:\myapp\
copy c:\OSGeo4W\bin\LIBMYSQL.dll c:\myapp\
copy c:\OSGeo4W\bin\hdf5.dll c:\myapp\
copy c:\OSGeo4W\bin\szip.dll c:\myapp\
copy c:\OSGeo4W\bin\libcurl.dll c:\myapp\
copy c:\OSGeo4W\bin\zlib1.dll c:\myapp\
copy c:\OSGeo4W\bin\openjp2.dll c:\myapp\
copy c:\OSGeo4W\bin\spatialindex1.dll c:\myapp\
copy c:\OSGeo4W\bin\qwt5.dll c:\myapp\

copy c:\OSGeo4W\apps\qt4\plugins\iconengines\qsvgicon4.dll c:\myapp\iconengines\

copy C:\Progra~1\Git\bin\libiconv-2.dll c:\myapp\
copy C:\Progra~1\Git\bin\libintl-8.dll c:\myapp\

copy c:\OSGeo4W\apps\qgis-dev\bin\qgis_Core.dll c:\myapp\
copy c:\OSGeo4W\apps\qgis-dev\bin\qgis_gui.dll c:\myapp\
copy c:\OSGeo4W\apps\qgis-dev\bin\msvcp90.dll c:\myapp\

copy c:\windows\system32\msvcp100.dll c:\myapp\
copy c:\windows\system32\msvcr100.dll c:\myapp\

copy C:\OSGeo4W\apps\qgis-dev\resources\* c:\myapp\qgis\resources
copy C:\OSGeo4W\apps\qgis-dev\plugins\* c:\myapp\qgis\plugins

To be able to run the app, on a fresh windows XP, I had to install:

And copy the whole folder c:\myapp from the building machine to the target machine.

It seems that from Vista, the 2005 redistributable package is included. So, no need to install it.

And voilà!

Keeping QGIS settings in sync on different machines

Here is a quick tip from a GIS.SE post that I answered the other day.

The topic was keeping the WMS settings in sync over different operating systems and machines. Normally QGIS will store it settings in the registry on Windows and in different locations on Linux and OS X. So then comes the question of how do you keep them in sync if you are using different machines.

Well the answer is simple. QGIS provides --optionspath and --configpath command line options in order to move the .qgis2 and settings files. Using these two options, or just the one depending on what you need, will allow you to store the QGIS settings in a different location. Rather then storing the settings in the registry, or .config and .plist files, it will create a .ini file and save everything there.

All in all this means you can redirect your QGIS settings to a folder on dropbox and tell your QGIS installs to load the settings from a single place keeping everything in sync. When you change a setting it will sync with Dropbox and onto your other machines.

The simple way on Windows to add the --optionspath and --configpath options is to copy the shortcut to QGIS and append it to the end of the Target.

--optionspath "F:\mydropbox\qgis" --configpath "F:\mydropbox\qgis"

QGIS IN THE CLOUD!!11! ok not really but still cool

  • <<
  • Page 79 of 142 ( 2821 posts )
  • >>

Back to Top

Sustaining Members