Adding ESRI’s World Hillshade layer to QGIS
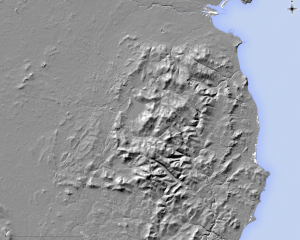
You may have seen my earlier tutorial where I described how to make nice looking hillshaded maps in QGIS using SRTM elevation data. Well, we don’t have to stop with just one hillshade layer on a map, it is possible to overlay multiple hillshades; a procedure that can increase the visual quality and detail. The following image is the hillshade we made before. Once you re-create a hillshade, following the previous tutorial, you can head to the next step (note that brightness and contrast settings may be different due to changes in how QGIS generates and displays hillshades).
We can improve the SRTM hillshade further by adding ESRI’s World Hillshade layer, which uses multi-directional illumination (also called a Swiss Hillshade in tribute to the celebrated Swiss cartographer Eduard Imhof). In addition, World Hillshade has a much higher resolution than SRTM 30m data in some regions of the world, it is 2m for most of the England and Wales, 10m for most of the US, 5m for Spain and 3m for Holland etc. The only drawback is that the style of this layer is somewhat controversial, some love it, some hate it, it looks like it’s illuminated from above, but mixing it with the SRTM hillshade obviates some of it criticised flaws.
To add the World Hillshade layer in QGIS go to the Layer Menu – Add Layer – Add ArcGIS MapServer Layer – click New and add the following URL:
https://services.arcgisonline.com/arcgis/rest/services/Elevation/World_Hillshade/MapServer
Notice QGIS 2.18 no longer needs a plugin to add ESRI layers, it new has this functionality built in. Also, open the url in a browser such as Firefox, it brings up a webpage that describes the layer. We also see links to other other layers. Yes, they can all be added to QGIS by simply taking the URL of the webpage that describe the layer and connecting to it via the ArcGIS MapServer Layer connector.
Name the layer World Hillshade and click Connect, then click and highlight the layer it connects to. Finally, click the Add button to add the layer to the canvas.
Next, we need to adjust the properties of the World Hillshade layer to properly overlay it above the SRTM hillshade layer. Make sure the World hillshade layer is the topmost layer. In the Layers Panel, right click Layer properties and in the window that opens up, click Style (if not visible). Next, change the Layer Blending mode (under color rendering) to Overlay. Adjust the layer’s brightness to around -20 and leave contrast at 0. If you find the scene is still too dark, brighten the SRTM Hillshade by increasing the layer’s brightness. You may also have to change (lower) the Min value of the Min – Max value boxes. Leave the contrast at 0 for the SRTM hillshade. Also, don’t brighten it too much as it might become washed out, loose detail, especially in bright areas. Play around the controls, settings may vary depending on the SRTM data you download and the version of QGIS you use.
Here’s a comparison in Ireland, a ring like structure of hills with a central peak. No, it’s not a meteorite crater. It’s a different kind of geological marvel, the Slieve Gullion Complex and its ring dyke; the deeply eroded remains of a 410 million year old Caledonian volcano. The SRTM hillshade is on the left and World Hillshade + SRTM hillshade is on the right (click on the image, it’s best appreciated full size):
We can see the World Hillshade + SRTM Hillshade layer shows much finer detail. We see a parallel array of roughly north-south orientated lines, these are fractures and faults that cut the Slieve Gullion Complex that were perhaps enhanced by glacial erosion. Also, look carefully, there seems to be some roads meandering across the landscape (hint, bottom of the map and right of the scale bar). You should get even better results with higher resolution World Hillshade data. We also notice that bending SRTM derived hillshade with World Hillshade adds a naturalistic illumination not apparent in multi-directional hillshading. So we have the best of both worlds, a high resolution hillshade and realistic looking illumination.
Hope you found this tutorial helpful.
References:
Baxter, S., 2008. A Geological Field Guide to Cooley Gullion, Mourne & Slieve Croob [pdf]. Geological Survey of Ireland, Dublin. p. 43-53.


