Related Plugins and Tags

QGIS Planet

Using Hy, a dialect of Lisp for Python, with QGIS

So tonight I rediscovered Hy. I had seen Hy before a while ago but never really sat down and tried it. Tonight just must have been one of those days to try something new.

So Hy is a dialect of Lisp but embedded in Python which means you can use any Python library will using a Lisp dialect. Pretty nifty.

My next thought was, how would this look using the QGIS libraries. So lets give it a try.

First we need to install Hy:

pip install Hy

Now just create a .hy file and add some code

(import qgis)
(import [qgis.core [QgsVectorLayer]])
(import [qgis.core.contextmanagers [qgisapp]])

(setv layers [])

(defn load-layer [file name]
    (setv layer (QgsVectorLayer file name "ogr"))
    (.append layers layer))

(defn print-layer [layer]
    (print "Layer Name:" (.name layer))
    (print "Valid:" (.isValid layer))
    (print "Extents:" (.toString (.extent layer))))

(defn main [app]
    (load-layer r"F:gis_datatest.shp" "test")
    (for [layer layers] (print-layer layer)))


(with [[app (apply qgisapp [] {"guienabled" False})]]
    (print "Loading QGIS")
    (main app))

run it in our shell and bingo.

F:devhy-qgis>hy qgistest.hy
Loading QGIS
Layer Name: test
Valid: True
Extents: 392515.3457026787800714,6461581.2076761415228248 : 392683.3794420150225051,6461705.1012571481987834
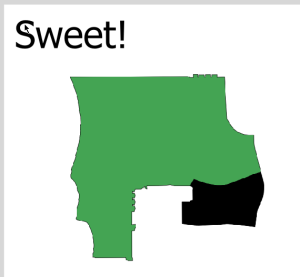
Sweet.

Just for reference the Python version of the above would be:

import qgis
from qgis.core import QgsVectorLayer
from qgis.core.contextmanagers import qgisapp

layers = []

def load_layer(file, name):
    layer = QgsVectorLayer(file, name, "ogr")
    layers.append(layer)

def print_layer(layer):
    print "Layer Name:", layer.name()
    print "Valid:", layer.isValid()
    print "Extents:", layer.extent().toString()

def main(app):
    load_layer(r"F:gis_datatest.shp", "test")
    for layer in layers:
        print_layer(layer)

with qgisappl(guienabled=False) as app:
    main(app)

More readable? No doubt, that is why I love Python, however the strange thing is the first time I looked at Lisp, including Hy, I thought “whoa all those parentheses back it up!1!” but strangely after using it for a while (read: not even a few hours) they don’t seem to be an issue, or not much of one anyway. YMMV.

The cool thing with using Hy is you can still use all the libraries you are used to as the example above shows, PyQt, QGIS, anything.

The other interesting, and pretty funky, thing is that you are able to import .hy files like normal Python files. If you create a file winning.hy you can just import winning into any Python application and it works.

Why bother? Mainly because learning something new is never a bad thing, and you never know what you might pick up.

Check out the Hy for more info on what you can do and how it works

I have also created a hy-qgis GitHub repo for some experiments.

Enjoy!


Filed under: Open Source

Animated QGIS map canvas item

Have you ever wanted to animate a QGIS map canvas item. No? Well soon you will.

First we need to create a custom QgsMapCanvasItem

from PyQt4.QtCore import QPointF, QRectF, QTimer, QObject, pyqtProperty, QPropertyAnimation, Qt
from PyQt4.QtGui import QPainter, QBrush, QColor
from qgis.gui import QgsMapCanvasItem
from qgis.core import QgsPoint

class PingLocationMarker(QgsMapCanvasItem):
    """
    Position marker for the current location in the viewer.
    """
    class AniObject(QObject):
        def __init__(self):
            super(PingLocationMarker.AniObject, self).__init_<a href="https://woostuff.files.wordpress.com/2014/10/marker.gif"><img src="https://woostuff.files.wordpress.com/2014/10/marker.gif?w=300" alt="marker" width="300" height="193" class="alignnone size-medium wp-image-61493" /></a>_()
            self._size = 0
            self.startsize = 0
            self.maxsize = 32

        @pyqtProperty(int)
        def size(self):
            return self._size

        @size.setter
        def size(self, value):
            self._size = value

    def __init__(self, canvas):
        self.canvas = canvas
        self.map_pos = QgsPoint(0.0, 0.0)
        self.aniobject = PingLocationMarker.AniObject()
        QgsMapCanvasItem.__init__(self, canvas)
        self.anim = QPropertyAnimation(self.aniobject, "size")
        self.anim.setDuration(1000)
        self.anim.setStartValue(self.aniobject.startsize)
        self.anim.setEndValue(self.aniobject.maxsize)
        self.anim.setLoopCount(-1)
        self.anim.valueChanged.connect(self.value_changed)
        self.anim.start()

    @property
    def size(self):
        return self.aniobject.size

    @property
    def halfsize(self):
        return self.aniobject.maxsize / 2.0

    @property
    def maxsize(self):
        return self.aniobject.maxsize

    def value_changed(self, value):
        self.update()

    def paint(self, painter, xxx, xxx2):
        self.setCenter(self.map_pos)

        rect = QRectF(0 - self.halfsize, 0 - self.halfsize, self.size, self.size)
        painter.setRenderHint(QPainter.Antialiasing)
        painter.setBrush(Qt.green)
        painter.setPen(Qt.green)
        painter.drawEllipse(QPointF(0,0), self.size, self.size)

    def boundingRect(self):
        return QRectF(-self.halfsize * 2.0, -self.halfsize * 2.0, 2.0 * self.maxsize, 2.0 * self.maxsize)

    def setCenter(self, map_pos):
        self.map_pos = map_pos
        self.setPos(self.toCanvasCoordinates(self.map_pos))

    def updatePosition(self):
        self.setCenter(self.map_pos)

marker = PingLocationMarker(iface.mapCanvas())

and this is the result

marker

wweeeee animated canvas item.

Run the above code in a QGIS Python console editor window and you should get the same effect.

So what is this magic? Well it turns out to be pretty easy all thanks to the handy class QPropertyAnimation. QPropertyAnimation takes a QObject and sets a property value until the end value is hit over the duration, the cool thing with this class is that it can take any QVariant type, which is pretty much anything, and it will go from start value to end value. You can also use other easing curves to change how the values change over time.

Super nifty!

The main important part of this is:

self.anim = QPropertyAnimation(self.aniobject, "size")
self.anim.setDuration(1000)
self.anim.setStartValue(self.aniobject.startsize)
self.anim.setEndValue(self.aniobject.maxsize)
self.anim.setLoopCount(-1)
self.anim.valueChanged.connect(self.value_changed)
self.anim.start()

which calls the value_changed and self.update() methods, when update is called paint will be called and we grab the current animation value. Note: -1 loop count means run forever.

self.aniobject is a custom QObject to hold our current animation value. QgsMapCanvasItem is not a QObject so we have to make another object to hold that value for us. I tried double inheritance here and it didn’t like it so I went with a nested class which is nice anyway.

And that is all you need to make a animated QgsMapCanvasItem, remember that QPropertyAnimation can be used on any QObject so you could do some pretty cool stuff with this if you have the need.

Be interested to hear any ideas on if we can use this in QGIS.

Note: A canvas item like this isn’t part of any layer. Canvas items live on on the canvas itself, above or below the map image. The markers that you see when you enable editing on a layer are canvas items, as are the lines when drawing a measure line, even the image you see in the canvas is a canvas item, etc.


Filed under: Open Source

Thank you from Stacey and I.

Though the kindness of everyone we made it to over $2000 to donate two, not one like we had planned at the start, camera packs to hospitals that need them. One will be going to the new Gold Coast hospital where Ellie was born and the other to another hospital who needs it. Both cameras will have Ellie’s name on them in her memory. They will go a long way to help preserve the memories of those last minutes just like it did for us with Ellie.

The money is now with Heartfelt and hopefully the cameras will be done soon. I will update this post with photos once they are done.

It was really amazing to see the number of people who I have never meet in person from all over the internet throwing in what they could to help us reach the goal. We are extremely grateful for everything everyone put in.

A massive thanks to everyone who donated:

  • Lyn Noble
  • Kylie and Nathan
  • Luke Bassett
  • Joanne Smith
  • Darryl & Angela Browning
  • Digital Mapping Solutions
  • David Baxter
  • Carl Wezel
  • Grandad and Grandma Woodrow
  • Bill Williamson
  • Helen Gillman
  • Karlie Jones
  • Lisa Gill
  • Andrew & Peta
  • Sally Drews
  • Matt Travis
  • Mummy, Daddy, Harry & Little Sis..
  • Terry Stigers
  • James McKeown
  • Jill Pask
  • Kym Zevenbergen
  • Jessica Nayler
  • Amelia Woodrow
  • Judy Burt
  • Russell and Suzann Woodrow
  • Jenny & Mark Gill
  • Emeley Sands
  • Rebecca Penny
  • Larissa Collins
  • Ross McDonald
  • Shantelle Sweedman
  • Rebbecca Ben izzy Erica
  • Aidan Woodrow & Andrew Smith
  • simbamangu
  • Sarah Rayner
  • Sassá
  • Matt Travis
  • Marco Giana
  • Heikki Vesanto
  • Jorge Sanz
  • Pure K.
  • Toby Bellwood
  • Andy Tice
  • Ujaval Gandhi
  • Matt Robinson
  • Geraldine Hollyman
  • Anonymous
  • Teresa Baldwin
  • Alexandre Neto
  • Chelsea Fell
  • Stephane Bullier
  • Nathan Saylor
  • Adrien ANDRÉ
  • Steven Feldman
  • Anita Graser
  • Chris Scott
  • Vicky Gallardo
  • Anonymous
  • Anonymous
  • Stevie Little

I will also add a massive thank you to DMS who has been super supportive though this whole year since Elly died, and they know very well the effect it has had on Stace and I over the past year.

In a perfect world we would never had to run a fund raiser for this but I’m glad Heartfelt exist to help those of us in need at the time.

Thank you from Stacey and I.


Filed under: Open Source

QGIS atlas on non geometry tables

This is proof that no matter how close you are to a project you can still miss some really cool stuff that you never knew or considered was possible.

The problem to solve:

You have a CSV with a row of colours. Each row should be a new map and each column is the colour for that feature.

This is example of that kind of input

A       B
#93b2f3    #FF0000 
#dfbdbb    #FF0000
#f9d230    #FF0000

This questhion was asked on GIS.SE this morning. When I first saw it I had no idea it was even possible, I was thinking along the same lines as the person asking, that it would have to be done with Python. Not hard, but a lot harder then something built in and I put it in the too hard basket. I thought the atlas can almost do that, almost but not really.

Well almost was wrong. It can.

Note: You will need QGIS 2.5 (2.6 when released) for this to work

Lets make some cool maps! (and go to GIS.SE and upvote Nyalls answer)

First open your vector layer and the CSV. Don’t worry about style just yet, we will do it later.

Create a composer and add your map.

Here comes the first part of the trick.

Enable Atlas and set the coverage layer to the CSV layer. Wait? What? That doesn’t make any sense. If you think about it for a while it does. We need a map for each row (or “feature”) in the CSV and atlas does just that.

atlas_colours

How do we style the features? Well here is the other part of the trick. In 2.6 there is a magic expression function that returns a field value from another feature. And it’s as simple as attribute( $atlasfeature , 'A' ) – give me the attribute from the current atlas feature for field ‘A’. Simple.

First we categorize our features so we have a symbol for each feature. I’m using a sample layer I have but you can understand how this works. The first feature is A and the other is B, etc, etc

render

Now to use another awesome feature of QGIS. The data defined symbol properties (and labels too). Change each symbol and define the colour data defined property. Using attribute( $atlasfeature , 'A' ) for the first one and attribute( $atlasfeature , 'B' ) for the second.

atlas_feature

That is it. Now jump back over to your composer and enable Atlas preview.

atlas1

atlas2

Bam! Magic! How awesome is that!

Now my other thought was. “Ok cool, but the legend won’t update”. I should learn by now not to assume anything. The legend will also update based on the colours from the feature.

atlas1_legend

atlas2_legend

How far can we take this. What if you need the label to match the colour. Simple just make the label text look like this:

<h1 style='color:[% "A" %]'>This is the colour of A</h1>

atlas1_label

Heaps of credit to Nyall and the others who have added all this great stuff to the composer, atlas, and the data defined properties. It’s not something that you will do every day but it’s great to see the flexibility of QGIS in these situations.

You can even make the background colour of the page match the atlas feature

atlas1_back

but don’t do that because people might think you are mad ;)


Filed under: Open Source

Fundraising for Eloise and Heartfelt

The death of our daughter was one of the hardest things my wife and I have ever had to deal with. It’s not something that I wish anyone ever have to experience and feel really sorry for those who have had to do it many times. There is something really raw about losing your own flesh and blood. It cuts deep, really really deep. There are really no words to describe the emptiness that you feel, or the feelings that follow after the event. Even with all the pain of loosing a child there is a great Australian service that helps to capture some of the final monents. The service is called Heartfelt and we used them for Ellie.

Heartfelt is a great free service that provides a photo session, including editing and prints (hard and digital) after, in the last and final days. This is the quote from their site:

Heartfelt is a volunteer organisation of professional photographers from all over Australia dedicated to giving the gift of photographic memories to families that have experienced stillbirths, premature births, or have children with serious and terminal illnesses.

Heartfelt is dedicated to providing this gift to families in a caring, compassionate manner.

All services are provided free of charge

Pretty impressive stuff. The last thing you want to have to do in a time like that is shell out for photos when you have other pressing issues.

As Ellie’s 1st Birthday is coming in up October Stace and I would love to raise enough money to donate a camera pack to a hospital though Heartfelt in Elly’s name. We have created a fundraiser page in her name at: http://www.mycause.com.au/page/79669/eloises1stbirthdayheartfelt in order collect dontations for anyone who would like to help.

Camera packs can be donated to a hospital to allow staff at the hospital to capture photos if Heartfelt can’t make it. The bonus is that Heartfelt will still edit and print the photos. How bloody awesome is that! More info on the camera packs is at: http://www.mycause.com.au/page/79669/eloises1stbirthdayheartfelt

We would be greatful for any donations, big or small, so we can donate a camera pack in Elly’s name.

We love and miss you a lot Eloise.


Filed under: Open Source

Function editor for QGIS expressions

A new feature for QGIS 2.8 is a function editor for expressions. Being able to define your own custom functions has be possible for a while now, over a year, I even have a plugin (Expressions+) that adds some extra ones, however it wasn’t easy for new users and required you to create files that lived on python path while also editing the startup.py file for QGIS so that functions got registed at start up. Way too much effort for my liking.

This feature is now exposed via the expression builder on the Function Editor tab. The function editor will create new Python files in qgis2\python\expressions and will auto load all functions defined when starting QGIS. I remember Sean Gillies saying that Python support in a field calculator should be a gateway to full Python programming, can’t get any more Python then full Python modules.

The best way to show this feature is a quick video so here it is

The play button in the editor will run the current editor file in the QGIS session and register any functions it finds, it will also save the file in the expressions folder.

You can make a new file by pressing the new file button which will add the basic function template, changing the name in the combobox and hitting save will save the file.

The function editor allows you have to define reuseable functions for your QGIS. If you want to share a function you simply share the .py file from the expressions folder and give it to another user. In future versions of QGIS we might have a way to download other users functions.

Auto expanding values

You can also use the args="auto" keyword in place of the number of args which will let QGIS work it out and expand the arguments for you.

Here is an example

@qgsfunction(args="auto", group='Custom')
def myfunc(value1, value2 feature, parent):
    pass

and can be used like this:

myfunc('test1', 'test2')

QGIS will workout how many arguments your function takes based on what you have defined. Note: The last arguments should always be feature, parent, these are not included in the count.

Raising errors

If you need to report a error from a function simply use the raise method like normal in QGIS and raise an exception.

@qgsfunction(args="auto", group='Custom')
def myfunc(value1, value2 feature, parent):
    raise Expection("Hahah Nope!")

The function wrapper will catch the exception and raise it though the expression engine.

A couple of things to note

  • New functions are only saved in the expressions folder and not in the project file. If you have a project that uses one of your custom functions you will need to also share the .py file in the expressions folder.
  • The editor doesn’t unregister any functions. If you define a function called test, hit play, change the name to test_2, hit play, both functions will exist until you reload QGIS.

Filed under: Open Source

QGIS gets Oracle support!

Seems this is a good day for QGIS Oracle users. According this commit made by Jürgen QGIS now has built-in Oracle support. Win!

Native Oracle support can now see QGIS being opened up to a wider user base yet again. A large user base normally means more people willing to sponsor awesome new features and bug fixes. Having seen the growth in the user base from having native MS SQL Server 2008+ support I can imagine what it will be like with Oracle.

The list of formats QGIS can open and edit is getting larger and larger with each release. Is there a future for vendor lock in? I can’t see it.

Standard disclaimer about latest dev build and new features :)


Filed under: Open Source, qgis Tagged: FOSSGIS, gis, Open Source, oracle, osgeo, qgis, qgis-editing, Quantum GIS

New QGIS PDF and HTML manuals

A quick update from the QGIS documentation team today on the mailing list. The QGIS 1.8 manual is now available in HTML and PDF form.

HTML manual can be found at:
http://docs.qgis.org/html/en/docs/user_manual/index.html

PDF manual at:
http://docs.qgis.org/pdf/QGIS-1.8-UserGuide-en.pdf

This has been part of an ongoing effort from the documentation team since before the 1.8 release to bring our all our documentation into reStructedText rather then LaTeX. Moving to reStructedText allows quicker updates and a larger range of final output formats.

I would like to thank everyone who has been involved in this process as I know what a grueling process updating documentation can be.

Community notice

Just remember you don’t have to be a programmer to contribute to an open source project. If you think you could contribute to the updating of the QGIS documentation please contact the team on the mailing list.


Filed under: Open Source, qgis Tagged: FOSSGIS, gis, Open Source, osgeo, qgis, Quantum GIS

Using a QGIS spatial index to speed up your code

If you need to do any kind of spatial operations in QGIS using Python or C++ you really want them to be as fast a possible in order reduce the amount of time you make the user wait. Lets take the simple scenario of a recent question that was asked on gis.stackexchange; Summing up values of neighboring polygons?.

I went for the SQL approach as I like how quick SQL can express what you need to do, however SQL is not the only way to skin a cat as spatialthoughts has shown in his blog post. Here Ujaval has used Python to find the neighboring polygons of each feature. Running the script on a small dataset yields results in reasonable time however running it on a larger dataset can take a long time.

In order to check if a feature touches another you need to have two features to compare against each other. The simple way to do this is to create two loops where you check each feature against every other feature. Here is a quick code example of just that.

layer = qgis.utils.iface.activeLayer()
# Select all features along with their attributes
allAttrs = layer.pendingAllAttributesList()
layer.select(allAttrs)
# Get all the features to start
allfeatures = {feature.id(): feature for (feature) in layer}

def noindex():
        for feature in allfeatures.values():
                for f in allfeatures.values():
                        touches = f.geometry().touches(feature.geometry())
                        # It doesn't matter if we don't return anything it's just an example

import timeit
print "Without Index: %s seconds " % timeit.timeit(noindex,number=1)

So the above code is pretty simple, just loop each feature and check against every other feature. No worries. No worries at least until you run this on a large dataset then I think you can see the issue here. Running the above code on a layer with around 28000 features takes 1912.41 seconds – that’s 31 minutes. Holy crap!

Note: We put all the features of the layer into a dictionary as it will make lookup quicker in the later index example.

How can we speed up the above code? Lets take a gander at QgsSpatialIndex

QgsSpatialIndex to rule them all

QgsSpatialIndex is a wrapper around the open source SpatailIndex lib and uses a RTree for an index method. If you don’t know what an index is you can think of it like the index in a book – a pointer to a location in the book rather then having to scan every page to find a word.

There isn’t much to using QgsSpatialIndex just insert each QgsFeature and it handles the rest, when we need something out we just use the intersects method to return any features inside an area.

layer = qgis.utils.iface.activeLayer()
# Select all features along with their attributes
allAttrs = layer.pendingAllAttributesList()
layer.select(allAttrs)
# Get all the features to start
allfeatures = {feature.id(): feature for (feature) in layer}

def withindex():
        # Build the spatial index for faster lookup.
        index = QgsSpatialIndex()
        for f in allfeatures.values():
                index.insertFeature(f)

        # Loop each feature in the layer again and get only the features that are going to touch.
        for feature in allfeatures.values():
          # Get the ids of all the features in the index that are within
          # the bounding box of the current feature because these are the ones
          # that will be touching.
          ids = index.intersects(feature.geometry().boundingBox())
          for id in ids:
            f = allfeatures[id]
            if f == feature: continue
            touches = f.geometry().touches(feature.geometry())
            # It doesn't matter if we don't return anything it's just an example

import timeit
print "With Index: %s seconds " % timeit.timeit(withindex,number=1)

Running this code on our 28000 feature layer returns the results in 10 seconds. 31 minutes down to 10 seconds by just using a spatial index. Nice!

So the next time you need to do some spatial operations remember to use the handy QgsSpatialIndex in order to speed up your code. If you don’t want to use QgsSpatialIndex, or need some more flexiblity, you could even use the Python RTree module.

Full code

layer = qgis.utils.iface.activeLayer()

# Select all features along with their attributes
allAttrs = layer.pendingAllAttributesList()
layer.select(allAttrs)
# Get all the features to start
allfeatures = {feature.id(): feature for (feature) in layer}

def noindex():
	for feature in allfeatures.values():
		for f in allfeatures.values():
			touches = f.geometry().touches(feature.geometry())
			# It doesn't matter if we don't return anything it's just an example

def withindex():
	# Build the spatial index for faster lookup.
	index = QgsSpatialIndex()
	map(index.insertFeature, allfeatures.values())

	# Loop each feature in the layer again and get only the features that are going to touch.
	for feature in allfeatures.values():
	  ids = index.intersects(feature.geometry().boundingBox())
	  for id in ids:
	    f = allfeatures[id]
	    touches = f.geometry().touches(feature.geometry())
	    # It doesn't matter if we don't return anything it's just an example

import timeit
print "With Index: %s seconds " % timeit.timeit(withindex,number=1)
print "Without Index: %s seconds " % timeit.timeit(noindex,number=1)


Filed under: Open Source, qgis Tagged: FOSSGIS, gis, qgis, Quantum GIS, spatial operations

Installing Python setuptools into OSGeo4W Python

The easiest way install Python libraries is to use easy_install and pip.  easy_install and pip are package managers for Python. From the easy_install page:

Easy Install is a python module (easy_install) bundled with setuptools that lets you automatically download, build, install, and manage Python packages.

and from the pip page:

pip is a tool for installing and managing Python packages, such as those found in the Python Package Index. It’s a replacement for easy_install.

To get easy_install you need to install Python setuptools and you are good to go. Sounds easy!  However the setuptools installer assumes that you have the normal standalone Python installed which writes it’s install location to the registry, and when you run the installer it will say that it can’t find Python on the system.  What the!?

If you have installed QGIS, or any other tool from the OSGeo4W install, you will see that OSGeo4W bundles its own version of Python in: C:\OSGeo4W\apps\python27. This is the Python that is used when calling python in the OSGeo4W shell.  It seems someone on the OSGeo wiki has made a bootstrapped installer for setuptools that will install setuptools and easy_install into the  C:\OSGeo4W\apps\python27 folder for you.

Steps to take

  • Download ez_setup.py
  • Run python ez_setup.py in your OSGeo4W shell
  • Done!

To install a package with easy_install just use:

easy_install {packagename}

I wanted to have bottle and flask installed:

easy_install bottle

which gives you something like:

Searching for bottle
Reading http://pypi.python.org/simple/bottle/
Reading http://bottle.paws.de/
Reading http://github.com/defnull/bottle
Reading http://bottlepy.org/
Best match: bottle 0.11.4
Downloading http://pypi.python.org/packages/source/b/bottle/bottle-0.11.4.tar.gz#md5=f767c340de0b7c9581917c48e609479b
Processing bottle-0.11.4.tar.gz
Running bottle-0.11.4\setup.py -q bdist_egg –dist-dir c:\users\woo\appdata\local\temp\easy_install-5b4qq6\bottle-0.11.4\egg-dist-tmp-q2yd68
zip_safe flag not set; analyzing archive contents…
bottle: module references __file__
bottle: module references __path__
Adding bottle 0.11.4 to easy-install.pth file
Installing bottle.py script to C:\OSGeo4W\apps\Python27\Scripts
Installed c:\osgeo4w\apps\python27\lib\site-packages\bottle-0.11.4-py2.7.egg
Processing dependencies for bottle
Finished processing dependencies for bottle

Install pip

Note

Most of the time any Python packages that are needed by your OSGeo4W tools are bundled in the installer and can be downloaded using the OSGeo4W installer, however there have been cases when I wanted to install a non OSGeo4W package into my setup by using easy_install or pip. Like bottle and flask in the example above.


Filed under: Open Source Tagged: FOSSGIS, osgeo, python, qgis, Quantum GIS

Five new awesomely awesome QGIS features – Round 2

As QGIS is such a fast moving project I have decided to make this a regular blog post in order to highlight some new features added to QGIS. If you haven’t already, don’t forget to check out round one.

Remember that some of these features may still only be new which might change between now and the next official released version. With that out of the way lets get listing.

Atlas integration

If you are a regular user of QGIS Python plugins, and who isn’t, then you would have used the awesome Atlas plugin developed by Vincent Picavet. This great tool can be used to generate mapbooks, or an atlas as some people like to say, using a coverage layer and a print composer. What makes this even more awesome is that it is now built into the print composer.

Atlas composer intergration

The builtin atlas function also gives you the ability to use an expression to do runtime text replacement, including access to all the fields on the coverage layer.  The coverage layer doesn’t even have to be a region layer, it can be a simple point layer, or even a line layer.   You can see the result of me running the atlas generation from the above example here

Big thanks to Oslandia for integrating this great feature, and the companies sponsoring the work.

New Python console

This new addition comes from the great work that Salvatore Larosa has been doing to add a better Python console to QGIS.

The new Python console includes attribute auto complete, syntax highlighting, better copy and paste, uploading to codepad, the ability to run code from a file, etc.  You don’t realise how much difference there is until you go back to using the old one in version 1.8.

New Python console

Tabbed and groups in builtin forms

One of the things I really loved about QGIS, coming from MapInfo, was the builtin forms.  Just having the ability to enter data using controls like combo boxes, calendar widgets, etc makes you one step closer to having better data.   This feature is the exact reason I setup a 67 year old for kerb data collection.

As good as they are the builtin forms have an issue of ending up with as a big scrolling list with lots of fields; also the lack of  the ability to group or put fields on tabs in the UI meant you had to create a custom form.  Well not any more.

There is now a combo box on the Fields tab that allows you to build a generated form but also add tabs and group boxes.  You can even have the same field shown more then once on the form, handy for something like an ID field that you would like to show on each tab.

With this new ability the builtin forms can get me 95% of the way for data entry jobs, the other 5% I just make a custom form – but that is very rare.

Sextante

Sextante is a great and powerful analytical framework that has been added to the core of QGIS thanks to Victor Olaya.  This is not a feature that I use a lot but this is only due to most of my work being in development and not analysis, however that doesn’t mean that it’s not a really cool feature.

One of the greatest things about the Sextante toolbox is that it allows you to integrate other great open source tools like GRASS, SAGA, R, OTB, etc, right into your QGIS workflow and view the results in the canvas. It even includes a modeller so that you can build a connected diagram of all the bits of your process, even if it crosses between programs.

The toolbox

For me what is even better is that you can use Sextante in your plugins or custom Python code.  Sextante has a Python interface – well the whole thing is written in Python – that you can use to run a Sextante supported algorithm.

import sextante
outputs_0=sextante.runalg("grass:v.crossbones", /file, 0, ,, 1, 2, 3, 4, 1=3.0,2=8.0,5=6.0,8=6.0,11=6.0,14=6.0, None)
outputs_1=sextante.runalg("grass:v.delaunay", outputs_0['output'], True, True, None)
outputs_2=sextante.runalg("grass:v.dissolve", outputs_0['output'], , None)

Victor has created a blog to cover some Sextante recipes at QGIS-SEXTANTE cookbook/. There are also some really cool example of Sextante in use at:

Massive amount of composer additions

This last feature, or rather feature set,  comes from the sponsorship and support of the World BankAustralia-Indonesia Facility for Disaster Reduction, Geoscience Australia and the GFDRR.  Most of this work was done to aid in the development of a new QGIS plugin called inaSAFE, which has also received some great praise

“(InaSAFE) is very beneficial for all of us. It’s a good example of our partnership.”
Dr Susilo Bambang Yudhoyono – President of Indonesia

Some of the improvements include:

  • A new loadFromTemplate method, in the API, that can do text replacement in the QGIS composer template.
  • Better support for EPSG:4326 scale bars
  • Multipage in one composer
  • Automatic overview frame in map frame
  • HTML frame
  • Zebra style grid frame border
  • More control of grid labels. Inside, outside, disabled
  • etc, etc

These are great additions to the QGIS composer and I have already used the overview frame feature along with the new atlas integration  to make some quick nice looking map books. \

A huge thanks to the World BankAustralia-Indonesia Facility for Disaster ReductionGeoscience Australia and the GFDRR, and all the developers included.

You can see some of the output that InaSAFE generates using some of these new features at http://quake.linfiniti.com/

P.S The World Bank also sponsored the new raster Save As.. ability just like we have for vector layers.


Filed under: Open Source, qgis Tagged: FOSSGIS, gis, Open Source, osgeo, qgis, Quantum GIS

FOSS4G-AU in summary

Last Thursday and Friday was our first local Australian FOSS4G event which was hosted at the CSRIO building in Brisbane.  Very big thanks to CSRIO for hosting the event.  The venue was setup perfectly for  hosting an event like this, including dual projectors for presenting, video calls over to Perth, etc.

The first day was done using a un-conference style of event. This is the first time I’ve been to a un-conference and I liked the format a lot.   Once everyone was there on the first morning we collected ideas from people and everyone voted on which ones they would like to see.  After we had picked enough topics Shaun and I made a program for the day and we started.

Topics included:

Me presenting QMap

The second day was a code sprint.  I worked on converting a MapBasic scripts from one of the guys to QGIS, and Jody enlisted the others to help check the headers of the GeoServer project so that it can finally pass OSGeo incubation.

Overall I think it was a very successful event.  I would like to make these a yearly event if we can, provided that we have people to talk, or projects to work on.

More information about up coming OSGeo events in Australia and New Zealand can be found at http://www.meetup.com/osgeo-aust-nz/


Filed under: Open Source, qgis Tagged: FOSSGIS, gis, Open Source, open source gis, osgeo, qgis, Quantum GIS

Australian FOSS4G is here

So that came around quick.  Seems it is November already.

Tomorrow is the FOSS4G-Au a locally organized un-conference.

How do I register?

If you would still like to come – which you should – you can register here (it’s free!) http://www.meetup.com/osgeo-aust-nz/events/83965312/ but you must RSVP on the meetup page in order to get building access and internet access.

Where is it at? (Directions)

The un-conference is held at The Queensland Centre for Advanced Technologies in Brisbane. Kudos to CSIRO for allowing us to use their facilities.

More details on un-conference?

Jody Garnett has also done a post on the un-conference and what this kind of conference style is like.  You can find more details here: http://how2map.blogspot.com.au/2012/11/foss4g-au-tomorrow.html 

The venue


Filed under: Open Source, qgis Tagged: foss4g, FOSSGIS, Open Source, OSS, qgis

User defined expression functions for QGIS

Ever since I added expression based labels, including the new expression builder UI, something that I always wanted to add is the ability to define custom user defined functions in Python (or C++) and use them in an expression. The expression engine is used for labels, rule based rendering, layer actions, field calculator, and atlas composer tags.  Thanks to the all the awesome work on the expression engine by Martin all this cool stuff is now possible.

Today I pushed a commit into master that adds the ability to define a function in Python (or C++), register it in the expression engine, then use it anywhere expressions are used.

The good stuff

Lets take a use case from Ujaval Gandhi and his example of counting vertices for each feature.

First we need to import the new qgsfunction decorator function from qgis.utils. The qgsfunction decorator will take a normal Python function, wrap it up in the class used to define a function, and register it in the engine.

So what does an empty function look like:

from qgis.utils import qgsfunction
from qgis.core import QGis

@qgsfunction(0, "Python")
def vertices(values, feature, parent):
	pass

@qgsfunction(0, "Python") means we are defining a new vertices function that takes 0 args and lives in the “python” group in the expression builder UI. Any custom function must take (values, feature, parent) as python args. values is a list of QVariants passed into the function, feature is the current QgsFeature, and parent is expression engine node (you use this to raise errors).

Lets stick some more logic in there:

from qgis.utils import qgsfunction
from qgis.core import QGis

@qgsfunction(0, "Python")
def vertices(values, feature, parent):
	"""
		Returns the number of vertices for a features geometry
	"""
	count = None
	geom = feature.geometry()
	if geom is None: return None
	if geom.type() == QGis.Polygon:
		count = 0
		if geom.isMultipart():
		  polygons = geom.asMultiPolygon()
		else:
		  polygons = [ geom.asPolygon() ]
		for polygon in polygons:
		  for ring in polygon:
		    count += len(ring)
	return count

Pretty simple. Get the geometry from the feature, check if it’s a polygon, if it is then count the number of vertices and return that number.

Now that we have that all done we can save it into a file in our .qgis/python folder, lets call it userfunctions.py (note you don’t have to save it here, anywhere that QGIS can find it will do.  Anywhere on PATH)

Lets open QGIS and run import userfunctions.py:

Importing functions from userfunctions.py

Now open the label properties for the layer:

The new function shown in the expression builder

Nice! Notice also that the function doc string is used as the function help. How cool is that.  You can also see the $ sign in front of the function, this is because any functions that take no args are considered special and use the $ sign as a convention, this is all automatic when the function is registered.

And the result is:

The label using the new function

You can even use it in the rule based rendering:

Rule rendering using new function

Enjoy!

Notes

  • You must unregister a function once you are finished with it using QgsExpression.unregisterFunction(name). This mainly applies to plugins where the user might unload your plugin and the code is no longer available. In the above example we could import userfunctions and never unregister because we plan on using it for the whole session.
  • You can’t override the built-in methods.

Filed under: Open Source, qgis Tagged: FOSSGIS, gis, Open Source, OSS, qgis, Quantum GIS

FOSS4G-AU un-conference

Another quick announcement for today. The local FOSS4G-AU chapter is holding un-conference and code sprint in Brisbane on the 15 and 16th of November 2012.

Ben Caradoc-Davies made the announcement on the mailing list the other day:

The Free and Open Source Software for Geospatial Australia (FOSS4G-AU)
2012 Unconference and Code Sprint will be held at CSIRO’s Queensland
Centre for Advanced Technologies (QCAT), Pullenvale QLD.
15 November: Unconference
16 November: Code Sprint
This is a participant-organised event: please add your unconference and code sprint topic suggestions to the wiki. Organisers are welcome; please speak up.

See here for details: http://wiki.osgeo.org/wiki/FOSS4G-AU_2012

RSVP essential for building access. Please sign up here:
http://www.meetup.com/osgeo-aust-nz/events/83965312/

Email: [email protected] (sign up here http://lists.osgeo.org/mailman/listinfo/aust-na)

Kind regards,
Ben Caradoc-Davies
Software Engineer
CSIRO Earth Science and Resource Engineering
Australian Resources Research Centre

Being part of osgeo-aust-nz and the local Australian open source GIS movement it’s great to see events like this being organized.

I’ll be there, most likely pimping some QGIS stuff.

Hope to see you there.

Just remember that RSVP is essential to get into the building.


Filed under: Open Source Tagged: foss4g, FOSSGIS, osgeo, qgis

QGIS Training in Brisbane (and other places in Australia)

Just a quick post to let everyone know that DMS will be running QGIS training on the 20 Nov 2012 to the 21 Nov 2012 in Brisbane, QLD. More information can be found at http://mapsolutions.com.au/training/quantum-gis/introduction-to-qgis.aspx

Other dates include:

23 Oct 2012 – 24 Oct 2012 – Perth
13 Nov 2012 – 14 Nov 2012 – Perth
20 Nov 2012 – 21 Nov 2012 – Brisbane
22 Nov 2012 – 23 Nov 2012 – Melbourne


Filed under: Open Source, qgis Tagged: osgeo, qgis, Quantum GIS

Back to Top

Sustaining Members