QGIS Planet

Create a QGIS vector data provider in Python is now possible


Why python data providers?

My main reasons for having Python data provider were:

  • quick prototyping
  • web services
  • why not?


This topic has been floating in my head for a while since I decided to give it a second look and I finally implemented it and merged for the next 3.2 release.


How it’s been done

To make this possible I had to:

  • create a public API for registering the providers
  • create the Python bindings (the hard part)
  • create a sample Python vector data provider (the boring part)
  • make all the tests pass


First, let me say that it wasn’t like a walk in the park: the Python bindings part is always like diving into woodoo and black magic recipes before I can get it to work properly.

For the Python provider sample implementation I decided to re-implement the memory (aka: scratch layers) provider because that’s one of the simplest providers and it does not depend on any external storage or backend.


How to and examples

For now, the main source of information is the API and the tests:

To register your own provider (PyProvider in the snippet below) these are the basic steps:

metadata = QgsProviderMetadata(PyProvider.providerKey(), PyProvider.description(), PyProvider.createProvider)
QgsProviderRegistry.instance().registerProvider(metadata)

To create your own provider you will need at least the following components:

  • the provider class itself (subclass of QgsVectorDataProvider)
  • a feature source (subclass of QgsAbstractFeatureSource)
  • a feature iterator (subclass of QgsAbstractFeatureIterator)

Be aware that the implementation of a data provider is not easy and you will need to write a lot of code, but at least you could get some inspiration from the existing example.


Enjoy wirting data providers in Python and please let me know if you’ve fond this implementation useful!

The post Create a QGIS vector data provider in Python is now possible first appeared on Open Web Solutions, GIS & Python Development.

Welcome QGIS 3 and bye bye Madeira

Last week I’ve been in Madeira at the hackfest, like all the past events this has been an amazing happening, for those of you who have never been there, a QGIS hackfest is typically an event where QGIS developers and other pasionate contributors like documentation writers, translators etc. gather together to discuss the future of their beloved QGIS software. QGIS hackfest are informal events where meetings are scheduled freely and any topic relevant to the project can be discussed. This time we have brought to the table some interesting topics like:

  • the future of processing providers: should they be part of QGIS code or handled independently as plugins?
  • the road forward to a better bug reporting system and CI platform: move to gitlab?
  • the certification program for QGIS training courses: how (and how much) training companies should give back to the project?
  • SWOT analysis of current QGIS project: very interesting discussion about the status of the project.
  • QGIS Qt Quick modules for mobile QGIS app
Tehre were also some mentoring sessions where I presented:
  • How to set up a development environment and make your first pull request
  • How to write tests for QGIS (in both python and C++)
  At this link you can find all the video recordings of the sessions: https://github.com/qgis/QGIS/wiki/DeveloperMeetingMadeira2018   Here is a link to the Vagrant QGIS developer VM I’ve prepared for the session: https://github.com/elpaso/qgis-dev-vagrant/   I’ve got a good feedback from other devs about my sessions and I’m really happy that somebody found them useful, one of the main goals of a QGIS hackfest should really be to help other developers to ramp up quicly into the project. Other than that, I’ve also find the time to update to QGIS 3.0 some of my old plugins like GeoCoding and QuickWKT.   Thanks to Giovanni Manghi and to Madeira Government for the organizazion and thanks to all QGIS sponsors and donors!   About me: I started as a QGIS plugin author, continued as the developer of the plugin official repository at https://plugins.qgis.org and now I’m one of the top 5 QGIS core contributors. After almost 10 years that I’m in the QGIS project I’m now not only a proud member of the QGIS community but also an advocate for the open source GIS software movement.

The post Welcome QGIS 3 and bye bye Madeira first appeared on Open Web Solutions, GIS & Python Development.

Building QGIS master with Qt 5.9.3 debug build

Building QGIS from sources is not hard at all on a recent linux box, but what about if you wanted to be able to step-debug into Qt core or if you wanted to build QGIS agains the latest Qt release? Here things become tricky. This short post is about my experiments to build Qt and and other Qt-based dependencies for QGIS in order to get a complete debugger-friendly build of QGIS.   Start with downloading the latest Qt installer from Qt official website: https://www.qt.io/download-qt-for-application-development choose the Open Source version.   Now install the Qt version you want to build, make sure you check the Sources and the components you might need. Whe you are done with that, you’ll have your sources in a location like /home/user/Qt/5.9.3/Src/ To build the sources, you can change into that directory and issue the following command – I assume that you have already installed all the dependencies normally needed to build C++ Qt programs – I’m using clang here but feel free to choose gcc, we are going to install the new Qt build into /opt/qt593.

./configure -prefix /opt/qt593 -debug -opensource -confirm-license -ccache -platform linux-clang
When done, you can build it with
make -j9
sudo make install
  To build QGIS you also need three additional Qt packages   QtWebKit from https://github.com/qt/qtwebkit (you can just download the zip): Extract it somewhere and build it with
/opt/qt593/bin/qmake WebKit.pro
make -j9
sudo make install
  Same with QScintila2 from https://www.riverbankcomputing.com/software/qscintilla
/opt/qt593/bin/qmake qscintilla.pro
make -j9
sudo make install
  QWT is also needed and it can be downloaded from https://sourceforge.net/projects/qwt/files/qwt/6.1.3/ but it requires a small edit in qwtconfig.pri before you can build it: set QWT_INSTALL_PREFIX = /opt/qt593_libs/qwt-6.1.3 to install it in a different folder than the default one (that would possibly overwrite a system install of QWT). The build it with:
/opt/qt593/bin/qmake qwt.pro
make -j9
sudo make install
  If everything went fine, you can now configure Qt Creator to use this new debug build of Qt: start with creating a new kit (you can probably clone a working Qt5 kit if you have one). What you need to change is the Qt version (the path to cmake) to point to your brand new Qt build,: Pick up a name and choose the Qt version, but before doing that you need to click on Manage… to create a new one: Now you should be able to build QGIS using your new Qt build, just make sure you disable the bindings in the CMake configuration: unfortunately you’d also need to build PyQt in order to create the bindings.   Whe QGIS is built using this debug-enabled Qt, you will be able to step-debug into Qt core libraries! Happy debugging!  

The post Building QGIS master with Qt 5.9.3 debug build first appeared on Open Web Solutions, GIS & Python Development.

Essen 2017 QGIS Hackfest

Another great QGIS hackfest is gone, and it’s time for a quick report. The location was the Linux Hotel, one of the best places where open source developers could meet, friendly, geek-oriented and when the weather is good, like this time, villa Vogelsang is a wonderful place to have a beer in the garden while talking about software development or life in general. This is a short list of what kept me busy during the hackfest:

  • fixed some bugs and feature requests on the official QGIS plugin repo that I’m maintaining since the very beginning
  • make the QGIS official plugin repository website mobile-friendly
  • QGIS Server Python Plugin API refactoring, I’ve completed the work on the new API, thanks to the ongoing server refactoring it’s now much cleaner than it was in the first version
  • attribute table bugs: I started to address some nasty bugs in the attribute table, some of those were fixed during the week right after the hackfest
  • unified add layer button, we had a productive meeting where we decided the path forward to implement this feature, thanks to Boundless that is funding the development, this feature is what’s I’m currently working on these days
Thanks to all QGIS donors and funders that made yet another great hackfest possible and in particular to Boundless Spatial Inc. for funding my personal expenses.    

The post Essen 2017 QGIS Hackfest first appeared on Open Web Solutions, GIS & Python Development.

A new QGIS plugin allows dynamic filtering of values in forms


This plugin has been partially funded (50%) by ARPA Piemonte.

Description

This is a core-enhancement QGIS plugin that makes the implementation of complex dynamic filters in QGIS attribute forms an easy task. For example, this widget can be used to implement drill-down forms, where the values available in one field depend on the values of other fields.

Download

The plugin is available on the official QGIS Python Plugin Repository and the source code is on GitHub QGIS Form Value Relation plugin repository

Implementation

The new “Form Value Relation” widget is essentially a clone of the core “Value Relation” widget with some important differences: When the widget is created:
  • the whole unfiltered features of the related layer are loaded and cached
  • the form values of all the attributes are added to the context (see below)
  • the filtering against the expression happens every time the widget is refreshed
  • a signal is bound to the form changes and if the changed field is present in the filter expression, the features are filtered against the expression and the widget is refreshed

Using form values in the expression

A new expression function is available (in the “Custom” section):
CurrentFormValue('FIELD_NAME')
This function returns the current value of a field in the editor form.

Note

  1. This function can only be used inside forms and it’s particularly useful when used together with the custom widget `Form Value Relation`
  2. If the field does not exists the function returns an empty string.

Visual guide

  Download the example project.   This is the new widget in action: changing the field FK_PROV, the ISTAT values are filtered according to the filter expression.
The new widget in action

The new widget drill-down in action

layer_config_fields

Choosing the new widget

Configuring the widget

Configuring the widget

Configuring the expression

Configuring the expression to read FK_PROV value from the form

News from QGIS HackFest in Las Palmas

First I wish to thank Pablo & friends for the amazing organization, unfortunately I couldn’t spend more than two full days there, but those two days have been memorable! Here is a picture of one of the most interesting discussions (photo: courtesy of Pablo). QGIS discussion at the developer meeting in Las Palmas An hack fest is an event for writing good code but what it’s really good at is to establish and cultivate relations with other coders, to exchange opinions and ideas and last but not least to have some fun and make new friends.   This time, we have had many interesting presentations and a couple of meetings where we spoke about technical aspects of the project management and infrastructure and about some important challenges, both in terms of code size and economical implications for who relies on it, that a growing project must face.   The latter was something I’ve also been considering for a while: now that pull requests (PR) for new features are coming down the pipeline, we must find a better way to manage their queue by giving a clear and transparent approval path and deadline. This management and approval process cannot rely entirely on volunteer work, the main reason being that most of the times the PR proposers have been paid for that PR and it’s not fair (nor reliable) that the (sometimes hard) job of doing a code review is not rewarded. On the other end, an investor cannot waste its time and money on a project without having a reasonable good chance to see its work eventually land into the core of QGIS.   Hugo (thanks for that!) organized a meeting to discuss this topic, that crosses personal business interests, ethical considerations and personal beliefs to a point that it’s not really easy to discuss in a calm and objective way, despite the premises, the discussion was very interesting and constructive and a QEP that tries to address at least some of this problems is open for discussion right now: https://github.com/qgis/QGIS-Enhancement-Proposals/issues/52   Another topic we’ve been discussing was how to manage python plugin dependencies, we’ve decided to start by adding a new metadata tag called external_deps that’s supposed to contain the PIP install string for the required packages, since PIP will be a builtin in python 3.4, that will probably solve most of our problems when we’ll integrate that into the plugin manager. At the moment the metadata is not documented nor required, but it’s there to allow for experiments.   We didn’t miss the occasion to talk about the ugly bug that affects fTools, not something I’m going to dig into in this post though.   Of course an hack fest is still a good opportunity for squashing bugs and implement new cool features, I’ve been busy mainly on the following topics:

  1. HiDPI screen support for web view widgets (help and plugin manager/installer)
  2. Form relations editing longstanding bugs
  3. New feature to optionally enter, edit and store Python form init code into the project (and DB), see the picture below
  4. Plugins website maintenance (added new metadata and fixed a few bugs, added an RPC call to export author email for admins)
New QGIS feature to store form init code   Thanks to all participants, to the organizers and to all QGIS sponsors and donors that made this possible!  

QGIS Server powers the new City of Asti WebGIS

A few days ago the new WebGIS of the City of Asti, a 76000 inhabitants city in Piedmont, was launched.  The new WebGIS uses QGIS Server and QGIS Web Client to serve maps and provide street and cadastrial search and location services.

The new WebGIS was developed by ItOpen and is online at: http://sit.comune.asti.it/site/?map=PRGAsti

QGIS Quick WKT plugin iface edition

Some plugin core functions can now be called from a Python console:

g = QgsGeometry.fromWkt('POINT (9.9 43)')
iface.show_geometry(g)
iface.show_geometry(g.buffer(0.2, 2))
iface.show_wkt('POINT (9 45)')
iface.show_wkb(r'0103...') # cut

All functions accept a layer title as optional argument, if None is given, they are automatically added to a Quick WKT GeometryType (memory) layer, such as Quick WKT Polygon for polygons.

QGIS developer meeting in Nødebo

During the hackfest I’ve been working on the refactoring of the server component, aimed to wrap the server into a class and create python bindings for the new classes. This work is now in the PR queue and brings a first working python test for the server itself.

The server can now be invoked directly from python, like in the example below:


#!/usr/bin/env python
"""
Super simple QgsServer.
"""

from qgis.server import *
from BaseHTTPServer import *

class handler (BaseHTTPRequestHandler):

    server = QgsServer()

    def _doHeaders(self, response):
        l = response.pop(0)
        while l:
            h = l.split(':')
            self.send_header(h[0], ':'.join(h[1:]))
            self.log_message( "send_header %s - %s" % (h[0], ':'.join(h[1:])))
            l = response.pop(0)
        self.end_headers()

    def do_HEAD(self):
        self.send_response(200)
        response = str(handler.server.handleRequestGetHeaders(self.path[2:])).split('\n')
        self._doHeaders(response)

    def do_GET(self):
        response = str(handler.server.handleRequest(self.path[2:])).split('\n')
        i = 0
        self.send_response(200)
        self._doHeaders(response)
        self.wfile.write(('\n'.join(response[i:])).strip())

    def do_OPTIONS(s):
        handler.do_GET(s)

httpd = HTTPServer( ('', 8000), handler)

while True:
    httpd.handle_request()

The python bindings capture the server output instead of printing it on FCGI stdout and allow to pass the request parameters QUERY_STRING directly to the request handler as a string, this makes writing python tests very easy.

QGIS and QT: getting ready for HiDPI screens


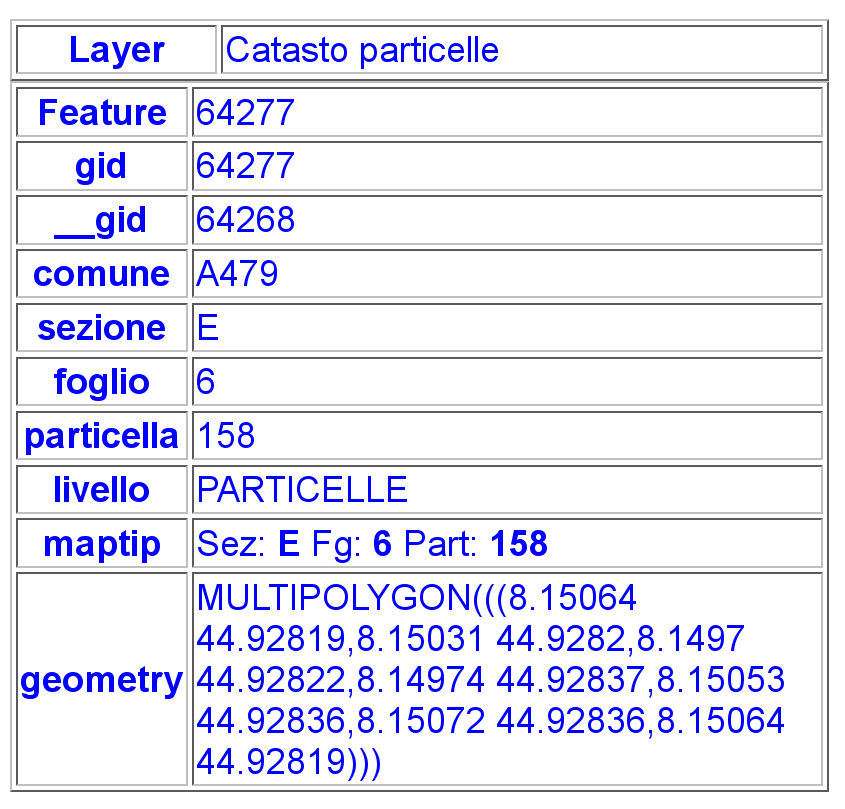
A few months ago I changed my laptop for a Dell M3800 with an amazing 3840×2160 15,6″ display, that means a crazy 282 dpi resolution. I won’t discuss the problems I had to face and resolve to make this thing usable with Kubuntu 14.04 because they are yet some useful resource on the net: https://wiki.archlinux.org/index.php/HiDPI. The executive summary is that KDE and QT/GTK applications work pretty well and without serious usability problems: Firefox, Chrome, Thunderbird have no problems at all if we exclude some really minor glitches like pixelated or too big icons in a few occasions (see the example below).

Small problem with a big icon in Firefox

Small problem with a big icon in Firefox @ 282 dpi


QGIS on HiDPI

Unfortunately, QGIS has some serious usability problems on such an high resolution screen and I spent a few hours try to understand how is it possible to fix them and what should be done to avoid them in the first place.

The reason behind is that HiDPI screens usage is increasing and we can expect they’ll gain more and more market share expecially among professional users and GIS users are mostly professional users!

To give you a quick taste of the kind of problems that have to be addressed, take a look at the pictures below.

QGIS statusbar: unreadable on HiDPI

QGIS statusbar: unreadable on HiDPI

qgis-hidpi-pluginmanager

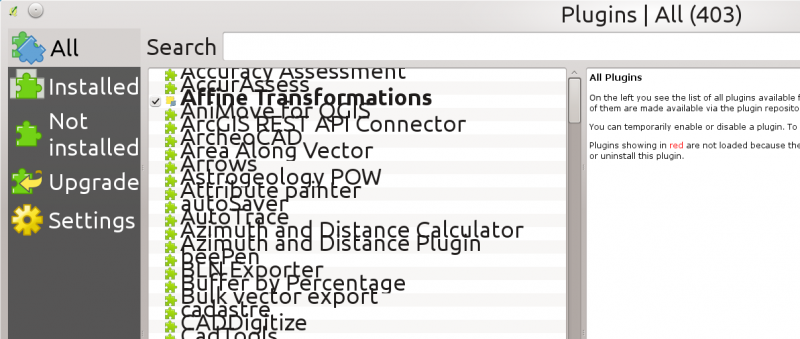
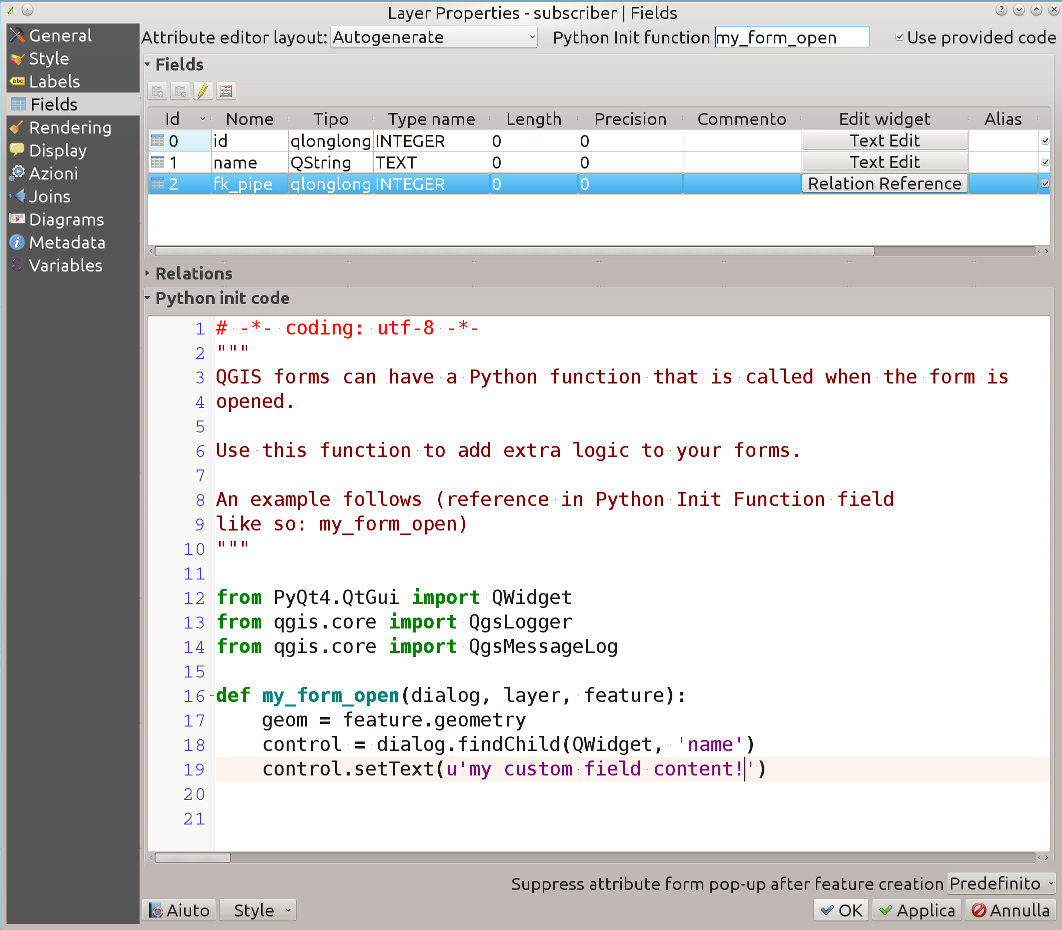
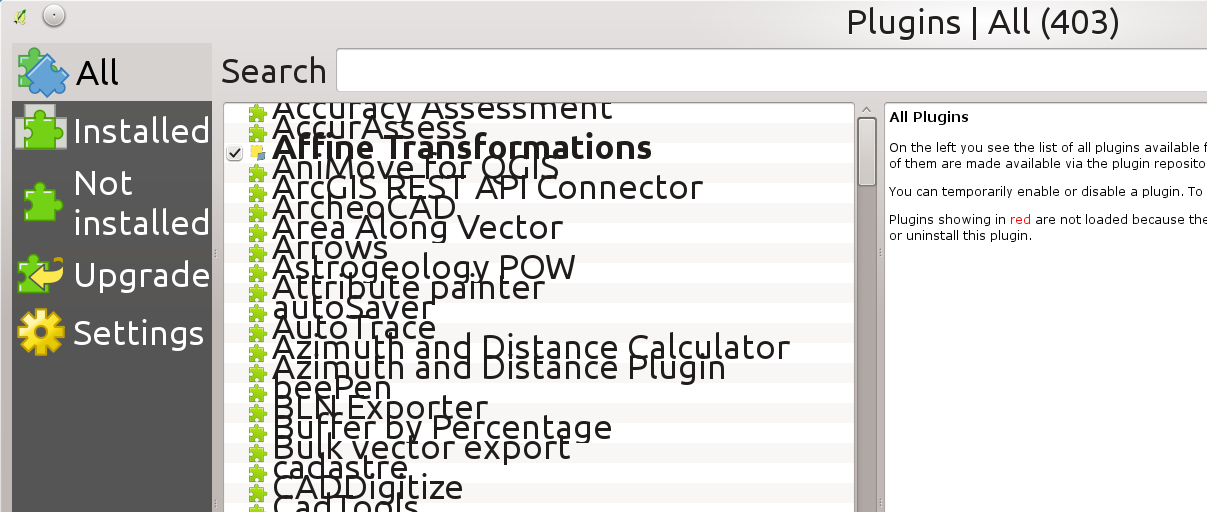
Plugin manager rows are too low and left tab column has a 200 px max width

qgis-hidpi-attributetable-issue

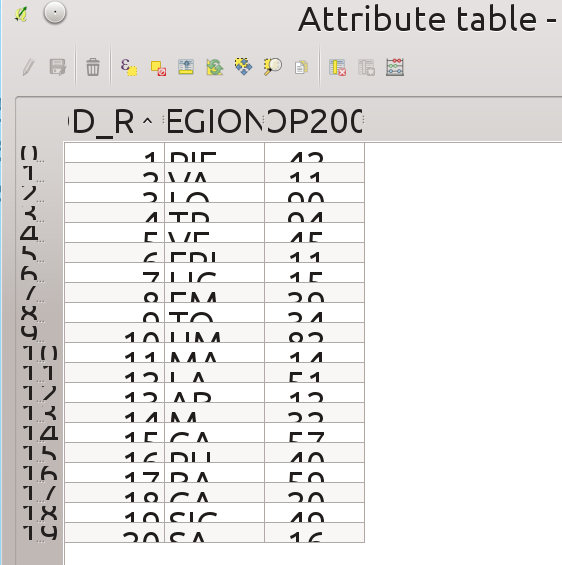
Attribute table rows are too low and icons are too small


I tried to fix some of the issues shown above and this is the resulting commit: https://github.com/qgis/QGIS/pull/2014/commits, QGIS run on different platforms and I wasn’t able to test it on all of them, I hope the fixes will not cause problems on platforms and screen sizes other than I could test myself.

But the purpose of this notes it to list some humble tips that could be useful to avoid or fix these kind of problem.

Tip #1: Avoid hardcoded pixel values!

Web developers started the fight with HiDPI screens a few years ago, (buzz)words like responsive design and the move towards mobile platforms forced the developers to consider what a pixel really is in a web context, and the obvious conclusion was that a pixel is not a pixel! Please see the following resources if you’re curious and not familiar with these concepts:

The most obvious and efficient solution for the web browser was to change the concept of pixel from a physical to a logical unit.

Unfortunately, at least in QT the pixel is still a physical pixel, this means the we must avoid to specify the size of GUI elements in pixel units.


Qt documentation has a page about Developing Scalable UIs.

This blog page also has some useful tips: HighDPI in KDE Applications.


A collection of useful tips for QT developers can be found in the HiDPI KDE wiki page:

  • Do not use QFont setPixelSize but use setPointSize, and better, avoid setting a custom size at all.
  • Try to stick with the possibilities from KGlobalSettings (KGlobalSettings::generalFont(), KGlobalSettings::largeFont() etc.)
  • Do not use a fixed QSize with images (QPixmap, QIcon…)
  • Do not use KIconLoader::StdSizes. Even though it would sound like a good idea to use it, it suffers from the same issue: Hardcoded pixel sizes.
  • To get a user’s configured icon size, include and use the IconSize function (note: this is not a member function): IconSize(KIconLoader::Small). However, be aware that the user might be able to mess up your apps look by setting some insane values here.
  • If you use svg images for icons (for example in plasma) get the standard sizes from some theme elements (e.g. buttons, fonts) and scale your images accordingly. (Don’t do this when using pixel based images)

Some of the tips above are clearly related to KDE, but I’ve found them still useful to get the overall picture.

Coming to QGIS specific problems, there are still many that have to be resolved, but the overall application is somewhat already useable. The issues I have addressed were easy picks and most of the times it was enough to remove the hardcoded values and rely to QT default sizing mechanisms to get a good result, such as in this case (from src/app/qgisapp.cpp):

//mCoordsLabel->setMaximumHeight( 20 );

Things were harder with plugin manager, the MVC delegate that draws the plugins rows contained a lot of hardcoded metrics for icon and text placement, the solution was to change the values to be relative to the configured font height, see all details in my PR to solve plugin manager HiDPI issues


This is generally a good idea: we must not make any assumption about the size of the fonts the user will be using.

Tip #2: force resize of dialogs

This is something that you should be aware of if you are using an HiDPI screen to build your GUI.

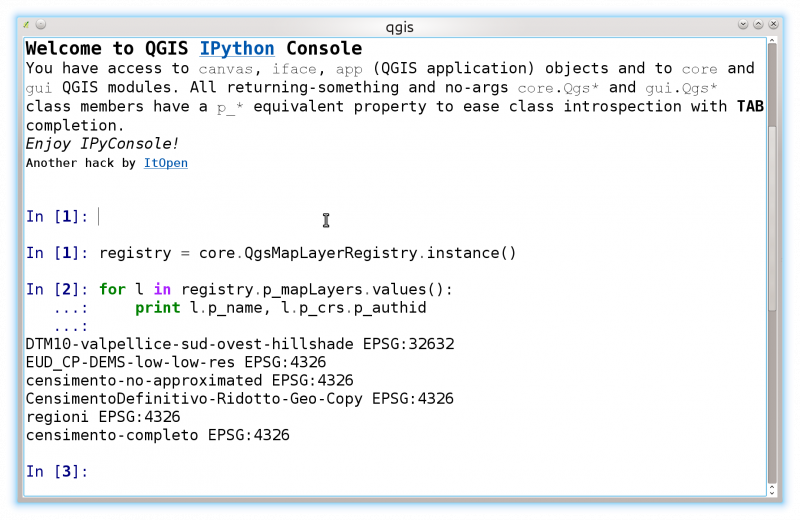
I first encountered this problem when developing my IPyConsole QGIS python plugin: I designed the GUI with designer-qt4 on my HiDPI screen and forget about testing it on “normal” screens, the result is that the window size of the settings dialog (a relatively small dialog) was set by designer at a crazy value of 1115×710. It was impossible from QT Designer to set a small size by dragging the window corner with the mouse: the application automatically reset the dialog size to the calculated minimum size (which on an HiDPI screen was that huge  1115×710).

The solution in that case was to manually alter the Ui_SettingsDialog.ui file to set a small size (say 300×200) and call adjustSize()

self.settingsDlg.show()
# This will adjust the size according to font/dpi:
self.settingsDlg.adjustSize()
result = self.settingsDlg.exec_()

Tip #3: Icons

I haven’t yet come to a solution for the right size for icons (suggestions welcome!). Of course the first point is to move all icons to SVG, the process has already started but many icons have still to be converted.

But having scalable icons is not enough: we must make sure that the icon size is not hardcoded in the GUI, there are some settings for icon size in QGIS options dialog and that might be the right point to start but we probably need more than one size:

  • size of toolbar icons
  • size of plugin icons
  • size for smaller toolbars (attribute table, python console vertical sidebar to cite a few)

Maybe a 3-sizes approach would be fine (big, medium, small), for an easy configuration, some pre-defined values for HiDPI / 96dpi and HD screens would be useful.

To get an idea of what the attribute table looks like right now on an HiDPI screen, look at the picture below, scaled to 96dpi:


qgis-hidpi-attributetable-small-icons-issue96dpi

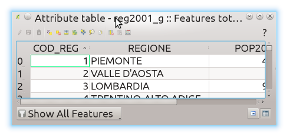
Icons are too small on an HiDPI screen


Conclusions

There is still much work to do in order to have an usable interface on HiDPI screens, some issues can be easily solved by avoiding hardcoded sizes and leaving to QT the heavy job of calculating GUI widget sizes.

It’s important that developers (not only core developers but plugin developers too) are aware of this kind of issues and how to avoid them in the first place.

HiDPI screens are just around the corner and it’s better to be prepared.


A final note about QT5, it’s not clear to me if and when the move to QT5 will be done and moreover if that move will automatically solve HiDPI issues due to a better HiDPI support, but I’m afraid it won’t.


QGIS development

We started our GIS development activities back in 2001, focusing on free open-source software, we developed and deployed several WebGis websites using GRASS and UNM MapServer plus PHP MapScript.

After a while, we stared our Python migration by using the GeoDjango Framework and a choice of Javascript mapping libraries for the client, in particular, we developed WebGIS front-ends with OpenLayers and GeoEXT.

QGIS python plugins development

For internal usage we developed two popular QGIS plugins:

both plugins are released with GPL license and are available on the official QGIS Python Plugins repository, source code is available on my GitHub account.

Official QGIS Python Plugins Repository

Back in 2010 we started contributing to the QGIS community by starting the implementation of the new official QGIS Python Plugins repository.

The new repository was developed in Python using the Django framework

We are still maintaining the plugins repository and we actively participate at all QGIS HackFests to share ideas and coordinate the development with the rest of the QGIS team.

QGIS Server and QGIS Web Client

For a medium sized public administration we recently developed a complete WebGIS system for cadastrial and planning data. We choose the amazing QGIS Server as mapping engine and QGIS Web Client for the client side.

During the development of the system we contributed to the code of both components by providing patches and bug fixes and by developing a full stack of PHP support services that are now integrated in the core of QGIS Web Client


QGIS Web Client GetFeatureInfo formatters

The transformation of a value to an URL address is done automatically in a few cases (this feature is currently undocumented): for example when the column value starts with http or https or a string contained in mediaurl parameter defined in Globaloptions.js.
But if you want more, then you need a real formatting function that given the value (and maybe some more information bits about where the values comes from) returns a properly formatted hyperlink or whatever else you need.

This new feature is currently available in my customformatters branch, and an example formatter is provided in Globaloptions.js and implemented for the helloworld.qgs sample project.

Here is how it works:

// Custom WMS GetFeatureInfo results formatters: you can define custom
// filter functions to apply custom formatting to values coming from
// GetFeatureInfo requests when the user use the "identify" tool.
// The same formatting functions can be normally also used as "renderer"
// function passed to column configuration in the "gridColumns" property
// of the grid configuration of the WMS GetFeatureInfo search panels.

// Example formatter, takes the value, the column name and the layer name,
// normally only the first parameter is used.
function customURLFormatter(attValue, attName, layerName){
    return '<a href="http://www.google.com/search?q=' + encodeURI(attValue) + '" target="_blank">' + attValue + '</a>';
}

// Formatters configuration
var getFeatureInfoCustomFormatters = {
    'Country': { // Layer name
        'name': customURLFormatter // Can be an array if you need multiple formatters
    }
};

If you also want to apply the same formatting to result grids coming from the search panels, you can use the very same functions passing the function in the renderer attribute of the datagrid, as shown around line 18 in the following snippet:

var simpleWmsSearch = {
  title: "Search continent",
  query: 'simpleWmsSearch',
  useWmsRequest: true,
  queryLayer: "Country",
  formItems: [
    {
      xtype: 'textfield',
      name: 'name',
      fieldLabel: "Name",
      allowBlank: false,
      blankText: "Please enter a name (e.g. 'africa')",
      filterOp: "="
    }
  ],
  gridColumns: [
    // Apply the formatter as the "renderer"
    {header: 'Name', dataIndex: 'name', menuDisabled: 'true', renderer: customURLFormatter}
  ],
//  highlightFeature: true,
//  highlightLabel: 'name',
  selectionLayer: 'Country',
  selectionZoom: 0,
  doZoomToExtent: true
};

The result of the formatter applied to both views is in the following picture:

Qgis Web Client Formatters

QGIS Server Python Plugins Ubuntu Setup

Prerequisites

I assume that you are working on a fresh install with Apache and FCGI module installed with:

$ sudo apt-get install apache2 libapache2-mod-fcgid
$ # Enable FCGI daemon apache module
$ sudo a2enmod fcgid

Package installation

First step is to add debian gis repository, add the following repository:

$ cat /etc/apt/sources.list.d/debian-gis.list
deb http://qgis.org/debian trusty main
deb-src http://qgis.org/debian trusty main

$ # Add keys
$ sudo gpg --recv-key DD45F6C3
$ sudo gpg --export --armor DD45F6C3 | sudo apt-key add -

$ # Update package list
$ sudo apt-get update && sudo apt-get upgrade

Now install qgis server:

$ sudo apt-get install qgis-server python-qgis

Install the HelloWorld example plugin

This is an example plugin and should not be used in production!
Create a directory to hold server plugins, you can choose whatever path you want, it will be specified in the virtual host configuration and passed on to the server through an environment variable:

$ sudo mkdir -p /opt/qgis-server/plugins
$ cd /opt/qgis-server/plugins
$ sudo wget https://github.com/elpaso/qgis-helloserver/archive/master.zip
$ # In case unzip was not installed before:
$ sudo apt-get install unzip
$ sudo unzip master.zip 
$ sudo mv qgis-helloserver-master HelloServer

Apache virtual host configuration

We are installing the server in a separate virtual host listening on port 81.
Rewrite module can be optionally enabled to pass HTTP BASIC auth headers (only needed by the HelloServer example plugin).

$ sudo a2enmod rewrite

Let Apache listen to port 81:

$ cat /etc/apache2/conf-available/qgis-server-port.conf
Listen 81
$ sudo a2enconf qgis-server-port

The virtual host configuration, stored in /etc/apache2/sites-available/001-qgis-server.conf:

<VirtualHost *:81>
    ServerAdmin webmaster@localhost
    DocumentRoot /var/www/html

    ErrorLog ${APACHE_LOG_DIR}/qgis-server-error.log
    CustomLog ${APACHE_LOG_DIR}/qgis-server-access.log combined

    # Longer timeout for WPS... default = 40
    FcgidIOTimeout 120 
    FcgidInitialEnv LC_ALL "en_US.UTF-8"
    FcgidInitialEnv PYTHONIOENCODING UTF-8
    FcgidInitialEnv LANG "en_US.UTF-8"
    FcgidInitialEnv QGIS_DEBUG 1
    FcgidInitialEnv QGIS_SERVER_LOG_FILE /tmp/qgis-000.log
    FcgidInitialEnv QGIS_SERVER_LOG_LEVEL 0
    FcgidInitialEnv QGIS_PLUGINPATH "/opt/qgis-server/plugins"

    # ABP: needed for QGIS HelloServer plugin HTTP BASIC auth
    <IfModule mod_fcgid.c>
        RewriteEngine on
        RewriteCond %{HTTP:Authorization} .
        RewriteRule .* - [E=HTTP_AUTHORIZATION:%{HTTP:Authorization}]
    </IfModule>

    ScriptAlias /cgi-bin/ /usr/lib/cgi-bin/
    <Directory "/usr/lib/cgi-bin">
        AllowOverride All
        Options +ExecCGI -MultiViews +FollowSymLinks
        Require all granted
        #Allow from all
  </Directory>
</VirtualHost>

Enable the virtual host and restart Apache:

$ sudo a2ensite 001-qgis-server
$ sudo service apache2 restart

Test:

$ wget -q -O - "http://localhost:81/cgi-bin/qgis_mapserv.fcgi?SERVICE=HELLO"
HelloServer!

See all QGIS Server related posts

QGIS Server: GetFeatureInfo with STYLE

There have been some requests in the past about custom CSS for html GetFeatureInfo responses from QGIS Server.

Currently, the HTML response template is hardcoded and there is no way to customize it, the Python plugin support introduced with the latest version of QGIS Server provides an easy way to add some custom CSS rules or even provide custom templates.

To get you started, I’ve added a new filter to my example  HelloServer plugin:

import os

from qgis.server import *
from qgis.core import *
from PyQt4.QtCore import *
from PyQt4.QtGui import *


class GetFeatureInfoCSSFilter(QgsServerFilter):

    def __init__(self, serverIface):
        super(GetFeatureInfoCSSFilter, self).__init__(serverIface)

    def requestReady(self):
        """Nothing to do here, but it would be the ideal point
        to alter request **before** it gets processed, for example
        you could set INFO_FORMAT to text/xml to get XML instead of
        HTML in responseComplete"""
        pass

    def responseComplete(self):
        request = self.serverInterface().requestHandler()
        params = request.parameterMap( )
        if (params.get('SERVICE').upper() == 'WMS' \
                and params.get('REQUEST', '').upper() == 'GETFEATUREINFO' \
                and params.get('INFO_FORMAT', '').upper() == 'TEXT/HTML' \
                and not request.exceptionRaised() ):
            body = request.body()
            body.replace('<BODY>', """<BODY><STYLE type="text/css">* {font-family: arial, sans-serif; color: blue;}</STYLE>""")
            # Set the body
            request.clearBody()
            request.appendBody(body)

This filter is pretty simple, if the request is a WMS GetFeatureInfo with HTML format, it injects a STYLE tag into the HTML HEAD.

Here is the output with blue color and arial fonts applied:

getfeatureinfo styled response

As an exercise left to the reader, you can also intercept the call in requestReady(self), change the INFO_FORMAT to text/xml and then do some real templating, for example by using XSLT or by parsing the XML and injecting the values into a custom template.

QGIS and IPython: the definitive interactive console

Whatever is your level of Python knowledge, when you’ll discover the advantages and super-powers of IPython you will never run the default python console again, really: never!

If you’ve never heard about IPython, discover it on IPython official website, don’t get confused by its notebook, graphics and parallel computing capabilities, it also worth if only used as a substitute for the standard Python shell.

I discovered IPython more than 5 years ago and it literally changed my life: I use it also for debugging instead ofpdb, you can embed an IPython console in your code with:

from IPython import embed; embed()

TAB completion with full introspection

What I like the most in IPython is its TAB completion features, it’s not just like normal text matching while you type but it has full realtime introspection, you only see what you have access to, being it a method of an instance or a class or a property, a module, a submodule or whatever you might think of: it even works when you’re importing something or you are typing a path like in open('/home/.....

Its TAB completion is so powerful that you can even use shell commands from within the IPython interpreter!

Full documentation is just a question mark away

Just type “?” after a method of function to print its docstring or its signature in case of SIP bindings.

Lot of special functions

IPython special functions are available for history, paste, run, include and many more topics, they are prefixed with “%” and self-documented in the shell.

All that sounds great! But what has to do with QGIS?

I personally find the QGIS python console lacks some important features, expecially with the autocompletion (autosuggest). What’s the purpose of having autocompletion when most of the times you just get a traceback because the method the autocompleter proposed you is that of another class? My brain is too small and too old to keep the whole API docs in my mind, autocompletion is useful when it’s intelligent enough to tell between methods and properties of the instance/class on which you’re operating.

Another problem is that the API is very far from being “pythonic” (this isn’t anyone’s fault, it’s just how SIP works), here’s an example (suppose we want the SRID of the first layer):

core.QgsMapLayerRegistry.instance().mapLayers().value()[0].crs().authid()
# TAB completion stops working here^

TAB completion stop working at the first parenthesis :(

What if all those getter would be properties?

registry = core.QgsMapLayerRegistry.instance()
# With a couple of TABs without having to remember any method or function name!
registry.p_mapLayers.values()
[<qgis._core.QgsRasterLayer at 0x7f07dff8e2b0>,
 <qgis._core.QgsRasterLayer at 0x7f07dff8ef28>,
 <qgis._core.QgsVectorLayer at 0x7f07dff48c30>,
 <qgis._core.QgsVectorLayer at 0x7f07dff8e478>,
 <qgis._core.QgsVectorLayer at 0x7f07dff489d0>,
 <qgis._core.QgsVectorLayer at 0x7f07dff48770>]

layer = registry.p_mapLayers.values()[0]

layer.p_c ---> TAB!
layer.p_cacheImage            layer.p_children       layer.p_connect       
layer.p_capabilitiesString    layer.p_commitChanges  layer.p_crs           
layer.p_changeAttributeValue  layer.p_commitErrors   layer.p_customProperty

layer.p_crs.p_ ---> TAB!
layer.p_crs.p_authid               layer.p_crs.p_postgisSrid      
layer.p_crs.p_axisInverted         layer.p_crs.p_projectionAcronym
layer.p_crs.p_description          layer.p_crs.p_recentProjections
layer.p_crs.p_ellipsoidAcronym     layer.p_crs.p_srsid            
layer.p_crs.p_findMatchingProj     layer.p_crs.p_syncDb           
layer.p_crs.p_geographicCRSAuthId  layer.p_crs.p_toProj4          
layer.p_crs.p_geographicFlag       layer.p_crs.p_toWkt            
layer.p_crs.p_isValid              layer.p_crs.p_validationHint   
layer.p_crs.p_mapUnits    

layer.p_crs.p_authid
Out[]: u'EPSG:4326'

This works with a quick and dirty hack: propertize that adds a p_... property to all methods in a module or in a class that

  1. do return something
  2. do not take any argument (except self)

this leaves the original methods untouched (in case they were overloaded!) still allowing full introspection and TAB completion with a pythonic interface.

A few methods are still not working with propertize, so far singleton methods like instance() are not passing unit tests.

IPyConsole: a QGIS IPython plugin

If you’ve been reading up to this point you probably can’t wait to start using IPython inside your beloved QGIS (if that’s not the case, please keep reading the previous paragraphs carefully until your appetite is grown!).

An experimental plugin that brings the magic of IPython to QGIS is now available:
Download IPyConsole


Please start exploring QGIS objects and classes and give me some feedback!


IPyConsole QGIS plugin

Installation notes

You basically need only a working IPython installation, IPython is available for all major platforms and distributions, please refer to the official documentation.


  • Page 1 of 1 ( 15 posts )
  • ItOpen
  • gis

Back to Top

Sustaining Members