Related Plugins and Tags

QGIS Planet

SLYR Update — June 2023

Welcome back, SLYR enthusiasts! We’re thrilled to share the latest updates and enhancements for our SLYR ESRI to QGIS Compatibility Suite that will dramatically streamline the use of ESRI documents within QGIS (and vice versa!). Our team has been hard at work, expanding the capabilities of SLYR to ensure seamless compatibility between the latest QGIS and ArcGIS releases. We’ve also got some exciting news for users of the Community Edition of SLYR! Let’s dive right in and explore the exciting new features that have been added to SLYR since our previous update

Converting Raster Layers in Geodatabases

We’re pleased to announce that SLYR now offers support for converting raster layers within Geodatabases. With this update, users can effortlessly migrate their raster data from ESRI’s Geodatabases to QGIS, enabling more efficient data management and analysis.

This enhancement is only possible thanks to work in the fantastic GDAL library which underpins QGIS’ raster data support. Please ensure that you have the latest version of QGIS (3.30.3 or 3.28.7 at a minimum) to make the most of this feature.

Annotation and Graphic Layer Improvements

Text Annotations along Curves

For those working with curved annotations, we’ve got you covered! SLYR now supports the conversion of text annotations along curves in QGIS. With this enhancement, you’ll get accurate conversion of any curved text and text-along-line annotations from MXD and APRX documents. This has been a long-requested feature which we can now introduce thanks to enhancements coming in QGIS 3.32.

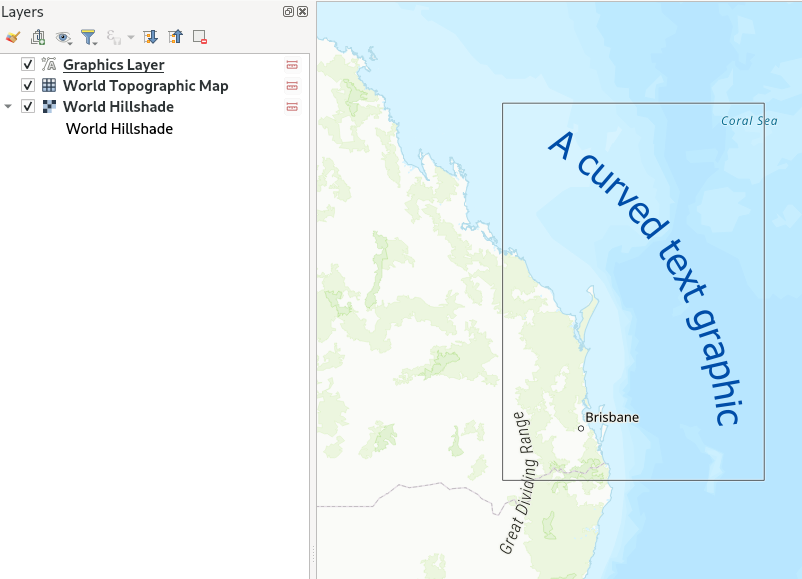
ArcGIS Pro Graphics Layer Support

SLYR now supports the conversion of ArcGIS Pro graphics layers, converting all graphic elements to their QGIS “Annotation Layer” equivalents. If you’ve spent hours carefully designing cartographic markup on your maps, you can be sure that SLYR will allow you to re-use this work within QGIS!

Curved text graphic conversion

Enhanced Page Layout Support

We’ve further improved the results of converting ArcGIS Pro page layouts to QGIS print layouts, with dozens of refinements to the conversion results. The highlights here include:

  • Support for converting measured grids and graticules to QGIS map grids
  • Enhanced dynamic text conversions:  Now, when migrating your projects, you can expect a smoother transition for dynamic text ensuring your layouts correctly show generated metadata and text correctly
  • Support for north arrows, grouped elements, legends and table frames.

Rest assured that your carefully crafted map layouts will retain their visual appeal and functionality when transitioning to QGIS!

Improved QGIS to ArcGIS Pro Conversions

SVG Marker Exports and Symbology Size

SLYR has introduced initial support for exporting SVG markers from QGIS to ArcGIS Pro formats. SVG graphics are a component of QGIS’ cartography, and are frequently used to create custom marker symbols. Unfortunately, ArcGIS Pro doesn’t have any native support for SVG graphics for marker symbols, instead relying on a one-off conversion from SVG to multiple separate marker graphics whenever an SVG is imported into ArcGIS Pro. Accordingly, we’ve implemented a similar logic in SLYR in order to convert SVG graphics to ArcGIS Pro marker graphics transparently whenever QGIS symbology is exported to ArcGIS. This enhancement allows for a seamless transfer of symbology from QGIS, ensuring that your converted maps retain their visual integrity.

Furthermore, the update includes support for exporting QGIS symbology sizes based on “map unit” measurements to ArcGIS Pro, resulting in ArcGIS Pro symbology which more accurately matches the original QGIS versions.

Rule-Based Renderer Conversion

The “Rule Based Renderer” is QGIS’ ultimate powerhouse for advanced layer styling. It’s extremely flexible, thanks to its support for nested rules and filtering using QGIS expressions. However, this flexibility comes with a cost — there’s just no way to reproduce the same results within ArcGIS Pro’s symbology options! Newer SLYR releases will now attempt to work around this by implementing basic conversion of QGIS rule-based renderers to ArcGIS Pro layers with “display filters” attached. This allows us to convert some basic rule-based configuration to ArcGIS Pro formats.

There’s some limitations to be aware of:

  1. Only “flat” rule structures can be converted. It’s not possible to convert a nested rule structure into something representable by ArcGIS Pro.
  2. While the QGIS expression language is very rich and offers hundreds of functions for use in expressions, only basic QGIS filter expressions can be converted to ArcGIS Pro rules.

Improved Conversion of Raster and Mesh Layers

Based on user feedback, we’ve made significant improvements to the conversion of QGIS rasters and mesh layers to ArcGIS Pro formats. Expect enhanced accuracy when migrating these types of data, ensuring a closer match between your QGIS projects and their ArcGIS Pro equivalents.

New tools

The latest SLYR release introduces some brand new tools for automating your conversion workflows:

Convert LYR/LYRX Files Directly to SLD

To facilitate interoperability, SLYR has introduced algorithms that directly convert ESRI LYR or LYRX files to the “SLD” format (Styled Layer Descriptor). This feature simplifies the process of sharing and utilizing symbology between different GIS software, allowing for direct conversion of ESRI symbology for use in Geoserver or Mapserver.

Convert File Geodatabases to Geopackage

We’re thrilled to introduce a powerful new tool in SLYR that enables a comprehensive conversion of a File Geodatabase to the Geopackage format. With this feature, you can seamlessly migrate your data from ESRI’s File Geodatabase format to the versatile and widely supported GeoPackage format. As well as the raw data conversion, this tool also ensures the conversion of field domains and other advanced Geodatabase functionality to their GeoPackage equivalent, preserving valuable metadata and maintaining data integrity throughout the transition. (Please note that this tool requires QGIS version 3.28 or later.)


All these exciting additions to SLYR are available today to SLYR license holders. If you’re after one-click, accurate conversion of projects from ESRI to QGIS, contact us to discuss your licensing needs.

As described on our SLYR page, we also provide some of the conversion tools for free use via the SLYR “Community Edition”. We’re proud to announce that we’ve just hit the next milestone in the Community Edition funding, and will now be releasing all of SLYR’s support for raster LYR files to the community edition! This complements the existing support for vector LYR files and ESRI style files available in the community edition. For more details on the differences between the licensed and community editions, see our product comparison.

SLYR Update — November 2022

Our SLYR tool is the complete solution for full compatibility between ArcMap, ArcGIS Pro and QGIS. It offers a powerful suite of conversion tools for opening ESRI projects, styles and other documents directly within QGIS, and for exporting QGIS documents for use in ESRI software.

A lot has changed since our last SLYR product update post, and we’ve tons of very exciting improvements and news to share with you all! In this update we’ll explore some of the new tools we’ve added to SLYR, and discuss how these tools have drastically improved the capacity for users to migrate projects from the ESRI world to the open-source world (and vice versa).

ArcGIS Pro support

The headline item here is that SLYR now offers a powerful set of tools for working with the newer ArcGIS Pro document formats. Previously, SLYR offered support for the older ArcMap document types only (such as MXD, MXT, LYR, and PMF formats). Current SLYR versions now include tools for:

Directly opening ArcGIS Pro .lyrx files within QGIS

LYRX files can be dragged and dropped directly onto a QGIS window to add the layer to the current project. All the layer’s original styling and other properties will be automatically converted across, so the resultant layer will be an extremely close match to the original ArcGIS Pro layer! SLYR supports vector layers, raster layers, TIN layers, point cloud layers and vector tile layers. We take great pride in just how close the conversion results are to how these layers appear in ArcGIS Pro… in most cases you’ll find the results are nearly pixel perfect!

In addition to drag-and-drop import support, SLYR also adds support for showing .lyrx files directly in the integrated file browser, and also adds tools to the QGIS Processing Toolbox so that users can execute bulk conversion operations, or include document conversion in their models or custom scripts.

ArcGIS Pro map (mapx) and project (aprx) conversion

Alongside the LYRX support, we’ve also added support for the ArcGIS Pro .mapx and .aprx formats. Just like our existing .mxd conversion, you can now easily convert entire ArcGIS Pro maps for direct use within QGIS! SLYR supports both the older ArcGIS Pro 2.x project format and the newer 3.x formats.

Export from QGIS to ArcGIS Pro!

Yes, you read that correctly… SLYR now allows you to export QGIS documents into ArcGIS Pro formats! This is an extremely exciting development… for the first time ever QGIS users now have the capacity to export their work into formats which can be supplied directly to ESRI users. Current SLYR versions support conversion of map layers to .lyrx format, and exporting entire projects to the .mapx format. (We’ll be introducing support for direct QGIS to .aprx exports later this year.)

We’re so happy to finally provide an option for QGIS users to work alongside ArcGIS Pro users. This has long been a pain point for many organisations, and has even caused organisations to be ineligible to tender for jobs which they are otherwise fully qualified to do (when tenders require provision of data and maps in ArcGIS compatible formats).

ArcGIS Pro .stylx support

Alongside the other ArcGIS Pro documents, SLYR now has comprehensive support for reading and writing ArcGIS Pro .stylx databases. We’ve dedicated a ton of resources in ensuring that the conversion results (both from ArcGIS Pro to QGIS and from QGIS to ArcGIS Pro) are top-notch, and we even handle advanced ArcGIS Pro symbology options like symbol effects!

Take a look below how even very advanced ArcGIS Pro style libraries convert beautifully to QGIS symbol libraries:

ArcMap Improvements

While we’ve been focusing heavily on the newer ArcGIS Pro formats, we’ve also improved our support for the older ArcMap documents. In particular, SLYR now offers more options for converting ArcMap annotation layers and annotation classes to QGIS supported formats. Users can now convert Annotation layers and classes directly over to QGIS annotation layer or alternatively annotation classes can be converted over to the OGC standard GeoPackage format. When exporting annotation classes to GeoPackage the output database is automatically setup with default styling rules, so that the result can be opened directly in QGIS and will be immediately visualised to match the original annotation class.

Coming soon…

While all the above improvements are already available for all SLYR license holders, we’ve got many further improvements heading your way soon! For example, before the end of 2022 we’ll be releasing another large SLYR update which will introduce support for exporting QGIS projects directly to ArcGIS Pro .aprx documents. We’ve also got many enhancements planned which will further improve the quality of the converted documents. Keep an eye on this blog and our social media channels for more details as they are available…

You can read more about our SLYR tool at the product page, or contact us today to discuss licensing options for your organisation.


Securely accessing ArcGIS Online (AGOL) and enterprise ArcGIS Portal sites through QGIS (2022 update!)

We’re often contacted for advice regarding our recommendations for securely accessing content on ArcGIS Online (AGOL) or enterprise ArcGIS Portal deployments from within QGIS. While we ran through our recommended setup in an older post, we thought it was time for a 2022 update for our recommendations. In this version we’ve updated some of the descriptions and screenshots for newer QGIS releases, and have added explicit instructions on accessing ArcGIS Online content too.

This post details step-by-step instructions in setting up both AGOL/ArcGIS Portal and QGIS to enable this integration. First, we’ll need to create an application on the server in order to enable QGIS users to securely authenticate with the server. The process for this varies between AGOL and ArcGIS Portal, so we’ve separated the guidelines into two sections below:

ArcGIS Portal

Creating an application

Logon to the Portal, and from the “Content” tab, click the “Add Item” option. Select “An application” from the drop down list of options:

Set the type of the application as “Desktop

You can fill out the rest of this dialog as you see fit. Suggested values are:

  • Purpose: Ready to Use
  • Platform: Qt
  • URL: https://qgis.org
  • Tags: QGIS, Desktop, etc

Now – here comes a trick. Portal will force you to attach a file for the application. It doesn’t matter what you attach here, so long as it’s a zip file. While you could attach a zipped copy of the QGIS installer, that’s rather wasteful of server space! We’d generally just opt for a zip file containing a text file with a download link in it.

Click Add Item when you’re all done filling out the form, and the new application should be created on the Portal.

Registering the Application

The next step is to register the application on Portal, so that you can obtain the keys required for the OAuth2 logon using it. From the newly created item’s page, click on the “Settings” tab:

Scroll right to the bottom of this page, and you should see a “Register” button. Press this. Set the “App type” to “Native“.

Add two redirect URIs to the list (don’t forget to click “Add” after entering each!):

  1. The Portal’s public address, e.g. https://mydomain.com/portal
  2. http://127.0.0.1:7070

Finally, press the “Register” button in the dialog. If all goes well then the App Registration section in the item settings should now be populated with details. From here, copy the “App ID” and “Secret” strings, we’ll need these later:

Determine Request URLs

One last configuration setting we’ll need to determine before we fire up QGIS is the Portal’s OAuth Request and Token URLs. These are usually found by appending /sharing/rest/oauth2/authorize and /sharing/rest/oauth2/token to the end of your Portal’s URL.

For instance, if your public Portal URL is http://mydomain.com/portal, then the URLs will be:

Request URL: http://mydomain.com/portal/sharing/rest/oauth2/authorize
Token URL: http://mydomain.com/portal/sharing/rest/oauth2/token

You should be able to open both URLs directly in a browser. The Request URL will likely give a “redirect URL not specified” error, and the Token URL will give a “client_id not specified” error. That’s ok — it’s enough to verify that the URLs are correct.

When this is all done we can skip ahead to the client-side configuration below.

ArcGIS Online (AGOL)

Registering an application on AGOL must be done by an account administrator. So first, we’ll logon to AGOL using an appropriate account, and then head over to the “Content” tab. We’ll then hit the “New Item” button to start creating our application:

From the available item types select the “Application” option:

We’ll then select the “Mobile” application type, and enter “https://qgis.org” as the application URL (it actually doesn’t matter what we enter here!):

Lastly, we can enter a title for the application and complete all the metadata options as desired, then hit the “Save” button to create the application. AGOL should then take us over to the applications content page (if not, just open that page manually). From the application summary page, click across to the “Settings” tab:

Scroll right down to the “Credentials” section at the bottom of this page and click the “Register application” button:

Enter the following “Redirect URLs”, by copying each value and then hitting “Add”

  • localhost
  • http://127.0.0.1:7070
  • https://127.0.0.1:7070

Set the “Application environment” to Browser and then click “Register” button to continue:

You’ll be taken back to the application Settings page, but should now see an Client ID value and option to show the Client Secret. Copy the “Client ID” and “Client Secret” (there’s a “copy to clipboard” button for this) as we’ll need these later:

We’re all done on the AGOL side now, so it’s time to fire up QGIS!

Creating an QGIS OAuth2 Authentication Configuration

From your QGIS application, select Options from the Settings menu. Select the Authentication tab. We need to create a new authentication configuration, so press the green + button on the right hand side of the dialog. You’ll get a new dialog prompting you for Authentication details.

You may be asked to create a “Master Password” when you first create an authentication setup. If so, create a secure password there before continuing.

There’s a few tricks to this setup. Firstly, it’s important to ensure that you use the exact same settings on all your client machines. This includes the authentication ID field, which defaults to an auto-generated random string. (While it’s possible to automatically deploy the configuration as part of a startup or QGIS setup script, we won’t be covering that here!).

So, from the top of the dialog, we’ll fill in the “Name” field with a descriptive name of the Portal site. You then need to “unlock” the “Id” field by clicking the little padlock icon, and then you’ll be able to enter a standard ID to identify the Portal. The Id field is very strict, and will only accept a 7 letter string! Since you’ll need to create a different authentication setup for each individual ArcGIS Portal site you access, make sure you choose your ID string accordingly. (If you’re an AGOL user, then you’ll only need to create one authentication setup which will work for any AGOL account you want to access).

Drop down the Authentication Type combo box, and select “OAuth2 Authentication” from the list of options. There’s lots of settings we need to fill in here, but here’s what you’ll need:

  • Grant flow: set to “Authorization Code”
  • Request URL: 
    • For ArcGIS Portal services: enter the Request URL we determined in the previous step, e.g. http://mydomain.com/portal/sharing/rest/oauth2/authorize
    • For AGOL services: enter https://www.arcgis.com/sharing/rest/oauth2/authorize
  • Token URL:
    • For ArcGIS Portal services: enter the Token URL from the previous step, e.g. http://mydomain.com/portal/sharing/rest/oauth2/token
    • For AGOL services: enter https://www.arcgis.com/sharing/rest/oauth2/token
  • Refresh Token URL: leave empty
  • Redirect URL: leave as the default http://127.0.0.1:7070 value
  • Client ID: enter the App ID (or Client ID) from the App Registration information (see earlier steps)
  • Client Secret: enter the App Secret (or Client Secret) from the App Registration information (see earlier steps)
  • Scope: leave empty
  • API Key: leave empty
  • For AGOL services only: you’ll also need to set the “Token header” option under the “Advanced” heading. This needs to be “X-Esri-Authorization” (without the quotes!)

That’s it — leave all the rest of the settings at their default values, and click Save.

You can close down the Options dialog now.

Adding the Connection Details

Lastly, we’ll need to setup the server connection as an “ArcGIS Rest Server Connection” in QGIS. This is done through the QGIS “Data Source Manager” dialog, accessed through the Layer menu. Click the “ArcGIS REST Server” tab to start with, and then press “New” in the Server Connections group at the top of this dialog.

Enter a descriptive name for the connection, and then enter the connection URLs. These will vary depending on whether you’re connecting to AGOL or an ArcGIS Portal server:

ArcGIS Online Connection

  • URL: This will be something similar to “https://services###.arcgis.com/########/arcgis/rest/services/”, but will vary organisation by organisation. You can determine your organisation’s URL by visiting the overview page for any dataset published on your AGOL account, and looking under the “Details” sidebar. Copy the address from the “Source: Feature Service” link and it will contain the correct URL parameters for your organisation. (Just make sure you truncate the link to end after the “arcgis/rest/services” part, you don’t require the full service endpoint URL)
  • Community endpoint URL: https://www.arcgis.com/sharing/rest/community
  • Content endpoint URL: https://www.arcgis.com/sharing/rest/content

ArcGIS Portal Connection

  • URL:  the REST endpoint associated with your Portal, e.g. “https://mydomain.com/arcgis/rest/services”
  • Community endpoint URL (optional): This will vary depending on the server setup, but will generally take the form “https://mydomain.com/portal/sharing/rest/community”
  • Content endpoint URL (optional): This will vary depending on the server setup, but will generally take the form “https://mydomain.com/portal/sharing/rest/content”

Lastly, select the new OAuth2 configuration you just created under the “Authentication” group:

Click OK, and you’re done! When you try to connect to the newly added connection, you’ll automatically be taken to the AGOL or ArcGIS Portal’s logon screen in order to authenticate with the service. After entering your details, you’ll then be connected securely to the server and will have access to all items which are shared with your user account!

We’ve regularly use this setup for our enterprise clients, and have found it to work flawlessly in recent QGIS versions. If you’ve found this useful and are interested in other “best-practice” recommendations for mixed Open-Source and ESRI workplaces, don’t hesitate to contact us to discuss your requirements… at North Road we specialise in ensuring flawless integration between ESRI based systems and the Open Source geospatial software stack.

Securely accessing enterprise ArcGIS Portal sites through QGIS

An updated version of this guide is available!

We were recently contacted for advice regarding our recommendations for securely accessing content on an enterprise ArcGIS Portal deployment from within QGIS. Fortunately, this setup is fully supported and works seamlessly in QGIS, thanks to the native integration of “OAuth2” authentication in QGIS!

This post details step-by-step instructions in setting up both ArcGIS Portal and QGIS to enable this integration. First, we’ll create a new desktop application on the Portal site in order to obtain the application-specific access keys for OAuth2 authentication. We’ll then create an authentication configuration in QGIS and associate this with a connection to the Portal site. Let’s dive in by doing the Portal configuration first…

Creating an application

Logon to the Portal, and from the “Content” tab, click the “Add Item” option. Select “An application” from the drop down list of options:

Set the type of the application as “Desktop

You can fill out the rest of this dialog as you see fit. Suggested values are:

  • Purpose: Ready to Use
  • Platform: Qt
  • URL: http://qgis.org
  • Tags: QGIS, Desktop, etc

Now – here comes a trick. Portal will force you to attach a file for the application. It doesn’t matter what you attach here, so long as it’s a zip file. While you could attach a zipped copy of the QGIS installer, that’s rather wasteful of server space! We’d generally just opt for a zip file containing a text file with a download link in it.

Click Add Item when you’re all done filling out the form, and the new application should be created on the Portal.

Registering the Application

The next step is to register the application on Portal, so that you can obtain the keys required for the OAuth2 logon using it. From the newly created item’s page, click on the “Settings” tab:

Scroll right to the bottom of this page, and you should see a “Register” button. Press this. Set the “App type” to “Native“.

Add two redirect URIs to the list (don’t forget to click “Add” after entering each!):

  1. The Portal’s public address, e.g. https://mydomain.com/portal
  2. http://127.0.0.1:7070

Finally, press the “Register” button in the dialog. If all goes well then the App Registration section in the item settings should now be populated with details. From here, copy the “App ID” and “Secret” strings, we’ll need these later:

Determine Request URLs

One last configuration setting we’ll need to determine before we fire up QGIS is the Portal’s OAuth Request and Token URLs. These are usually found by appending /sharing/rest/oauth2/authorize and /sharing/rest/oauth2/token to the end of your Portal’s URL.

For instance, if your public Portal URL is http://mydomain.com/portal, then the URLs will be:

Request URL: http://mydomain.com/portal/sharing/rest/oauth2/authorize
Token URL: http://mydomain.com/portal/sharing/rest/oauth2/token

You should be able to open both URLs directly in a browser. The Request URL will likely give a “redirect URL not specified” error, and the Token URL will give a “client_id not specified” error. That’s ok — it’s enough to verify that the URLs are correct.

We’re all done on the Portal side now, so time to fire up QGIS!

Creating an QGIS OAuth2 Authentication Configuration

From your QGIS application, select Options from the Settings menu. Select the Authentication tab. We need to create a new authentication configuration, so press the green + button on the right hand side of the dialog. You’ll get a new dialog prompting you for Authentication details.

There’s a few tricks to this setup. Firstly, it’s important to ensure that you use the exact same settings on all your client machines. This includes the authentication ID field, which defaults to an auto-generated random string. (While it’s possible to automatically deploy the configuration as part of a startup or QGIS setup script, we won’t be covering that here!).

So, from the top of the dialog, we’ll fill in the “Name” field with a descriptive name of the Portal site. You then need to “unlock” the “Id” field by clicking the little padlock icon, and then you’ll be able to enter a standard ID to identify the Portal. The Id field is very strict, and will only accept a 7 letter string!

Drop down the Authentication Type combo box, and select “OAuth2 Authentication” from the list of options. There’s lots of settings we need to fill in here, but here’s what you’ll need:

  • Grant flow: set to “Authorization Code”
  • Request URL: enter the Request URL we determined in the previous step, e.g. http://mydomain.com/portal/sharing/rest/oauth2/authorize
  • Token URL: enter the Token URL from the previous step, e.g. http://mydomain.com/portal/sharing/rest/oauth2/token
  • Refresh Token URL: leave empty
  • Redirect URL: leave as the default http://127.0.0.1:7070 value
  • Client ID: enter the App ID from the Portal item’s App Registration information (see earlier steps)
  • Client Secret: enter the App Secret from the Portal item’s App Registration information (see earlier steps)
  • Scope: leave empty
  • API Key: leave empty

That’s it — leave all the rest of the settings at their default values, and click Save.

You can close down the Options dialog now.

Adding the Portal Connection Details

Lastly, we’ll need to setup the Portal connection as an “ArcGISFeatureServer” and “ArcGISMapServer” connection in QGIS. This is done through the QGIS “Data Source Manager” dialog, accessed through the Layer menu. Click the “ArcGIS Feature Server” tab to start with, and then press “New” in the Server Connections group at the top of this dialog.

Enter a descriptive name for the connection, and then enter the URL for the ArcGIS server REST endpoint associated with your Portal:

Lastly, select the new OAuth2 configuration you just created under the “Authentication” group:

Click OK, and you’re done! When you try to connect to the newly added connection, you’ll automatically be taken to the Portal’s logon screen in order to authenticate with the server. After entering your details, you’ll then be connected securely to the server and will have access to all items which are shared with your user account on the Portal!

You can then repeat this step for and create a similar connection under the “ArcGIS Map Server” tab.

We’ve regularly use this setup for our enterprise clients, and have found it to work flawlessly in recent QGIS versions! If you’ve found this useful and are interested in other “best-practice” recommendations for mixed Open-Source and ESRI workplaces, don’t hesitate to contact us to discuss your requirements… at North Road we specialise in ensuring flawless integration between ESRI based systems and the Open Source geospatial software stack.

SLYR ESRI to QGIS compatibility suite – October 2019 update

Recently, staff at North Road have been hard at work on our SLYR “ESRI to QGIS compatiblity suite“, and we thought it’s time to share some of the latest exciting updates with you.

While SLYR begun life as a simple “LYR to QGIS conversion tool”, it quickly matured into a full ArcGIS compatibility suite for QGIS. Aside from its original task of converting ESRI LYR files, SLYR now extends the QGIS interface and adds seamless support for working with all kinds of ArcGIS projects and data files. It’s rapidly becoming a must-have tool for any organisation which uses a mix of ESRI and open source tools, or for any organisation exploring a transition away from ArcGIS to QGIS.

Accordingly, we thought it’s well past time we posted an update detailing the latest functionality and support we’ve added to SLYR over the past couple of months! Let’s dive in…

  • Full support for raster LYR file conversion, including unique value renderers, color map renderers, classified renderers, RGB renderers and stretched color ramp renderers:

    From ArcMap…

    …to QGIS!
  • Support for conversion of fill symbol outlines with complex offsets, decorations and dashed line templates
  • Conversion of 3D marker and simple 3D lines to their 2d equivalent, matching ArcMap’s 2D rendering of these symbol types
  • Beta support for converting map annotations and drawings, including custom text labels and reference scale support
  • Label and annotation callout support*
  • Support for converting bookmarks stored in MXD documents*
  • Support for converting ESRI bookmark “.dat” files via drag and drop to QGIS*
  • Correct conversion of OpenStreetMap and bing maps basemap layers
  • SLYR now presents users with a friendly summary of warnings generated during the LYR or MXD conversion process (e.g. due to settings which can’t be matched in QGIS)
  • Added support for MXD documents generated in very early ArcMap versions
  • We’ve added QGIS Processing algorithms allowing for bulk LYR to QLR and MXD to QGS conversion. Now you can run a batch conversion process of ALL MXD/LYR files held at your organisation in one go!
  • Greatly improved matching of converted symbols to their original ArcGIS appearance, including more support for undocumented ArcGIS symbol rendering behavior
  • Support for conversion of text symbols and label settings stored in .style databases*
  • Directly drag and drop layers and layer groups from ArcMap to QGIS to add them to the current QGIS project (maintaining their ArcGIS symbology and layer settings!)*
  • Directly drag and drop layers from ArcCatalog to QGIS windows to open in QGIS*
  • Support for ESRI MapServer layers

(*requires QGIS 3.10 or later)

Over the remainder of 2019, we’ll be hard at work further improving SLYR’s support for MXD document conversion, and adding support for automatic conversion of ArcMap print layouts to QGIS print layouts.

While SLYR is not currently an open-source tool, we believe strongly in the power of open source software, and accordingly we’ve been using a significant portion of the funds generated from SLYR sales to extend the core QGIS application itself. This has directly resulted in many exciting improvements to QGIS, which will become widely available in the upcoming QGIS 3.10 release. Some of the features directly funded by SLYR sales include:

  • A “Segment Center” placement mode for marker line symbols
  • Reworked bookmark handling in QGIS, with a greatly enhanced workflow and usability, and a stable API for 3rd party plugins and scripts to hook into
  • Improved handling of layer symbology for layers with broken paths
  • Auto repair of all other broken layers with a matching data source whenever a single layer path is fixed in a project
  • Support for managing text formats and label settings in QGIS style libraries, allowing storage and management of label and text format presets
  • A new Processing algorithm “Combine Style Databases“, allowing multiple QGIS style databases to be merged to one
  • Adding a “Save layer styles into GeoPackage” option for the “Package Layers” algorithm
  • New expression functions which return file info, such as file paths and base file names
  • Adding new options to autofill the batch Processing dialog, including adding input files using recursive filter based file searches
  • Coming in QGIS 3.12: A new option to set the color to use when rendering nodata pixels in raster layers
  • Coming in QGIS 3.12: A new “random marker fill” symbol layer type, which fills polygons by placing point markers in random locations

You can read more about our SLYR ESRI to QGIS compatibility tool here, or email [email protected] to discuss licensing arrangements for your organisation! Alternatively, send us an email if you’d like to discuss your organisations approach to open-source GIS and for assistance in making this transition as painless as possible.

Announcing our SLYR (MXD to QGIS) funding drive!

One product which North Road had the chance to develop last year, and which we are super-proud of, is our SLYR ESRI style to QGIS conversion tool. If you haven’t heard of it before, this tool allows automatic conversion of ESRI .style database files to their equivalent QGIS symbology equivalent. It works well for the most part, and now we’re keen to take this to the next stage.

The good news is that North Road have been conducting extensive research and development over the past 12 months, and we’re pleased to announce our plans for extending SLYR to support ESRI LYR and MXD documents. The LYR and MXD formats are proprietary ESRI-only formats, with no public specifications allowing their use. This is a huge issue for organisations who want to move from an ESRI environment to the open geospatial world, yet are held back by hundreds (or thousands!) of existing ESRI MXD map documents and layer styles which they currently cannot utilise outside of the ESRI software ecosystem. Furthermore, many providers of spatial data only include ESRI specific layer formatting files with their data supplies. This leaves users with no means of utilising these official, pre-defined styles in non-ESRI tools.

In order for us to continue development of the SLYR tool and unlock use of LYR and MXD formats outside of ESRI tools, we are conducting a funding campaign. Sponsors of the campaign will receive access to the tools as they are developed and gain access to official support channels covering their use. At the conclusion of this drive we’ll be releasing all the tools and specifications under a free, open-source license.

You can read the full details of the campaign here, including pricing to become a project sponsor and gain access to the tools as they develop. As a campaign launch promo, we’re offering the first 10 sponsors a super-special discounted rate (as a reward for jumping on the development early).

The mockup below shows what the end goal is: seamless, fully integrated, automatic conversion of MXD and LYR files directly within the QGIS desktop application!

Back to Top

Sustaining Members